Power touring GN Build Thread

bishir

Serenity Now
Joined
Aug 11, 2002
Edit: I'm just going to make this my car's 'build' thread.

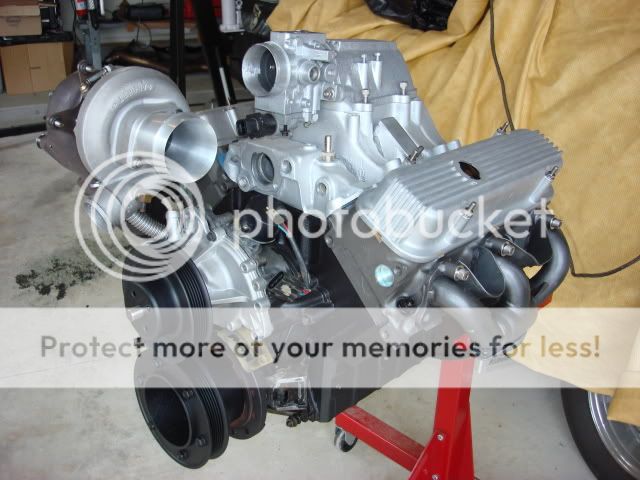
I pulled the engine over the weekend due to a leaky rear main. The engine ran well and this is my first motor pull. I plan on changing as many seals as possible and cleaning up the engine since it looks like an ecological disaster with the oil leak. I don't plan on any major upgrades but I do plan the following:

  • change out stock timing gear (research shows can't go wrong with the TA one though expensive)
  • replace seals (open to your suggestions on where to buy, are kits available?)
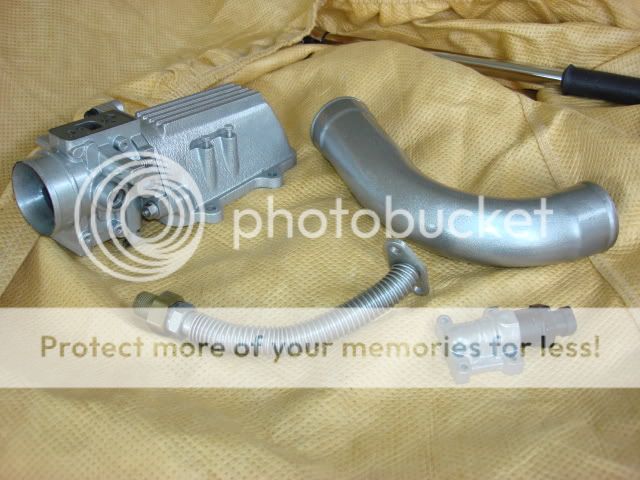
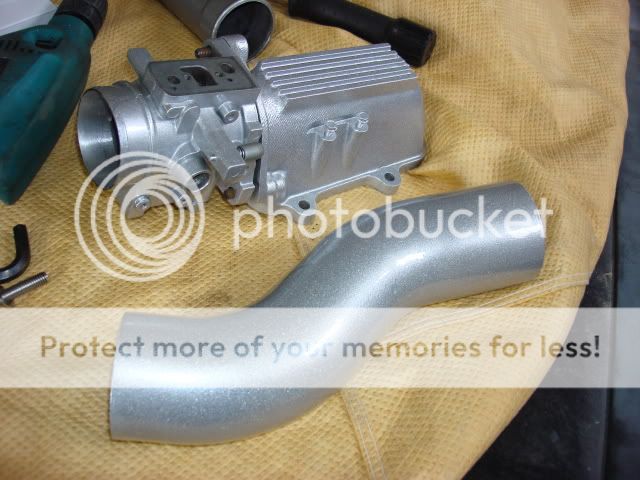
  • powdercoat, powdercoat, powdercoat. (i'm ordering the eastwood gun, got pics of your engines?)
  • since the engine is out I plan on swapping the steering shaft to the jeep version. (got one for sale?)
  • clean off the undercoating. (original owner LOVED Zeibart, its awlful, any tips on it's removal?)
  • replace faulty ac compressor. (got a recommendation?, if not I'll search)
  • Replace powersteering pump. (mine has a slight whine)
  • perhaps run new transmission cooling lines since they're a pain anyway.
  • reroute and/or replace engine harness. (I really want a cleaner engine bay)
  • would like to clean up the firewall some (tips?)
I'm upgrading the suspension and brakes too, but I'm having a bad case of "whileI'matititis" I'm thinking of having the stock heads redone and ported as well as the intake. The car is mostly a cruiser, but the last time I ran it at the track with my same mods it put down a 96mph 1/8 mile time with a terrible 60 ft to run a 7.9 @ 96mph. So the car is making good power based on the mph... I know a good port job will really wake the car up, but that will involve cracking the mythical "virgin" head seal. ;)Looking for your input and suggestions on what you'd do.

I had a buddy already give me one good tip I probably wouldn't have done unless he suggested it. He said don't flip the motor over to unbolt the oil pan on the stand due to a chance of debris. It makes perfect since and I wouldn't have done that so I'm glad he suggested it.

Any tips would be great, I'll take some pics and share as I go. I already have some I'll post soon.
 
Upper plenum bracket. Eastwood chrome powdercoat. It cooked some much like chrome and held up so well everything is getting the same treatment.
chromebracket.jpg
 
Most powdercoat chrome I've seen turns out more of a silverish color. That looks pretty close to the real thing. From what I read most of the chrome applications require a clear and most clear turns yellow when heat is applied. Thanks for sharing!
 
You may want to research your PS Pump Whine before you start throwing new parts at it.

I believe there was an upgraded PS Hose (less of a radical bend) that proved to be the solution to the reported whine - at least this was the case with my '87 - and if memory serves me correctly - this hose was upgraded and replaced on my vehicle - like back in ~ 1989.
 
I would get a valve job and replace those springs. Also install smooth stem (TTA exhaust valves) ex valves with positive seals and cut the guides. Don't worry about the mythical factory seal. Use head studs.

Blue print the oil pump.

Check #1 cam bearing for wear.

Send off the cam sensor get it rebuilt.

A lot easier to replace upper control arm bushing with engine out, idler arm ok,drag link?

Start there :)
 
The single stage Bonded chrome powders look OK, but they still really don't look like chrome.

FWIW. The cast AL parts are coated with Underhood clear (A satin clear made to stand the heat). Valve covers are satin black. Compressor housing is Blasted AL powder.

IMG_9437.jpg


IMG_9436.jpg


IMG_9433.jpg
 
My parts did get a coat of clear. They see some good heat under the hood. Nothing has turned yellow or lost any color.
 
Thanks for the engine porn! Did you blast your aluminum parts with powder? I hear sand can cause pitting...

Amiga I like your color scheme. I prefer cast as well. How is your compressor holding up to the heat, I have read too many good things about the high temp coatings. Is yours an Eastwood costing?

I used AL OX media on the most of the parts.

The compressor has held up fine. The DBB not so much but that's another story (It's sitting on the bench locked up right now). And FWIW the turbine housing was done in Cast Iron Ceramic.
 
I pulled the whole front clip mostly because I wanted to clean up the frame rails too. I'll probably start a build thread somewhere to doc my suspension build as well.
 

Attachments

  • photo.JPG
    photo.JPG
    334.6 KB · Views: 525
Thanks for the link, I will enjoy looking at those when I get home (photobucket blocked at work)

As you can see the car received Ziebart undercoating early in it's life. I hate it, but when the car was stripped for paint it was well preserved. I'm going to start getting it off the frame. The upper a-arm pic shoes you how liberal the product was applied. I plan on changing the suspension parts so I won't remove the coating on them. So far acetone and a scraper is working, but to get the remaining material I'll probably have to wire brush it off. Any suggestions? On the crossover pic you can see the reason I pulled the motor. Oil!!
 

Attachments

  • aarm.JPG
    aarm.JPG
    466.9 KB · Views: 599
  • engineonstand.JPG
    engineonstand.JPG
    500.7 KB · Views: 592
  • undercoatnasty.JPG
    undercoatnasty.JPG
    515.6 KB · Views: 582
  • oileverywhere.JPG
    oileverywhere.JPG
    506.4 KB · Views: 585
  • enginepic.JPG
    enginepic.JPG
    456.7 KB · Views: 566
Thanks for the link, I will enjoy looking at those when I get home (photobucket blocked at work)

As you can see the car received Ziebart undercoating early in it's life. I hate it, but when the car was stripped for paint it was well preserved. I'm going to start getting it off the frame. The upper a-arm pic shoes you how liberal the product was applied. I plan on changing the suspension parts so I won't remove the coating on them. So far acetone and a scraper is working, but to get the remaining material I'll probably have to wire brush it off. Any suggestions? On the crossover pic you can see the reason I pulled the motor. Oil!!

I usually use mineral spirits and a flat plastic brush to break it down then wipe with a clean rag. That Ziebart undercoating although it can be a PIA to remove it preserved your car.
 
I dropped the pan tonight and it looked pretty good in there. I can see the timing chain through the gap in the front cover and it looks like a double chain, I'm not sure... I'll try to get a pic and post it. I didn't thing a stock chain was a double one... the pistons had Buick stamped on the insides of the skirts so all looks stock... Except maybe that chain...
 
Since the heads are off I'm having my brother do some port work on them. He's a Ford guy do I dunno. ;)
 

Attachments

  • valvebefore.JPG
    valvebefore.JPG
    43.1 KB · Views: 427
  • valve.JPG
    valve.JPG
    58.9 KB · Views: 436
  • portbefore.JPG
    portbefore.JPG
    64.3 KB · Views: 438
  • port before2.JPG
    port before2.JPG
    57.3 KB · Views: 413
  • port3.JPG
    port3.JPG
    52.6 KB · Views: 436
  • port1.JPG
    port1.JPG
    58.6 KB · Views: 441
  • exhaust port.jpg
    exhaust port.jpg
    40 KB · Views: 422
FWIW, Here's some of my coated parts. Intake parts are Eastwood 'OEM Sparkle Silver', the pulleys are Eastwood 'Satin Black' and the wheels are PowderBuyThePound.com's 'Super Durable Wet Black':
buickengine017.jpg

^Word of caution, that turbo oil drain crumbled to pieces upon install. The heat from the oven likely killed its ability to flex.
buickengine029.jpg

buickengine021.jpg

_DSC0992.jpg
 
Here are some updated photos of the head work. My brother bent one of his mandrels pretty bad at one point. He's used to working with aluminum heads on his Mustangs and he said these iron heads are kicking his butt. He has well over 40 hours so far in these so far. He's taking his time and I showed him some documenation I found on GNTTYPE.org If anyone has a spare set of junk valves (just need 2) we really could use them to do a light polish on the combustion chambers.

Also early it was suggested I get TTA exhaust valves. I'm sure TA Performance has those and the seals?
 

Attachments

  • FebHeadwork.jpg
    FebHeadwork.jpg
    67.8 KB · Views: 384
  • FebHeadwork3.jpg
    FebHeadwork3.jpg
    74.4 KB · Views: 373
  • FebHeadwork2.jpg
    FebHeadwork2.jpg
    92.9 KB · Views: 383
  • FebHeadwork1.jpg
    FebHeadwork1.jpg
    53.2 KB · Views: 368
  • FebHeadwork4.jpg
    FebHeadwork4.jpg
    96.2 KB · Views: 396
  • FebHeadwork5.jpg
    FebHeadwork5.jpg
    70.2 KB · Views: 373
  • FebHeadwork6.jpg
    FebHeadwork6.jpg
    51.3 KB · Views: 364
  • FebHeadwork7.jpg
    FebHeadwork7.jpg
    49.9 KB · Views: 393
Double post.. please see above..

Mods, if you see this please delete this reply and move this thread to the approriate section as I plan on just making this thread my 'build' thread.


Also, can you change the title to: "Powertouring GN Build"
 
Top