
You are using an out of date browser. It may not display this or other websites correctly.
You should upgrade or use an alternative browser.
You should upgrade or use an alternative browser.
How to: Freshen your used 200-4r pump
- Thread starter INEEDAGN
- Start date
If you really want to get in depth on that particular mod, you'd need to consider the converter clutch valvetrain as well and whether or not it has a non lock valve installed (which allows lube correction on a non lock trans).

Furthermore, every diagram I've ever seen (which is all reprinted from the principal of operation manual) shows that circuit as if there's an orifice or screen in the passage between line pressure and that valve land but in reality it's not there. I've even checked an early casting pump to look for it. This diagram was printed before production so it may have been omitted later. (Anyone have a later revision of the diagram?) Lends to the idea that even the engineers were torn on the balance between lube and hard throttle pump volume/pressure.
Want to get really off the wall? Consider the idea that the decrease oil land is exposed well before the valve actually bottoms out and you could theoretically shim the valve to prevent it from fully closing off the converter circuit . Play with that idea at your own risk..
Furthermore, every diagram I've ever seen (which is all reprinted from the principal of operation manual) shows that circuit as if there's an orifice or screen in the passage between line pressure and that valve land but in reality it's not there. I've even checked an early casting pump to look for it. This diagram was printed before production so it may have been omitted later. (Anyone have a later revision of the diagram?) Lends to the idea that even the engineers were torn on the balance between lube and hard throttle pump volume/pressure.
Want to get really off the wall? Consider the idea that the decrease oil land is exposed well before the valve actually bottoms out and you could theoretically shim the valve to prevent it from fully closing off the converter circuit
. Play with that idea at your own risk..Lil Truck
I spend to much time here....
- Joined
- Sep 26, 2002
Update
I have rebuilt 2 more pumps using the methods in this thread by Ineedagn . I just installed on of them in my GN a few weeks ago with a dual feed it is working perfectly! I used the purple spring in the regulator and the shim washer on the pressure relief, the pump clearance is at .0015. Full TV pressures Min 260 to max 300, trans works perfect!
Thanks again for all this great information INEEDAGN !
TexasT
Texas, Where are you from
- Joined
- Sep 10, 2002
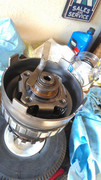
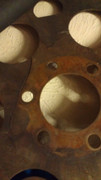
Images have been lost in the last crash(fire at the host was what was told) so maybe Mr Ineedagn will repost. I have some pix from when I did mine. What would you like to see?
Here are a couple .

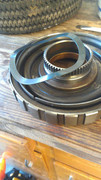
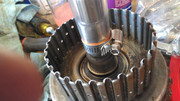
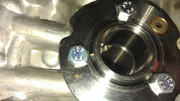
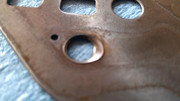
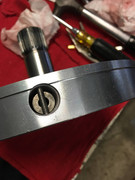
Need a hardened stator support. This shows some wear on the splines.
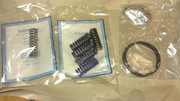
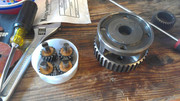
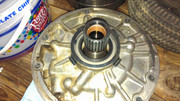
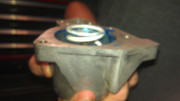
The sonnax parts I used. Hard rings, slide spring and 700r4 spring for the boost valve.
Not in the pump but something I did was double up the low/rev wave spring to lessen the "jerk" when shifting into gear with the higher internal pressure. Something to think about if you are going in that deep.
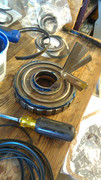
Showing the use of the feeler gauge to help with the piston seals. Use plenty of trans gel and take your time. This isn't a contest to see how fast you can get it. And a torn seal will ruin your day. Some seal install tools are real nice but can be hard to find and acquire.

Another shot of how I used some plastic cut from a two liter soda bottle and the feeler gauges working the seals in.
They tool I whipped up to use in my press to get the retainer on and off the piston. Real fun right there.
Measuring the play in the lower section.
Sizing the rings on the forward drum shaft.
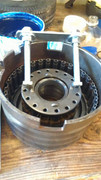
Replacing the bearing in the planetary I used and making sure the planets had correct play.
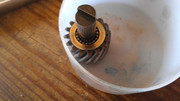
Watch it with those needle bearings they are real fun.
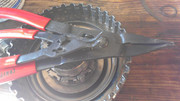
The flat ring pliers I used. They worked for the 2004r but I ended up buying a different set when I did the 4l60e as these didn't fit.
Here are a couple .
Need a hardened stator support. This shows some wear on the splines.
The sonnax parts I used. Hard rings, slide spring and 700r4 spring for the boost valve.
Not in the pump but something I did was double up the low/rev wave spring to lessen the "jerk" when shifting into gear with the higher internal pressure. Something to think about if you are going in that deep.
Showing the use of the feeler gauge to help with the piston seals. Use plenty of trans gel and take your time. This isn't a contest to see how fast you can get it. And a torn seal will ruin your day. Some seal install tools are real nice but can be hard to find and acquire.
Another shot of how I used some plastic cut from a two liter soda bottle and the feeler gauges working the seals in.
They tool I whipped up to use in my press to get the retainer on and off the piston. Real fun right there.
Measuring the play in the lower section.
Sizing the rings on the forward drum shaft.
Replacing the bearing in the planetary I used and making sure the planets had correct play.
Watch it with those needle bearings they are real fun.
The flat ring pliers I used. They worked for the 2004r but I ended up buying a different set when I did the 4l60e as these didn't fit.
TexasT
Texas, Where are you from
- Joined
- Sep 10, 2002
Sorry, had to split it up as the site apparently will only allow so many images in a post.
I sourced some hex heads bolts as specified in the ck perf book to replace the stock ones. Installed with red lock tite.
Seal retainer. Cheap and maybe it will help keep the seal in with the higher pressures. Seal installed with red lock tite also.
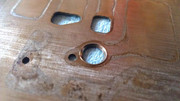
Inspect your separating plate if you will be reusing it. The balls hit it pretty hard and can deform it. With a flat faced hammer and decent flat place you can work the holes back to decent without much trouble. Or replace the plate. I'm cheap so we know what I did.
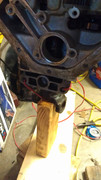
My setup to set the end play of the output shaft.
The stock tv spring(bottom) and my "custom" length tv spring for the tv valve in the vb. I have since found these are sold in the longer length but I didn't know this at that time, so I made my own. This was knowledge posted by Lonnie Dyers in this forum.
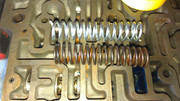
Accumulator spring spaced out as per info sent by David Husek. I kept the accumulators functioning. It is a Buick and not a Chevy so I wanted it to shift decent at lower throttle angles and bark em at wot.

As specified, I'm on a budget but wanted to use the 700r4 bottom feed filter. No money for the fancy pan so I used the stock one and made sure to cover the switch so the filter doesn't ground it out and cause probs. I run the fluid a quart over full too.
Inspect your flex plate. They do crack.

This is a nifty book if you are interested in how the trans works. Also great is the ck performance "bible" for the 2004r.
And this is the Bison mod as posted by Bison. Good to keep the buzzing and pressure loss on the over pressure valve. Be sure to pull it out and inspect the ball. I like to use some lapping compound on a big cotton swab to "dress" the seat whil;e it is apart. Be sure to clean it well so the lapping compound doesn't end up where it shouldn't.
If you need help or more pix lmk and Ill do what I can.
I sourced some hex heads bolts as specified in the ck perf book to replace the stock ones. Installed with red lock tite.
Seal retainer. Cheap and maybe it will help keep the seal in with the higher pressures. Seal installed with red lock tite also.
Inspect your separating plate if you will be reusing it. The balls hit it pretty hard and can deform it. With a flat faced hammer and decent flat place you can work the holes back to decent without much trouble. Or replace the plate. I'm cheap so we know what I did.
My setup to set the end play of the output shaft.
The stock tv spring(bottom) and my "custom" length tv spring for the tv valve in the vb. I have since found these are sold in the longer length but I didn't know this at that time, so I made my own. This was knowledge posted by Lonnie Dyers in this forum.
Accumulator spring spaced out as per info sent by David Husek. I kept the accumulators functioning. It is a Buick and not a Chevy so I wanted it to shift decent at lower throttle angles and bark em at wot.
As specified, I'm on a budget but wanted to use the 700r4 bottom feed filter. No money for the fancy pan so I used the stock one and made sure to cover the switch so the filter doesn't ground it out and cause probs. I run the fluid a quart over full too.
Inspect your flex plate. They do crack.
This is a nifty book if you are interested in how the trans works. Also great is the ck performance "bible" for the 2004r.
And this is the Bison mod as posted by Bison. Good to keep the buzzing and pressure loss on the over pressure valve. Be sure to pull it out and inspect the ball. I like to use some lapping compound on a big cotton swab to "dress" the seat whil;e it is apart. Be sure to clean it well so the lapping compound doesn't end up where it shouldn't.
If you need help or more pix lmk and Ill do what I can.
Rich, thanks for the post! saw your comments on dr dan's thread at ROP (2014). im not looking for anthing in particular - just collecting links with pics as i go through the CK manual. i know i wont understand how everything works when i crack the case open, but i want to at least be able to picture everything and know (generally) what im going to need to do to get to where i want it to be. even if i dont understand completely whats going on, i can at least follow instructions/suggestions. ive done a few th350s so ive got just enough knowledge to end up with a pile of junk. ill be starting with a CQ core and itll be going behind my stock SBO 350 (cruiser). building the trans to fit planned engine upgrades to ~300/400 hp/tq. was thinking of starting a build "help me!!!" thread on classic olds, but might be smarter to do it here instead. thanks again - mark
ineedagn - thanks, def would like to see pics for reference.
olds403 - ill have to look at my core to see how the pump looks, if its worn, ill prob buy a reconditioned one since i dont have the ability to mill it. didnt realize extreme was still around, i grew up a few miles from their original shop (east side cincy).
olds403 - ill have to look at my core to see how the pump looks, if its worn, ill prob buy a reconditioned one since i dont have the ability to mill it. didnt realize extreme was still around, i grew up a few miles from their original shop (east side cincy).
Lonnie is still there. He is where I got my most recent set of parts for my full billet roller. He made me a nice pump....worth it. I had another done by a seller on Ebay - he is in Vegas.ineedagn - thanks, def would like to see pics for reference.
olds403 - ill have to look at my core to see how the pump looks, if its worn, ill prob buy a reconditioned one since i dont have the ability to mill it. didnt realize extreme was still around, i grew up a few miles from their original shop (east side cincy).
MR C
Member
- Joined
- Aug 15, 2019
Can't open pics why?Scraped the Teflon layer off two of the Teflon bushings to show the difference.
This is the same bushing as number 2 in the post above. This is a used bushing I took out. Note the porous bronze middle layer (again this is a split bushing).
View attachment 317738
This is the same as number 5 above, note a very thin Teflon coating over Babbitt. Gouged into it good just for fun. (Again this one was a solid bushing).
View attachment 317739
Shout out to the veteran builders, has anyone been using these Teflon/Babbitt solid bushings in either the pump or the direct drum and are they holding up? I was sent two of them in a kit from a vendor but I won't name them because I bought their kit right after the originals became unavailable and it was probably the only thing out there at the time. I've been using them in the direct drum but not the pump. I still have a few to use up.
All 100+ pictures lost here are still on my phone. Problem is I can’t edit them back in without starting a new thread from scratch. So I’d have to import them all to a laptop and then copy/paste all the text one at a time and I just haven’t had time to sit and do it all at once.
MR C
Member
- Joined
- Aug 15, 2019
Oh ok thanks, nothing particular was just wondering why I couldn't open or see some of the pictures in previous post thought it was my computer acting up or chemo brain LOLBoard crashed and lost a lot of the pix. Anything in particular you want to see?
Similar threads
- Replies
- 3
- Views
- 419
- Replies
- 8
- Views
- 394