Replacing injectors and FPR

oc192

Member
Joined
May 18, 2010
I am installing a set of used 42# injectors, casper's injector harness, adj FPR and a new TT chip. This will be my first go around, are there any tips, tricks, or precautions that I should use/take? I know most of you guys and gals can do do this stuff in your sleep but me on the other hand will need every ounce of help possible....:D
 
removal ,nah pretty easy installation use vasaline on all orings snap into fuel rail and slip into intake make sure your clips are on the upper part of injectors you will know what i am talking about whenyou remove them. regulator thread the fuel line into the reg a few turns before bolting it to rail once its all tight turn key on and look for leaks. set fp with hose off regulator usually 43# i think
 
Lube up the injector o rings with dish or hand soap to prevent ripping the o rings. Unplug the computer before messing with the ecm and remember to put the ground strap back on the coilpack and module assembly when bolting it back down. Read Eric's instructions before you operate the car. You should use a known good if not new fuel pressure gauge to set the fuel pressure
 
Get a couple of pry bars if that fuel rail has never been off your gonna need them and lube the injector o rings real good i had a vacuum leak when i was done :frown: buy it came apart easier the second time, also watch not to pinch the injector harness anywhere
 
Get a couple of pry bars if that fuel rail has never been off your gonna need them and lube the injector o rings real good i had a vacuum leak when i was done :frown: buy it came apart easier the second time, also watch not to pinch the injector harness anywhere

Agreed.

There is supposed to be a ground strap on the coil pack??? :confused:

No, but I added one just as a precaution. I used some wire I had here, 10 gauge it probably was; and made a dedicated ground to the lower intake manifold. I used the EGR soleniod stud for a ground, since I dont have a solenoid on my car.

As for the injectors, I agree with everything already said. Be extremely gentle with the fuel rail. DEPRESSURIZE THE FUEL SYSTEM BEFORE YOU START! If you dont, there will be fuel everywhere and a potential fire hazard.

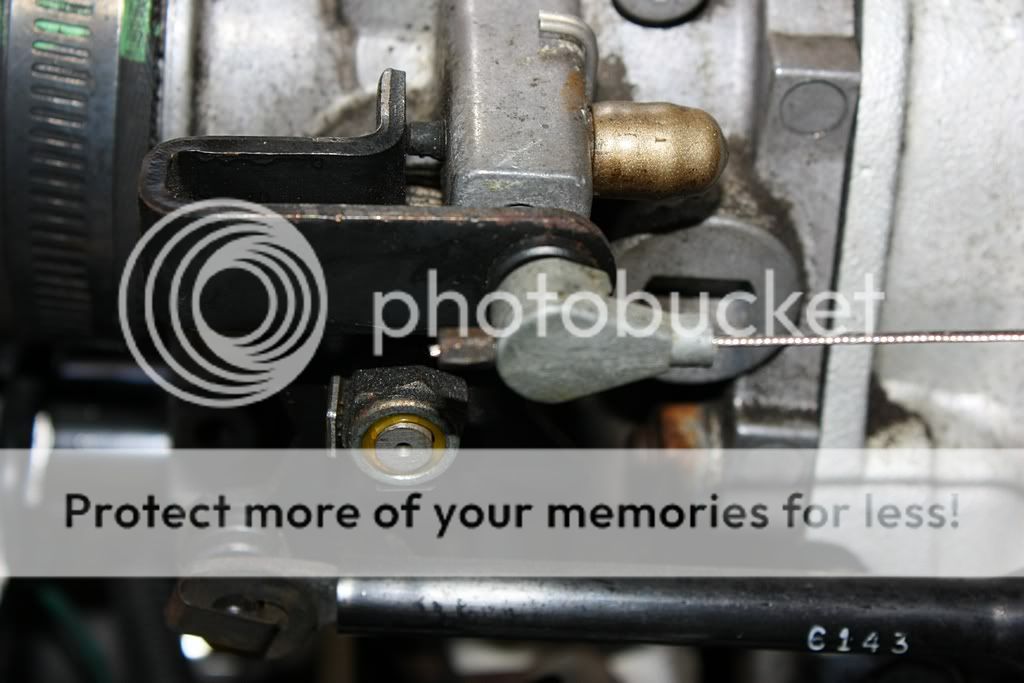
First loosen the fuel feed on the passengers side. You'll need a 16mm flare wrench. Remove coilpack & module assembly (two 15mm nuts and a 13mm bolt on the backside). Undo spark plugs wires as well. Remove and set it aside. A 1/4" socket or nutdriver will get the coilpack connector off. Unhook the throttle, TV, and cruise control cable. A medium sized pair of channellocks will do this. A 7mm socket will remove the bracket from the plenum. Under that bracket, will be a 13mm but. Remove it.

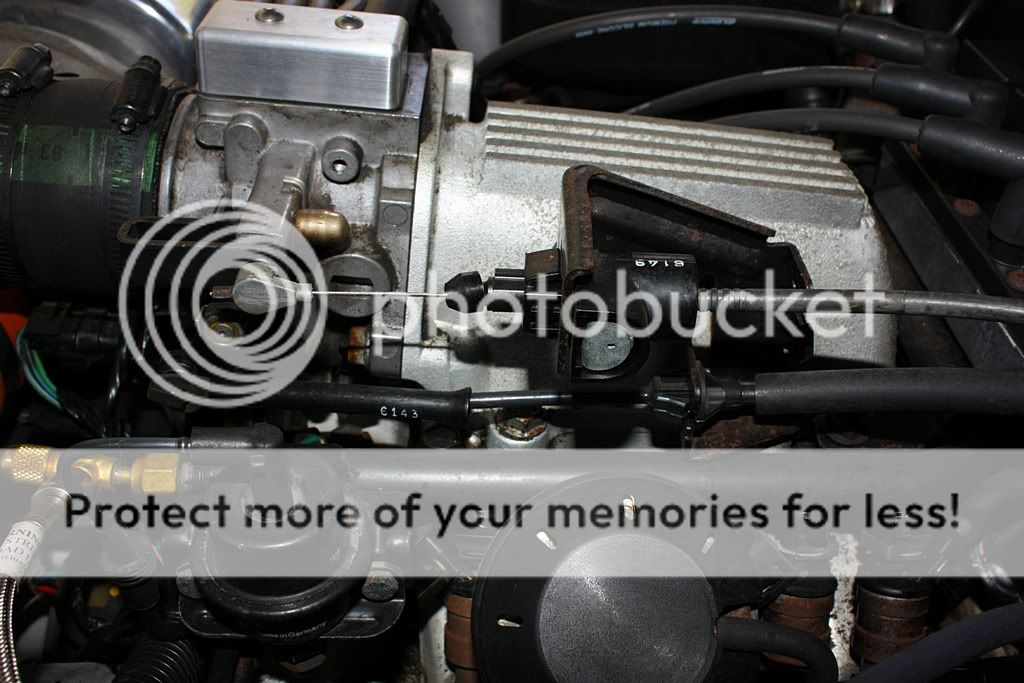
Loosen and remove the fuel feed and return lines with the 16mm flare wrench. If you dont have one, Sears sells the good ones. I usually break them loose with the flare, then remove them with a regular wrench. There will be four bolts for the rail. Two 10mm in front and two 13mm in the rear. Loosen them but dont remove. Unplug the injector harness from the engine harness. Its easier then trying to fight all six injectors plugs. Pull out the little plastic slide clip thing but dont loose it. Use a short 2x4 and lay it on the passenger's valvecover to protect it. Get a long screwdriver or prybar and gently but firmly pry up on the rail. Try and do it as evenly as possible, dont just try to get it out all at once. Driver's side may be a but trickier with the EGR valve there but it should be loose enough already. You may have to use some penetrant such as PB Blaster to make it easier. If its a high mileage car with original injectors, they'll be tough to get out. I know the one's in my WH-1 were a b!tch back in the day...

Remove the fuel rail, injectors and harness as a unit. Get a small pick tool and make sure none of the old o-rings are left in the injector bosses in the intake. A small screwdriver will work as well. Also make sure no debris get done there and clean the bosses out as best as you can.

Remove and replace old injectors in the rail. Be gentle with the rail and again, make sure all the old o-rings come out. If not, you'll have a fuel leak. I use Vaseline to lubricate the new injectors' o-rings, as well as the o-ring on the regulator. Get the new regulator in and use the bolts to seat it. I think they are 8mm? Maybe?

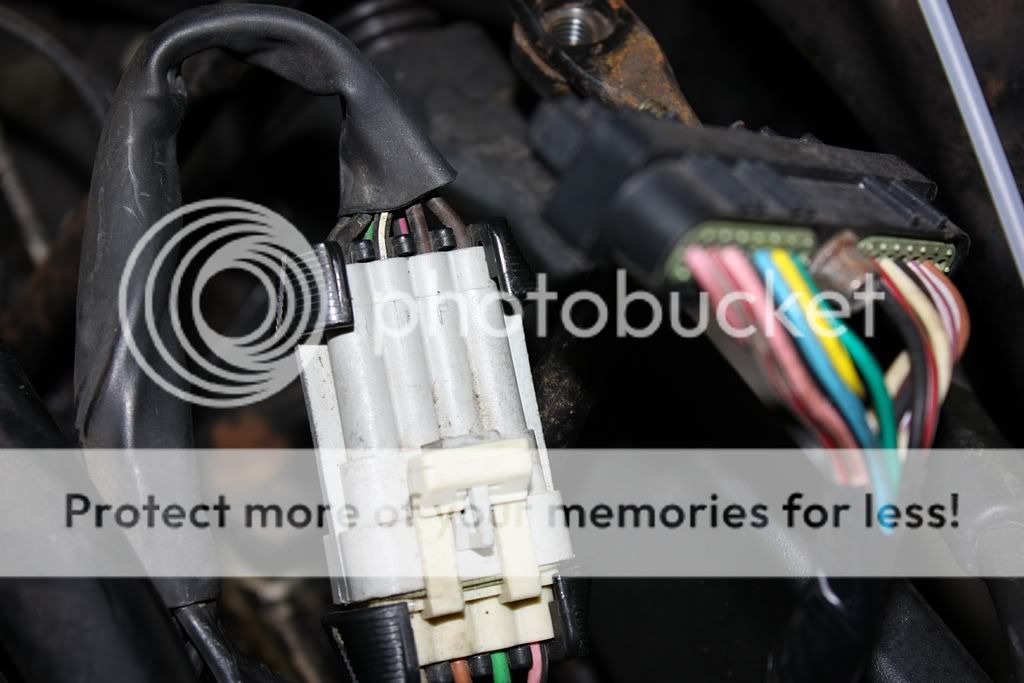
Plug in the injector harness, the Casper's harness is numbered and is a very very nice, high quality unit. I didn't re-use the original injector clips. That's up to you. Mine was a little long but that was fine with me. I neatly ziptied the harness to the rail and plugged it in.

Installation is pretty much the opossite of removal. I used blue LocTite on my fuel rail bolts as I wanted them to stay torqued. Now would be a good time to put in a RJC PowerPlate (if you wanted too) and/or a EGR blockoff. I had on on my car, but it leaked so I put the EGR valve back on. Some Ultra Copper RTV will help seal it.

Get the car back together, unplug the ECM connector by the battery (orange wire) and put the new chip in. Plug the ECM in and prime the fuel system. Check for leaks!! Best if you have someone help you here. Set the fuel pressure to 43psi with the vacuum line off.

And you should be ready to roll.

This is how I do injectors when I have. It's what works best for me. Might not be the easiest/fastest way but the job gets done just the same.

Sorry for the book.

Hope this helps.

Scott.
 
"Remove coilpack & module assembly (two 15mm nuts and a 13mm bolt on the backside)." The bolt on the backside requires a 10MM socket to remove it.
 
"Remove coilpack & module assembly (two 15mm nuts and a 13mm bolt on the backside)." The bolt on the backside requires a 10MM socket to remove it.

Hmmm, interesting. Mine was a 13mm bolt, identical to the ones used on the fuel rail. Probably got changed at some point or I put a different one in.

Sorry for the confusion.:redface:
 
Wow, thanks everyone for the tips. I have this thread printed out and ready to go for tomorrows project. Scott, special thanks for taking the time to write a nice detailed description!

Thanks,
Don
 
Wow, thanks everyone for the tips. I have this thread printed out and ready to go for tomorrows project. Scott, special thanks for taking the time to write a nice detailed description!

Thanks,
Don

No problem Don. I think I got all the big things. Just take you time. One thing to remember is when you tighten the bolts up, dont go crazy. Hand tight plus a little extra will do. Like I said, I used some LocTite but thats up to you.

Have fun and I hope the job goes well.
 
Great advice from everyone here. Please let me stress how important it is start the fuel return line threads FIRST before bolting to the fuel rail. I stripped mine and has to replace fuel line. Not fun and waste of money for line.

Good luck!
 
Great advice from everyone here. Please let me stress how important it is start the fuel return line threads FIRST before bolting to the fuel rail. I stripped mine and has to replace fuel line. Not fun and waste of money for line.

Good luck!

D'oh! I think I forgot to mention that too... I usually set the rail in and get the injectors all lines up then I get the fuel lines started in the holes. I also us a 3/8" extension and a plastic mallet to seat the rail. Then tighten the bolts up.

One more thing Don. The little linkage clips that hold the cables to the throttle arm like to go flying.... And there REAL easy to loose! Just be easy and use a small flathead screwdriver and take them off. Then use the channellocks to take the cables out of the bracket.

More is coming back to me now that Im awake. Was pretty tired when I made that post last night.
 
Comparing what is provided here and the instructions on gnttype.org, they mention removing all of the vac lines from the block. I took a peek under the hood and there is a hard line that runs pretty close to the fuel rail. Do you guys mess with the vac lines at all?
 
Great advice from everyone here. Please let me stress how important it is start the fuel return line threads FIRST before bolting to the fuel rail. I stripped mine and has to replace fuel line. Not fun and waste of money for line.

Good luck!

X2! Been there and done that. :(
 
Comparing what is provided here and the instructions on gnttype.org, they mention removing all of the vac lines from the block. I took a peek under the hood and there is a hard line that runs pretty close to the fuel rail. Do you guys mess with the vac lines at all?

Nope. The only vac line you need to touch is the one for the regulator. Unhook it and thats it.
 
OK, 2 minutes into the project and I broke the vac line going into the FPR...hahaah.. I pretty much have everything removed so I can pry up on the fuel rail but I have two road blocks.

1) the connector for injector harness that plugs into the main harness, should that just pop off or do you have to bend a tab up ? I am bad about breaking connectors :)

2) can someone give some more detail on removing the TV cable. Scot said to use channel locks but I am not sure what I am locking onto. It looks like the grey connector on the top just snaps on and If I push it towards the front of the car it should pop off right? The bottom line looks like there is a retaining clip that holds on the cable, just remove that somehow?

-3154b.jpg


-3155b.jpg


Thanks
 
OK, 2 minutes into the project and I broke the vac line going into the FPR...hahaah.. I pretty much have everything removed so I can pry up on the fuel rail but I have two road blocks.

1) the connector for injector harness that plugs into the main harness, should that just pop off or do you have to bend a tab up ? I am bad about breaking connectors :)

2) can someone give some more detail on removing the TV cable. Scot said to use channel locks but I am not sure what I am locking onto. It looks like the grey connector on the top just snaps on and If I push it towards the front of the car it should pop off right? The bottom line looks like there is a retaining clip that holds on the cable, just remove that somehow?


Thanks

1. I can look at mine when I get home and get back to you. For some reason I thought there is a tab that you pull all the way out.

2. Just grab it with some pliers and pull towards the front of the car. Should snap right off.
 
OK, 2 minutes into the project and I broke the vac line going into the FPR...hahaah.. I pretty much have everything removed so I can pry up on the fuel rail but I have two road blocks.

1) the connector for injector harness that plugs into the main harness, should that just pop off or do you have to bend a tab up ? I am bad about breaking connectors :)

2) can someone give some more detail on removing the TV cable. Scot said to use channel locks but I am not sure what I am locking onto. It looks like the grey connector on the top just snaps on and If I push it towards the front of the car it should pop off right? The bottom line looks like there is a retaining clip that holds on the cable, just remove that somehow?

-3154b.jpg


-3155b.jpg


Thanks

Its okay Ron. Dont worry about the fuel pressure vacuum line. Just replace with a piece of regular line and ziptie both ends.

First, on the injector harness; the clip slides out. You dont bend it, it slides out. I guess its something like a locking clip. Be gentle as its plastic, but it should come out. Then carefully unplug the injector harness itself from the engine harness.

Second, the tv cable. In you first pic you posted, dead center look at the throttle arm. The cable with the round gray end is the tv cable. Hold the arm and push the gray end forward (towards the front of the car). It should pop right off. Then, as you see the cable come though the bracket; use the channellocks to depress the tabs and push it back towards the firewall. It should be very easy to remove.

For the other two cables, one is the cruise control and the other it the thottle; use a small flathead screwdriver to remove the clips. They like to go flying anywhere they please, never to be found again... Go slow. You can see one in the bottom left of you first picture. Pry the tab up gently and slide the clip back. It should come free. Then just remove the cables from the bracket the same way you did the TV.

Hope this helps you.

Scott.
 
Thanks Scott. In the pics, it appears there are only 2 lines to disconnect. On the TV cable, when I pop off the gray connector, it looks like the gray piece would just slide towards the firewall and stop at the bracket right? Am I suppose to depress the black piece that is against the bracket so it slides through? The bottom connection looks pretty easy to take off.

Just curious, can I just disconnect the 2 cables on the end and then just leave it attached to the bracket and place the whole assembly to the side after I unbolt it from the plenum?

Regarding the connector, I am trying to release the injector connector from the main harness connector, there is a tab of sorts but it doesnt appear to be a locking tab.


IMG_3170b.jpg

For the connector in the bottom pic. The ends of the white tabs is what is holding the gray connector to lhe black connector. You can see the edge of the green rubber just under those tabs. It is a weather pac connector. Pry up the little whit tabs and pull apart.
 
Top