Stage 2 TT street car

247f01e437ad7d05591f63e6fce79863.jpg
2220aeade01db63f75cde8ccc99bc346.jpg
41b5c984a65278a2a6b44a4b1a029b76.jpg
8c993a6c1b75cc615265af825d599b42.jpg
a2c805ba3f5c336f1df860e45fd20818.jpg


Sent from my iPhone using Tapatalk
d4c82fa90aacaca7e92f7ffce1cc71f1.jpg
 
Last edited:
247f01e437ad7d05591f63e6fce79863.jpg
2220aeade01db63f75cde8ccc99bc346.jpg
41b5c984a65278a2a6b44a4b1a029b76.jpg
8c993a6c1b75cc615265af825d599b42.jpg
a2c805ba3f5c336f1df860e45fd20818.jpg


Sent from my iPhone using Tapatalk
d4c82fa90aacaca7e92f7ffce1cc71f1.jpg
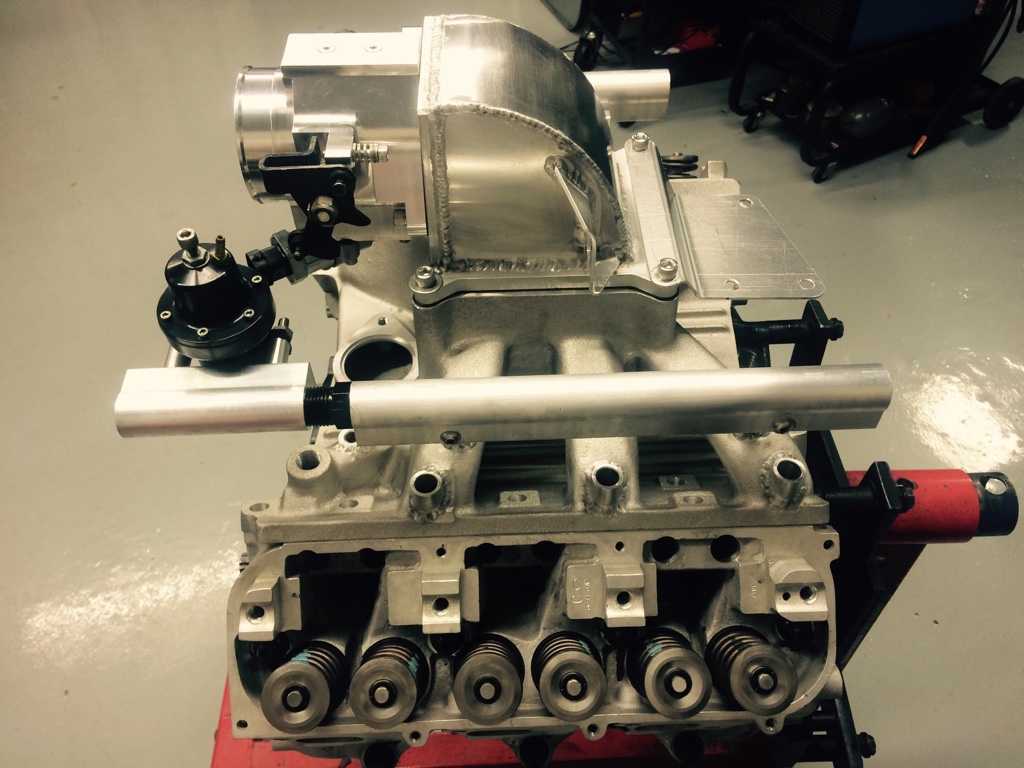
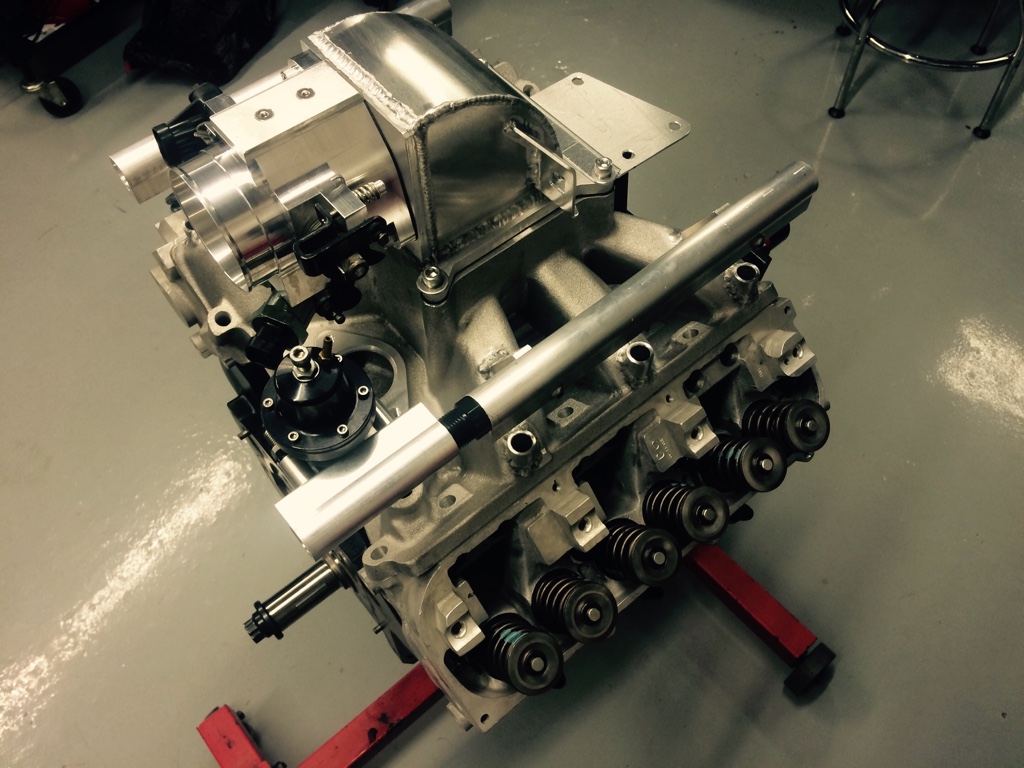
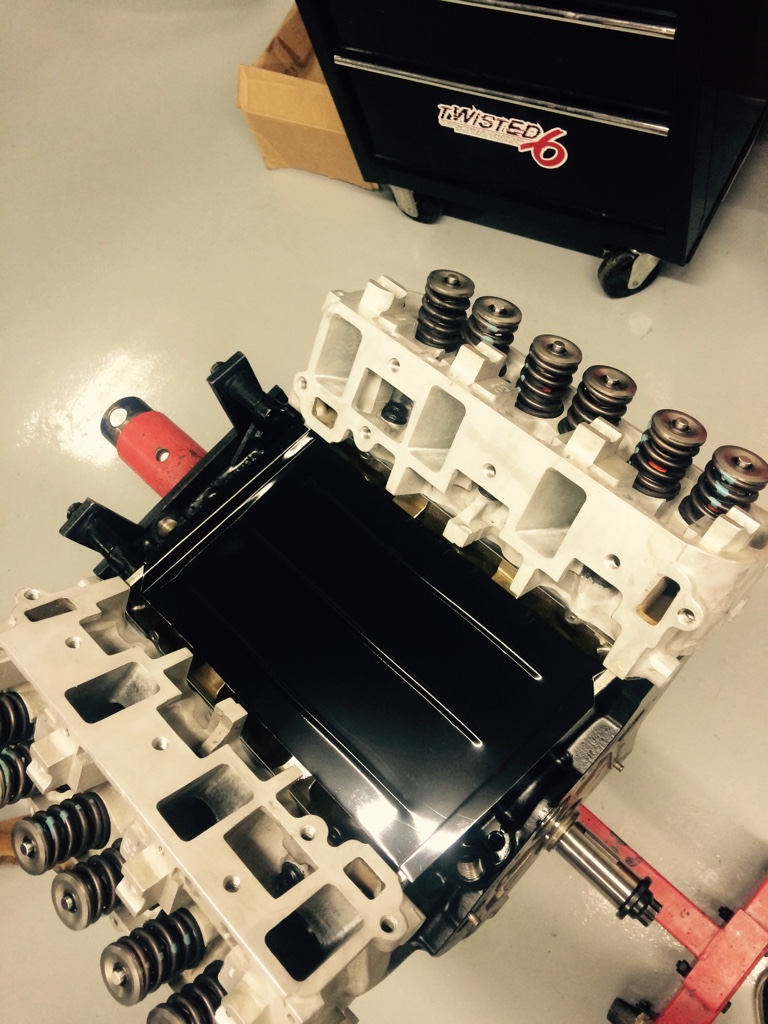
I cant wait to see it with all it's stuff bolted on and mocked up on the stand. I like the way you did the regulator on the rail. I have mine on the rail as well. I used an o-ring to pipe fitting. Problem is, when you tighten it up if it doesn't stop where you want it, you have to back it out and run a tap a little deeper. It's sort of trial and error. Your set-up seems simpler.
 
For power levels at this level, I would NOT recommend a stock style fuel pressure regulator. At 750 HP I have to ream the internal stand pipe up as far as I can and still leave enough material for the diaphragm puck to seal against.
I would suggest a remote mount aftermarket regulator. Look closely at the ID of the outlet of that regulator. I just had to also upgrade to a -6 AN return line even after removing all the Saginaw fittings on the entire system. At idle/cruise you are going to NEED a large by-pass circuit.
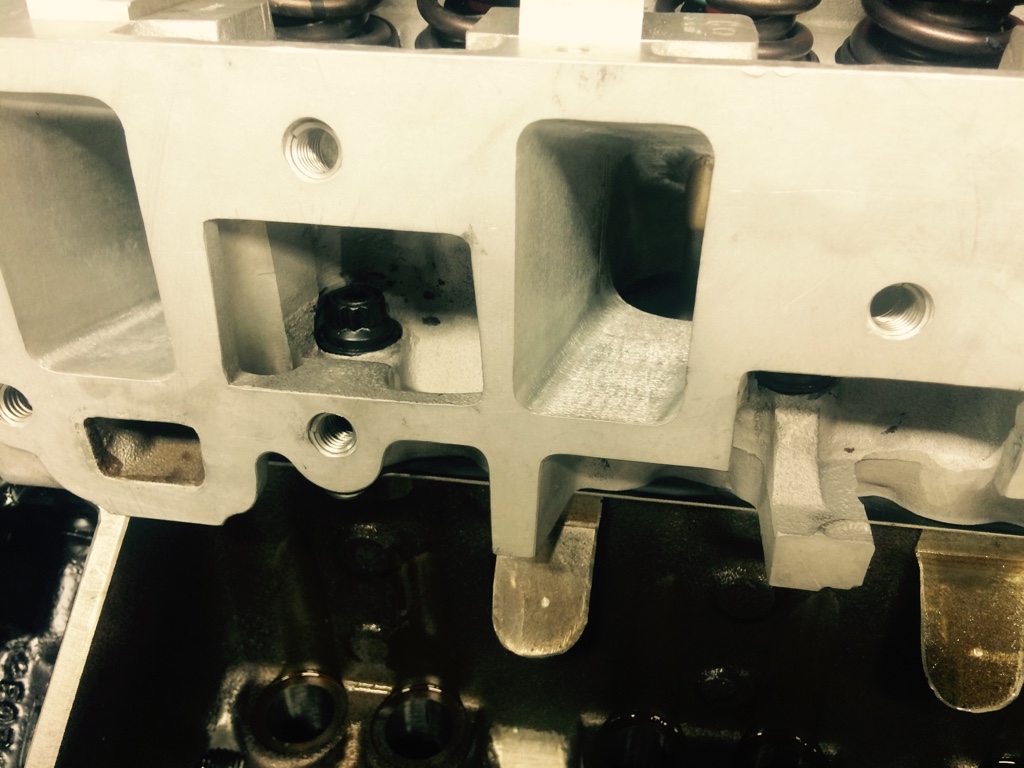
Yes, I agree. I looked more closely and now I realize it's a stock configured regulator. I thought it was an Aeromotive. When I said I had mine on the rail, I meant I threaded it on with an adapter instead of mounting it to the fender or fire wall. I'm using a big Aeromotive pro-regulator and you should look into something like this as well. Especially if you may want to play around with e-85 in the future.
 
For power levels at this level, I would NOT recommend a stock style fuel pressure regulator. At 750 HP I have to ream the internal stand pipe up as far as I can and still leave enough material for the diaphragm puck to seal against.
I would suggest a remote mount aftermarket regulator. Look closely at the ID of the outlet of that regulator. I just had to also upgrade to a -6 AN return line even after removing all the Saginaw fittings on the entire system. At idle/cruise you are going to NEED a large by-pass circuit.

Thanks Ken,
I will change the tiny regulator to a big one, the Racetronix fuel lines front to back are -8 & -6. I'll probably have to chop off the engine side Teflon line fittings to custom fit them to the new regulator location. I've built steel braided lines but have not worked with Teflon fuel lines, I suspect its similar.
Ideally I'd like to have the engine run on a dyno before dropping it in the car to see what it will do & take care of the FAST tuning but I don't think Chris offers this service. I am hoping Bill Anderson will take on the job of the final exhaust/ intake pipe fabrication and engine tuning at his shop once the engine is in the car. I talked with Injector Dynamics and they suggested their 120lb injectors so I am leaning towards this size injector.

Mike
 
Cal Hartline is your new best friend. Cal can tune a hummingbirds wings while in flight. Beehtoven had Cal tune his stuff........... I jest, but Cal would be my choice at your level. (and he couldn't be farther away from me and still,be inside the US borders)
 
The Goodridge lines are very easy to assemble. You can get all kinds of fittings that you may need to rearrange a your set up. All you really need are aluminum jaws for your bench vise.
 
Cal Hartline is your new best friend. Cal can tune a hummingbirds wings while in flight. Beehtoven had Cal tune his stuff........... I jest, but Cal would be my choice at your level. (and he couldn't be farther away from me and still,be inside the US borders)

Yes indeed, Cal's tune is on the FAST system I bought from Richard who had it on his stage 2 engine till the Carrillo rod snapped in half while idling. He was running 120 lb injectors as well but I suspect it will need tweaking, Cal is too far away.

Mike
 
Cal is not really too far away. I know this isn't the best time but he is coming up to NC, just a few short hours away from VA. I figure if he gets enough support to come up here, his visits may become more frequent and as always you could get a start program to get the car running. I doubt if some one has a combo that he doesn't have loaded in his magic laptop.
 
My first set is Moroso, they used to make a set of alternator brackets that gave you the option of either side to mount the engine. High on the driver side and low on the passenger side. Moroso used to carry a lot of the oil pans, alt. brackets, belt drives, and pulley's for the stage 2 stuff. I will go thru boxes and boxes and look. After buying so many of these motors you tend to keep the extra small parts that come on them. I bet Mike Booher would have some. You could also go custom, it's just aluminum and proper spacing. I doubt if there are any stage 2 guys out there that doesn't have several v- belt mandrels, gilmer drives and brackets that they didnt need just laying around. Hopefully you will get a good response. I dont have the champion set up on either of my twin turbo motors. I will try to get you some pics also.

I'd like to see how you did the accessory mounts on your TT setups, I know my alternator is going to get in the way and there is a 0 % chance I'm giving up P/S.

Mike
 
I'd like to see how you did the accessory mounts on your TT setups, I know my alternator is going to get in the way and there is a 0 % chance I'm giving up P/S.

Mike
Do you plan to run a skinny front tire? I missed my power steering for about 3 minutes. I use an S-10 manual steering box. Just the slightest bit of roll with a skinny front tire and it feels no different then my stock sh't box 4 door 98' Honda Civic. You may want to consider it as an option.

In another thread, I recommended to someone also building a TT set-up, to create the entire set-up before locating the turbos. Then after mounting the turbos, build the headers to connect the dots. I know you had your headers built off site. This complicates things slightly. A little more fabrication should get you through it though.
 
Removed the vacuum brakes and began the install of the manual brake MC, figuring out where to drill the brake pedal, level pushrod turned out to be 1" above the vacuum brake pedal pin. MC is 7/8" bore, 4 wheel discs. The Eastwood double flare tool is the best buy ever. DSCF0110.JPG DSCF0111.JPG DSCF0112.JPG DSCF0118.JPG DSCF0123.JPG


Mike
 
Don't be so concerned about the pushrod is level. I would make sure the pedal ratio is correct for the master cylinder used. For me I set the pedal up for a 7:1 ratio with a 1 1/21 bore MC. The vacuum brake upper hole is about 6.5:1. With a 7/8 bore you may need something different.
AG.
 
Took pedal measurements, 13.45" from pivot pin to center of brake pedal, 2.2" from pivot pin to manual brake hole already drilled in pedal. So the hole in the pedal is really perfect at 6.11:1 ratio. I have the TRZ MC mounting plate to level the MC but the angle seems off if I have to get it in that upper hole, I could install it a little lower than the top hole at the expense of increasing pedal effort or correct the angle on the bracket so the push rod is higher up on the pedal.

Mike
 
The TRZ master cylinder plate is only tilted back 11 deg. the firewall is 17 deg. When I bolted up the master cylinder and tried to place the master cylinder push rod into the upper hole on my vacuum brake pedal it put the push rod at a wicked angle, there was no chance it would work. I modeled the plate with the correct 17 degree angle, had it printed with a 3D printer and it leveled the master cylinder perfectly. The push rod lines up nicely with the upper hole now and the push rod is almost level. The end piece I screwed onto the end of the push rod is a 3 dollar piece from Summit. Now I need a CNC machine to make the part.
DSCF0208.JPG DSCF0209.JPG DSCF0211.JPG DSCF0214.JPG
Mike
 
I know there are others who may say it isn't needed. But I wan't to see a 90mm throttle body on that thing real bad!
 
Top