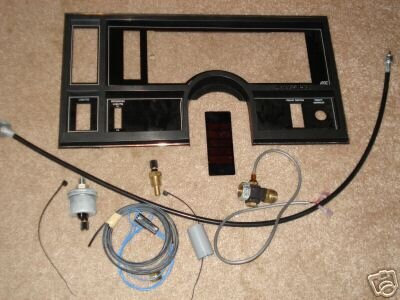
In the process of chasing down some voltage issues and in the mindset of preventing future odd problems I ordered the Casper Ground Stretcher kit available here:
The instructions aren't 100% clear at first glance and as far as I can find there aren't any good walkthroughs in how to install in with the engine still in the car. After a bunch of poking around, reading up and finally just attempting it I feel like I more or less have it figured out.
I'm currently mid-install but I thought I would provide a walkthrough for others in my situation who don't have the luxury of pulling the motor or having it out already. I have seen quite a few posts with people frustrated or stumped with the kit and hopefully this will assist others in the future. This install is taking place in my tiny East Austin one car garage using a jack and stands with almost no clearance on either side of the car so if I can do it anyone can. I'll basically be clearing up any misconceptions that I had with Casper's instructions as well as providing additional info that I found helpful.
As I get wrap things up I'll update the thread and post more photos.
Begin by prepping your wire to pull up from the top of the motor into the engine bay. This allows you to cut and crimp the wire and pull the new ground strap back down to the factory engine grounding point later
You'll want to start by removing the plug wires and coil pack, this gives you easy access to the plastic jacketed wiring harness that runs behind the motor along the firewall. There are three nuts that hold the coil pack in place. Two 1/2" (if memory serves me right) nuts on the fuel rail and a 10mm tucked away between it and the firewall. You'll also need to unplug it from the harness on the driver's side to completely remove it.
On the passenger side of the engine bay, along the heater box, you will want to remove the flexible plastic shrouding from the wiring harness. To begin with you'll unclip it from the a/c shield then peel it back. To get proper access disconnect the two heater hoses going into the firewall and pull them out of the way. You won't be able to remove the flexible shrouding completely until you unbolt the rigid shrouding that is on the driver's side of the harness (it is bolted into the top of the engine with a 13mm bolt, use a 6" extension with a u-joint adaptor on the end to avoid having to remove the coil pack bracket). Once it is unbolted you will need to remove the plastic rivets on either side. I found a box cutter to be able to slice these right off (careful with your fingers and other wiring!) Once this is done the flexible shrouding should pull right off.
Get under the car near the starter. You'll need to disconnect the two wires from the bottom of the starter and pull it upwards towards the motor. The ground wires split off of this bundle and if it is still attached to the starter you will not be able to pull them up into the engine bay later. This is the bundle of wire that is jacketed in black plastic flex tube visible in the photo of the original grounds from beneath the car.
From here you should be able to look up and see the grounds. They are located at the back of the passenger side head. They consist of 4 ground rings with 7 wires coming off of them total. Based upon what I have read in some cars there are grounded to one bolt but in most cars there are two bolts. Mine had two.
The bolts are 5/8", I had to use a u-joint adaptor with a long extension on the lower one to break it loose and was able to hand loosen it the rest of the way. The upper bolt was more difficult as due to a bracket I wasn't able to get a socket on it due to the space being too shallow. I ended up breaking it loose with a ratcheting wrench and again removing by hand. I feel like I got lucky as both were able to be broken loose and hand unthreaded easily. Maybe there's a bright side to all those years of oil leaks down the back of the motor?
Once you've removed the bolts you should be able to pull the wiring harness up from the engine bay and grab all four rings. The wire breaks off from the harness to the starter and grounding points directly behind the transmission fluid dipstick. I was able to pull this bundle of wire up a few inches just enough to grab the grounds and not have to re-route the entire bundle back down later.
This is as far as I've gotten today. I'll edit this post later with more photos and walk-through as I wrap things up. Fingers crossed but I think I have gotten the hardest part done with...
This is a great walk-through! Thank you so much for taking the time and effort to put this together for us! Looking forward to the second half of the walk-through.
A quick note: I incorrectly identified the sizes of the nuts on the front of the coil pack, they are in fact 15mm. Also, the bolts that secure the grounds to the back of the head are also 15mm.
I found two tools useful. The first is the type of crimp tool that you will need. You want to ensure that it is a piercing type tool as shown in the photo below. This ensures that when you solder the connection the solder will flow inside the wire and make a more "permanent" connection. Photo attached. This particular one I picked up at Home Depot for $25. You can find them in the general hand tools section or the electricians tool section. They had other variants for $15-$30. The second is a locking "forceps" this was useful to hold the wire in place while soldering (the wire will get hot) as well as pulling the ground strap down back between the head and firewall. I have also attached a photo for reference.
At this point you should cut the rings off of all 7 ground wires, you'll note that 6 of them are 14 gauge and one is 12 gauge
Strip them back but not too much, take your time as you don't have much room for mistake or to maneuver, the wires don't come too far out of the harness, four of the wires should be longer than the other three
Before you begin crimping ensure that the heat shrink wrap is already on the wires! I found that if I pushed it up against the ring connections the pair of heat shrink tubing sort of wedged each other into place and stayed out of my way as can be seen in the photo below
The 12 gauge wire will get it's own crimp, the other 6 wires will be paired off two to a crimp. Make sure that you have firmly pushed the wire as far as it will go into the connector as you want the crimp to hold the wire in place and make a connection in addition to the solder. A little exposed wire is okay but you want to minimize this as it is a future potential failure point
Once all four crimps are complete solder the connector where you crimped and the connector is now pierced. You should be able to see a little bit of the copper wire through where you pierced. This is where I recommend two things: holding the wire with the forceps as it will not only prevent you from burning yourself but also keeps the wire steady and having a second person to either hold or solder. It helps when you have a good friend who used to solder for a living. The solder should flow into the connector and completely fill the pierced crimp point as can be seen below. Don't go too wild as you don't want to drip solder everywhere or burn any of the insulation.
Give each freshly soldered wire a minute or two to cool down before moving onto the next one. Once all four wires are soldered and cooled you can now slide the heat shrink wrap down over the connectors and use a heat gun to shrink them into place
At this point I pulled out the stud and connected everything to it. The last thing I wanted to do is to mount it and find that one wire was too short or stretched. The two ring connectors off the wiring harness will attach to the stud as well as the ground strap. The longer strap will go back to the original ground location behind the head while the shorter strap will attach to the existing ground point on the firewall on the driver's side behind the coil pack as can be seen in the photo
I started the process of getting the wire back onto the head by pulling the harness back down to the starter. Make sure that it is routed between the starter and the heat shield. You don't want a melted through wire later!
From here I used the forceps to guide the wire from the top behind the head. Use the transmission dip stick as a reference point both from the top and below. It should route directly behind it. Once it was dropped in from the top I again used the long forceps to grab the wire and pull it down. While I had it snagged it made it easy to slip the ground bolt through the ring connector.
The ground strap is only long enough to hit the top and less conveniently located position on the back of the head. I made sure to put some anti seize on the bolt and laying on my back with my feet towards the grill (painfully) snaked my right arm up and slowly and carefully hand threaded the bolt back into place doing the final tightening with a ratcheting wrench.
With everything bolted up except for the new grounding stud I played around with positioning to find a spot that had the best compromise on flat firewall surface, accessibility and not putting any tension on any of the wiring or straps. The screws that come with the kit are not self tapping so I used a small drill bit to put guide holes in the firewall and then ran the screws the rest of the way in by hand. I was able to drill the guide holes with the intake on but it would be easier to do with it removed.
At this point it's time to button everything up. Re-wrap the wiring harness, put the coil pack back on and reattach the heater hoses and you should be set! Not only will you have a fresh ground on the car but you'll have an easily accessible grounding point going forward!
If anyone has any questions feel free to post them here or DM me!
Since the photos were lost on this in The Great Server Fire of 2020 I thought I would repost it with photos and clean up the directions into a single post with a few minor corrections:
In the process of chasing down some voltage issues and in the mindset of preventing future odd problems I ordered the Casper Ground Stretcher kit available here:
The instructions aren't 100% clear at first glance and as far as I can find there aren't any good walkthroughs in how to install in with the engine still in the car. After a bunch of poking around, reading up and finally just attempting it I feel like I more or less have it figured out.
I thought I would provide a walkthrough for others in my situation who don't have the luxury of pulling the motor or having it out already. I have seen quite a few posts with people frustrated or stumped with the kit and hopefully this will assist others in the future. This install is taking place in my tiny East Austin one car garage using a jack and stands with almost no clearance on either side of the car so if I can do it anyone can. I'll basically be clearing up any misconceptions that I had with Casper's instructions as well as providing additional info that I found helpful.
Begin by prepping your wire to pull up from the top of the motor into the engine bay. This allows you to cut and crimp the wire and pull the new ground strap back down to the factory engine grounding point later
You'll want to start by removing the plug wires and coil pack, this gives you easy access to the plastic jacketed wiring harness that runs behind the motor along the firewall. There are three nuts that hold the coil pack in place. Two 15mm nuts on the fuel rail and a 10mm tucked away between it and the firewall. You'll also need to unplug it from the harness on the driver's side to completely remove it.
On the passenger side of the engine bay, along the heater box, you will want to remove the flexible plastic shrouding from the wiring harness. To begin with you'll unclip it from the a/c shield then peel it back. To get proper access disconnect the two heater hoses going into the firewall and pull them out of the way. You won't be able to remove the flexible shrouding completely until you unbolt the rigid shrouding that is on the driver's side of the harness (it is bolted into the top of the engine with a 13mm bolt, use a 6" extension with a u-joint adaptor on the end to avoid having to remove the coil pack bracket). Once it is unbolted you will need to remove the plastic rivets on either side. I found a box cutter to be able to slice these right off (careful with your fingers and other wiring!) Once this is done the flexible shrouding should pull right off.
Get under the car near the starter. You'll need to disconnect the two wires from the bottom of the starter and pull it upwards towards the motor. The ground wires split off of this bundle and if it is still attached to the starter you will not be able to pull them up into the engine bay later. This is the bundle of wire that is jacketed in black plastic flex tube visible in the photo of the original grounds from beneath the car.
From here you should be able to look up and see the grounds. They are located at the back of the passenger side head. They consist of 4 ground rings with 7 wires coming off of them total. Based upon what I have read in some cars there are grounded to one bolt but in most cars there are two bolts. Mine had two.
The bolts are 15mm, I had to use a u-joint adaptor with a long extension on the lower one to break it loose and was able to hand loosen it the rest of the way. The upper bolt was more difficult as due to a bracket I wasn't able to get a socket on it due to the space being too shallow. I ended up breaking it loose with a ratcheting wrench and again removing by hand. I feel like I got lucky as both were able to be broken loose and hand unthreaded easily. Maybe there's a bright side to all those years of oil leaks down the back of the motor?
Once you've removed the bolts you should be able to pull the wiring harness up from the engine bay and grab all four rings. The wire breaks off from the harness to the starter and grounding points directly behind the transmission fluid dipstick. I was able to pull this bundle of wire up a few inches just enough to grab the grounds and not have to re-route the entire bundle back down later.
I found two tools useful. The first is the type of crimp tool that you will need. You want to ensure that it is a piercing type tool as shown in the photo below. This ensures that when you solder the connection the solder will flow inside the wire and make a more "permanent" connection. Photo attached. This particular one I picked up at Home Depot for $25. You can find them in the general hand tools section or the electricians tool section. They had other variants for $15-$30. The second is a locking "forceps" this was useful to hold the wire in place while soldering (the wire will get hot) as well as pulling the ground strap down back between the head and firewall. I have also attached a photo for reference.
At this point you should cut the rings off of all 7 ground wires, you'll note that 6 of them are 14 gauge and one is 12 gauge
Strip them back but not too much, take your time as you don't have much room for mistake or to maneuver, the wires don't come too far out of the harness, four of the wires should be longer than the other three
Before you begin crimping ensure that the heat shrink wrap is already on the wires! I found that if I pushed it up against the ring connections the pair of heat shrink tubing sort of wedged each other into place and stayed out of my way as can be seen in the photo below
The 12 gauge wire will get it's own crimp, the other 6 wires will be paired off two to a crimp. Make sure that you have firmly pushed the wire as far as it will go into the connector as you want the crimp to hold the wire in place and make a connection in addition to the solder. A little exposed wire is okay but you want to minimize this as it is a future potential failure point
Once all four crimps are complete solder the connector where you crimped and the connector is now pierced. You should be able to see a little bit of the copper wire through where you pierced. This is where I recommend two things: holding the wire with the forceps as it will not only prevent you from burning yourself but also keeps the wire steady and having a second person to either hold or solder. It helps when you have a good friend who used to solder for a living. The solder should flow into the connector and completely fill the pierced crimp point as can be seen below. Don't go too wild as you don't want to drip solder everywhere or burn any of the insulation.
Give each freshly soldered wire a minute or two to cool down before moving onto the next one. Once all four wires are soldered and cooled you can now slide the heat shrink wrap down over the connectors and use a heat gun to shrink them into place
At this point I pulled out the stud and connected everything to it. The last thing I wanted to do is to mount it and find that one wire was too short or stretched. The two ring connectors off the wiring harness will attach to the stud as well as the ground strap. The longer strap will go back to the original ground location behind the head while the shorter strap will attach to the existing ground point on the firewall on the driver's side behind the coil pack as can be seen in the photo
I started the process of getting the wire back onto the head by pulling the harness back down to the starter. Make sure that it is routed between the starter and the heat shield. You don't want a melted through wire later!
From here I used the forceps to guide the wire from the top behind the head. Use the transmission dip stick as a reference point both from the top and below. It should route directly behind it. Once it was dropped in from the top I again used the long forceps to grab the wire and pull it down. While I had it snagged it made it easy to slip the ground bolt through the ring connector.
The ground strap is only long enough to hit the top and less conveniently located position on the back of the head. I made sure to put some anti seize on the bolt and laying on my back with my feet towards the grill (painfully) snaked my right arm up and slowly and carefully hand threaded the bolt back into place doing the final tightening with a ratcheting wrench.
With everything bolted up except for the new grounding stud I played around with positioning to find a spot that had the best compromise on flat firewall surface, accessibility and not putting any tension on any of the wiring or straps. The screws that come with the kit are not self tapping so I used a small drill bit to put guide holes in the firewall and then ran the screws the rest of the way in by hand. I was able to drill the guide holes with the intake on but it would be easier to do with it removed.
At this point it's time to button everything up. Re-wrap the wiring harness, put the coil pack back on and reattach the heater hoses and you should be set! Not only will you have a fresh ground on the car but you'll have an easily accessible grounding point going forward!
If anyone has any questions feel free to post them here or DM me!