You can type here any text you want

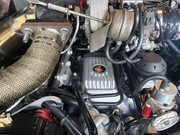
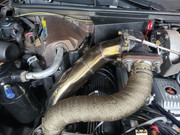
Longtime .... Update on my 1985 Grand National

Welcome!

By registering with us, you'll be able to discuss, share and private message with other members of our community.

SignUp Now!
I agree with GX1 !!!
Looks killer!!!
I'm excited to hear about how it runs!
Congrats on getting it out and back up on its feet !!!
ENJOY!!!
- Jerry
Thanks for the kind words guys.

I am just buttoning up the dump pipe and electric cutouts today. The vband turndown was way to long so I shortened it and welded it. Here are a couple of pictures of it installed...its still warm to the touch.

Now I am just getting ready to wire it all up inside the car. It came with a Remote FOB, but no toggle switch for inside the car, so I bought a monetary switch and will be connecting it into the relay and putting the switch in the ashtray.
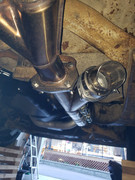
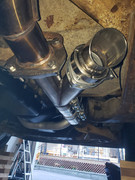

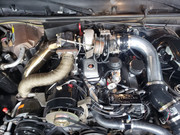
 
I am just buttoning up the dump pipe and electric cutouts today. The vband turndown was way to long so I shortened it and welded it. Here are a couple of pictures of it installed...its still warm to the touch.
Wow, that looks SWEET !!
Which electric cutout is that?

Can't wait until its running!
I love to see the TR's come back to life!!! :D
ENJOY!!!
- Jerry
 
Wow, that looks SWEET !!
Which electric cutout is that?

Can't wait until its running!
I love to see the TR's come back to life!!! :D
ENJOY!!!
- Jerry
Hey Jerry,

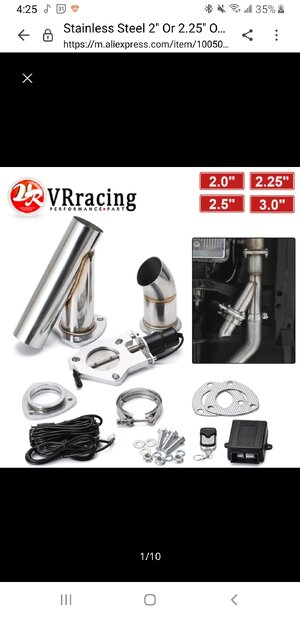
The cutouts are an off brand from China, thought I would give them a try......they were pretty inexpensive.....cost me about $150 canadian shipped....and they arrived in about 10 days.

Came with everything that was needed.

I ended up using the dump pipe that came with my 3 " Downpipe. As I already had it installed by the time the cutout kit arrived. It came with a remote fob, but I decided to make up a toggle switch amd hooked it up to the relay box......it had the pins that are needed on the relay box.

Here is a picture of what comes in the kit. They work really good.
 

Attachments

  • Screenshot_20221004-162503_Samsung Internet.jpg
    Screenshot_20221004-162503_Samsung Internet.jpg
    452.8 KB · Views: 97
Hi,

So I got my SCE copper gaskets for the Up pipe and my Metco angled breather today. I also got my hands on an intake manifold emblem from a member on the site.....Thanks Fred!!!

As for getting the car fired up and on the road, I took it out for a spin and what a night and day difference. The New Bison Upgraded Turbo is amazing.....it spools up quick and you can really hear it when it does. An issue i am having is the gap i have on the plugs, i think it may be to small for the amount of boost that I am running in the Hot Air car. I am using the Autolite 24 with a .032 gap. I also have a set of Autolite 25's. I just noticed it takes a bit longer to fire up, and when I am sitting at a light the car is shaking and hesitating alot more than it ever did before with my NGK UR5 installed right out of the box. I am actually thinking of reinstalling the NGK......what do you guys think? I think the 0.028 gap is small for my setup What would a safe gap be on either the Autolite 25's or the NGK ur5. I only close to 14lbs of boost in my car as per the Turbo Tweak Chip.


On my scanmaster It says I have knock retard. It almost always is sitting at 0.0 in first and 2nd gear, but creeps up to about 2-3 when I am in 3rd gear, this when I have my foot on the gas pedal and not even WOT. I think I may have over tightened the knock sensor when I replaced it. Is there a correct way to install the Knock sensors that I may have missed?

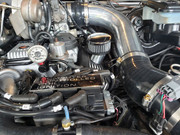
Here are a couple of pics now.


Thanks guys

A.
 
Okay so I got in there with a couple extensions and swivel and 7/8 socket and loosened up the knock sensor and torqued it to the correct specs 14 ft lbs, i only removed the first portion of the cold air pipe. Thank God.

The knock is still there, I am actually thinking it is the downpipe to the exhaust......the portion that bends towards the dump pipe and the mufflers under the car is touching the frame.....it is very tight in there. I am thinking when I am under WOT that the car is sending vibrations from the frame rail through the new motor mounts and setting off the knock sensor......I guess I will need to remove the uppipe and get to the clamps on the downpipe and try to tweak it as much as I can away from the frame rail. I hope this fixes the issue.

I also have to play around with the IAC and TPS settings as they are a off.

I read the how to reset the IAC and adjust the TPS on gnttype and vortexbuick and it seems easy enough.

Oh and one more thing.....there hasn't been a drop of oil under the car since I dropped the pan and did the rear main seal.....the cometic gasket is doing its job!!!
 
The knock is still there
Are you sure that you got a good tank of gas when you filled it up last?
I can see the knock occurring in 3rd more than 1st or 2nd because there is more of a load on the car at higher speeds.
Throw a can of octane booster in it to see if it goes away?
It could be the exhaust, but a can of octane booster is a quicker check! No KR on the 1-2 or the 2-3 shifts?
Good Luck!
- Jerry
Hi,

Yes I have been filling up with 91 octane for almost a year....that is what the previous TT chip and the newest TT chip was set to.

I will still try the octane boost .

I took the car out today after getting the TPS and IAC readings set perfectly. At operating temp (closed loop the IAC readings were were low...under 10..... the TPS was set at .42 and WOT was 4.62.

On the drive When I punch the pedal and it shifts from.1st to 2nd and than to third....there is a knock right before it shifts.....about 1 - 2 on the scan master. When I am doing regular driving amd it shifts through he gears there is no knock...stays at 0.0.

I was thinking there may not be enough fuel delivery in WOT (lean). So I changed my MAF Translator setting on the WOT knob to #1....which was 2% Rich at WOT.

I did a once over on all the vaccum lines as well and zap strapped them all. I ordered a new gasket for the vaccum block as well.

Thanks

I even loosened up the exhaust and moved it away from the frame rail.
 
Big Dawg very nice work great attention to detail ! This is very motivating to see another member post and explain upgrades and progress of sweet builds !…your valve covers are Sweet looking too…..now u got me looking into this DIY paint oven lol may I ask how did u get the texture on your valve covers with the black paint like that?
 
Big Dawg very nice work great attention to detail ! This is very motivating to see another member post and explain upgrades and progress of sweet builds !…your valve covers are Sweet looking too…..now u got me looking into this DIY paint oven lol may I ask how did u get the texture on your valve covers with the black paint like that?
Hey,

Thanks for the kind words, the paint was VHT wrinkle paint.....it sprays out like regular spray paint (wet looking), but once you bake/heat the paint for at least an hour at 200-250 degrees the paint will start to wrinkle and adhere to the part and is very durable. I watched a bunch of videos where some people used heat guns directly on the paint but it seemed to be a bit more difficult to evenly heat all areas of the part that was painted. This is why I chose to build a DIY curing box/oven.
 
Hey buddy, u need to clean the paint where the wastegate puck it's. I didn't clean it off mine and the puck would stick. I had /o take it all back a loose and do it.
 
Hey buddy, u need to clean the paint where the wastegate puck it's. I didn't clean it off mine and the puck would stick. I had /o take it all back a loose and do it.
What paint are you talking about that needs to be cleaned, wastegate puck on the inside of the downpipe? Or on the outside where the puck arm is? The flange is steel.....its discolored because of heat but it is still steel...no paint.

I attached a pic


Am I missing something.....

Thanks A,
 
Big Dawg,
Car looks very nice. Lots of nice work you did.
I am a member of the BC Grand National Racing Assoc., look us up on Facebook.
I have in-laws in Coquitlam, BC so frequently are up in the area.
Would like to meet you some time.
My GN is a 84. Notes in signature...
 
Big Dawg, ever track down the source of your knock retard?
Hi,
I re&re the knock sensor and torqued it again with loc tight, and made sure nothing was vibrating up against the motor in anyway. It kind of just went away......it shows up the odd time,, but real minimal usually in 3rd gear. I don't know what I did but it fixed it.
 
I recently installed a oil catch can as well. The new angled breather that I had ordered for the car was slowly getting soaked with oil and once and a while it was deipping onto the valve cover. The weird thing is that there wasn't a baffle of anykind on the bottom side of the valve cover hole.

I mounted the catch can with no breather as I decided to have the clean oil free fumes going back into the motor, kind of like how the stock setup was. I came up with a way to use a valve cover cap from a later model regal and installed a fitting in it and run one hose to the catch can and the out goes into a fitting on the intake tube from the big mouth kit...seems to work pretty good.

20230929_112737.jpg
20230929_112741.jpg
20230929_112748.jpg
20230929_120316.jpg
20231005_133137.jpg
20231005_133133.jpg
20231005_133127.jpg
 
Back
Top