Powermaster rebuild
- Thread starter TurboDave
- Start date
Welcome!
By registering with us, you'll be able to discuss, share and private message with other members of our community.
SignUp Now!You are using an out of date browser. It may not display this or other websites correctly.
You should upgrade or use an alternative browser.
You should upgrade or use an alternative browser.
scgnx2
Active Member
- Joined
- Jan 24, 2009
- Messages
- 387
If I may ask, where are you getting replacement seals from ?
Very cool pictures. Send more as you put it back togetherPM started acting a bit strange, but unlike most, I decided to troubleshoot and found an internal leakage issue.
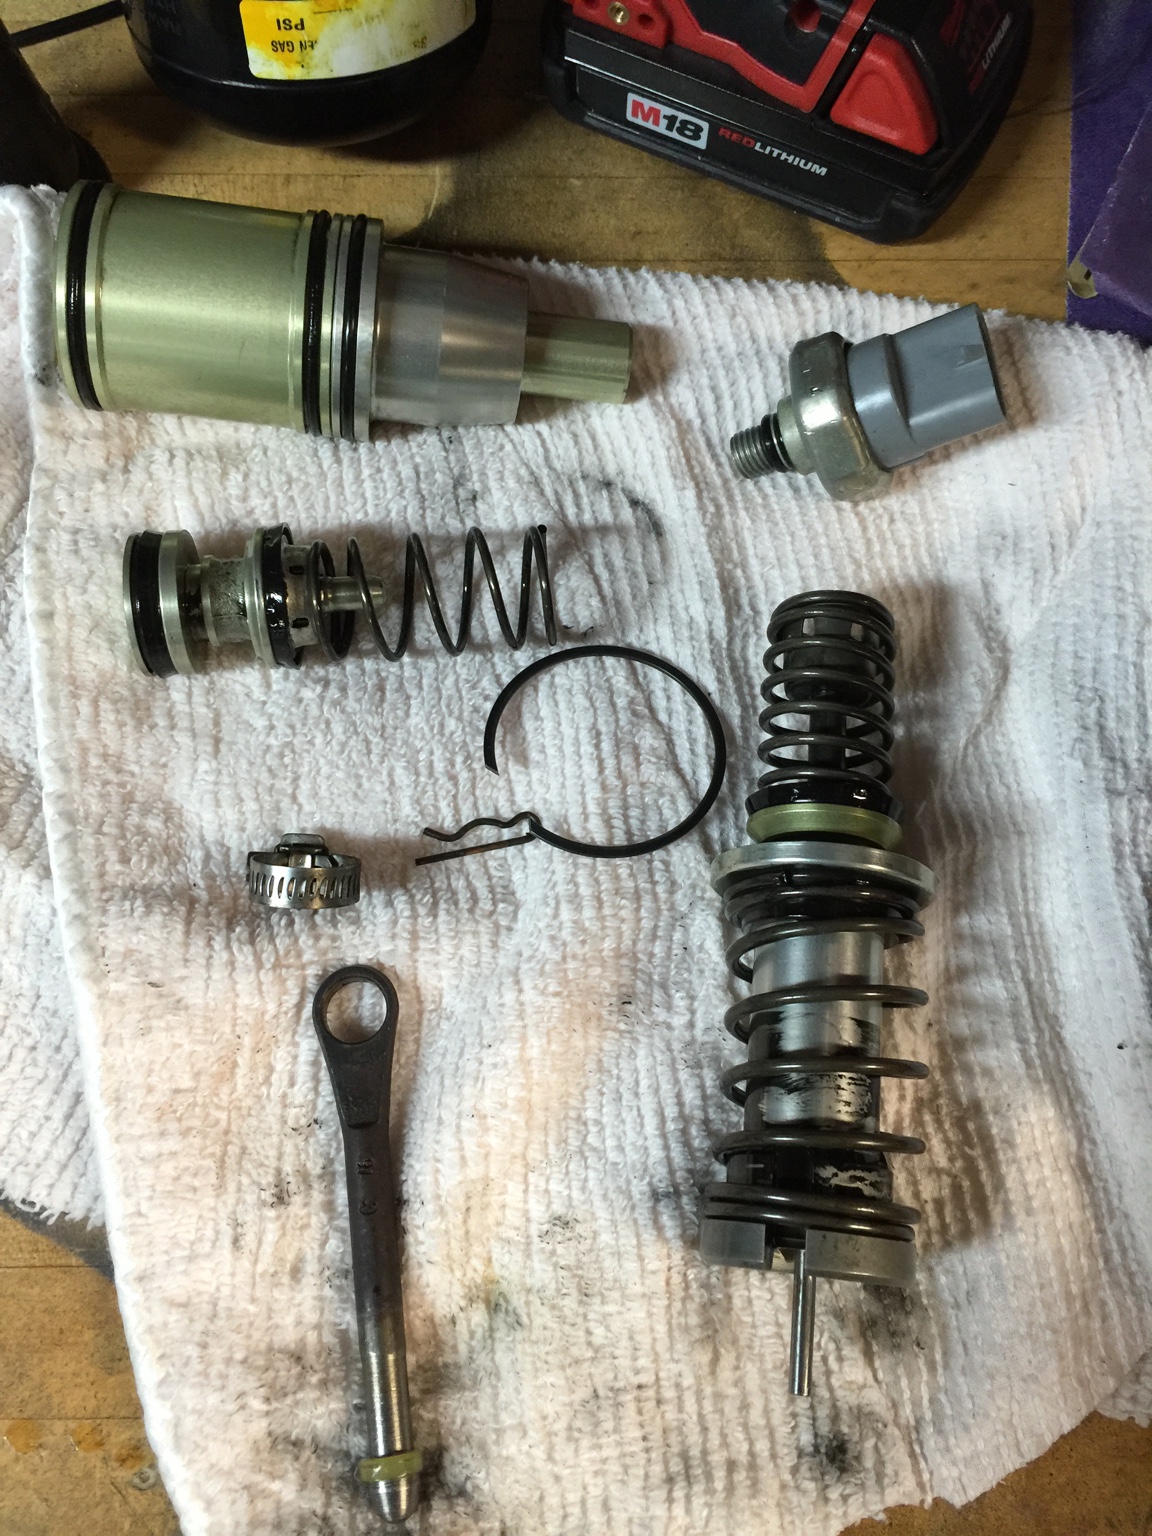
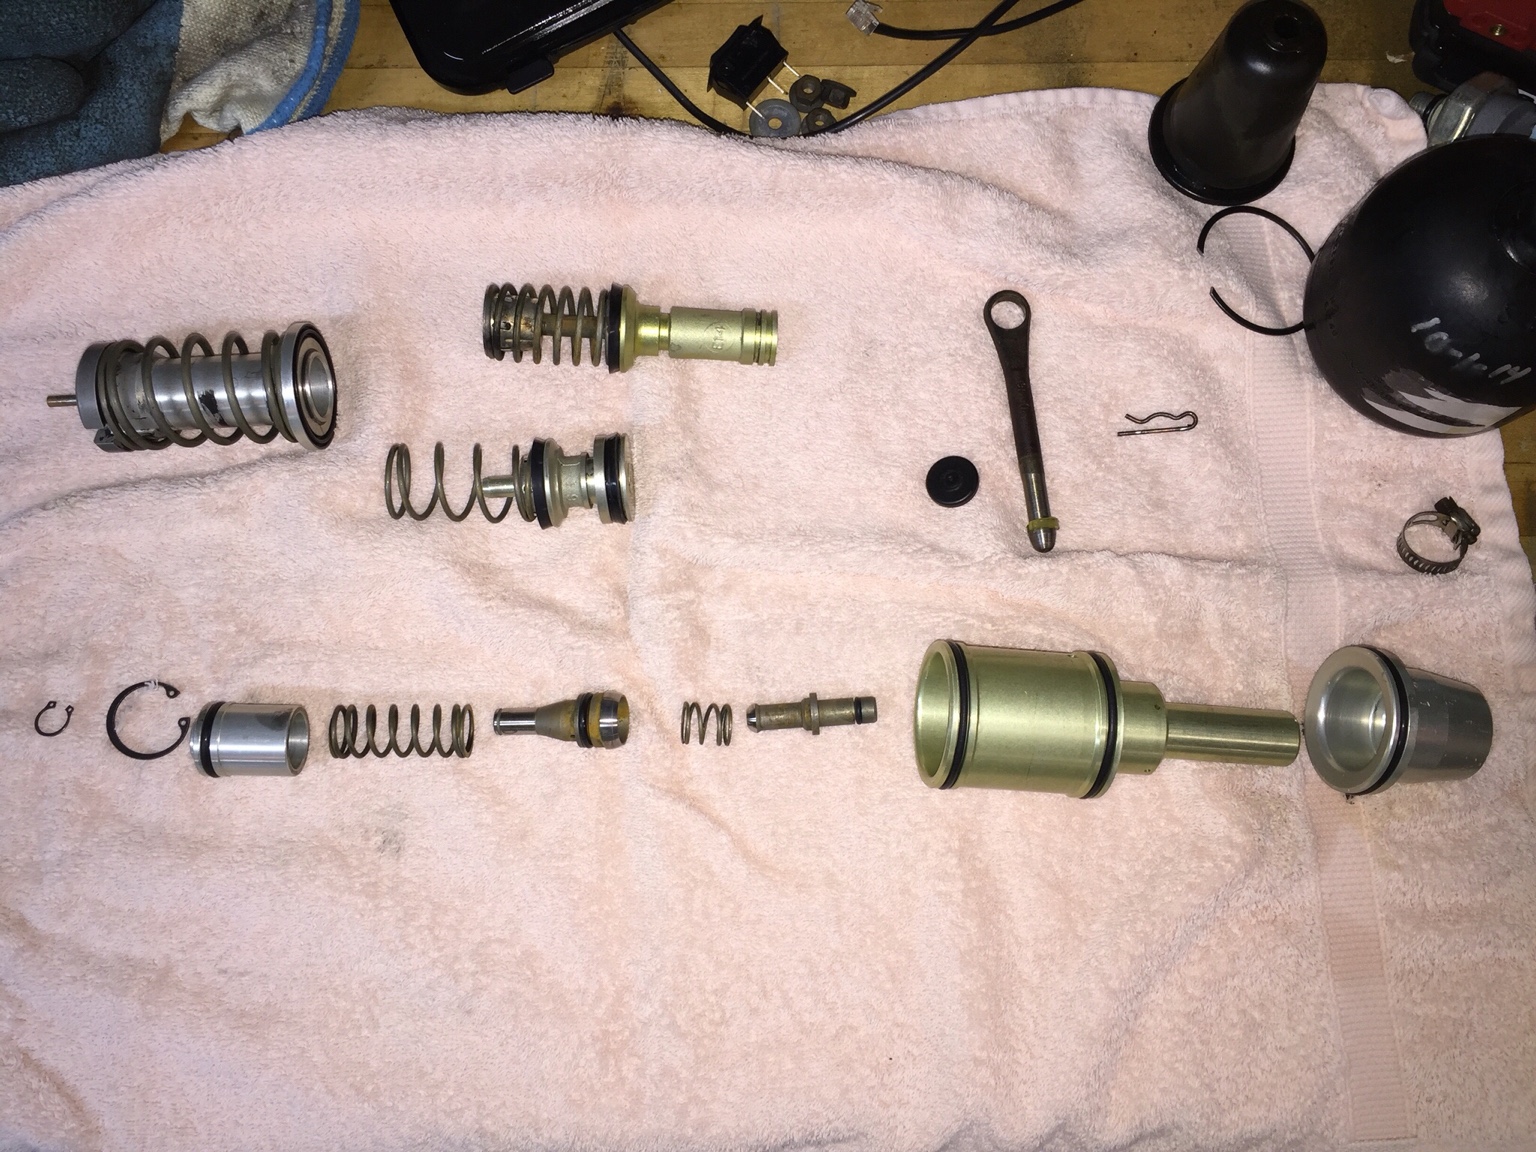
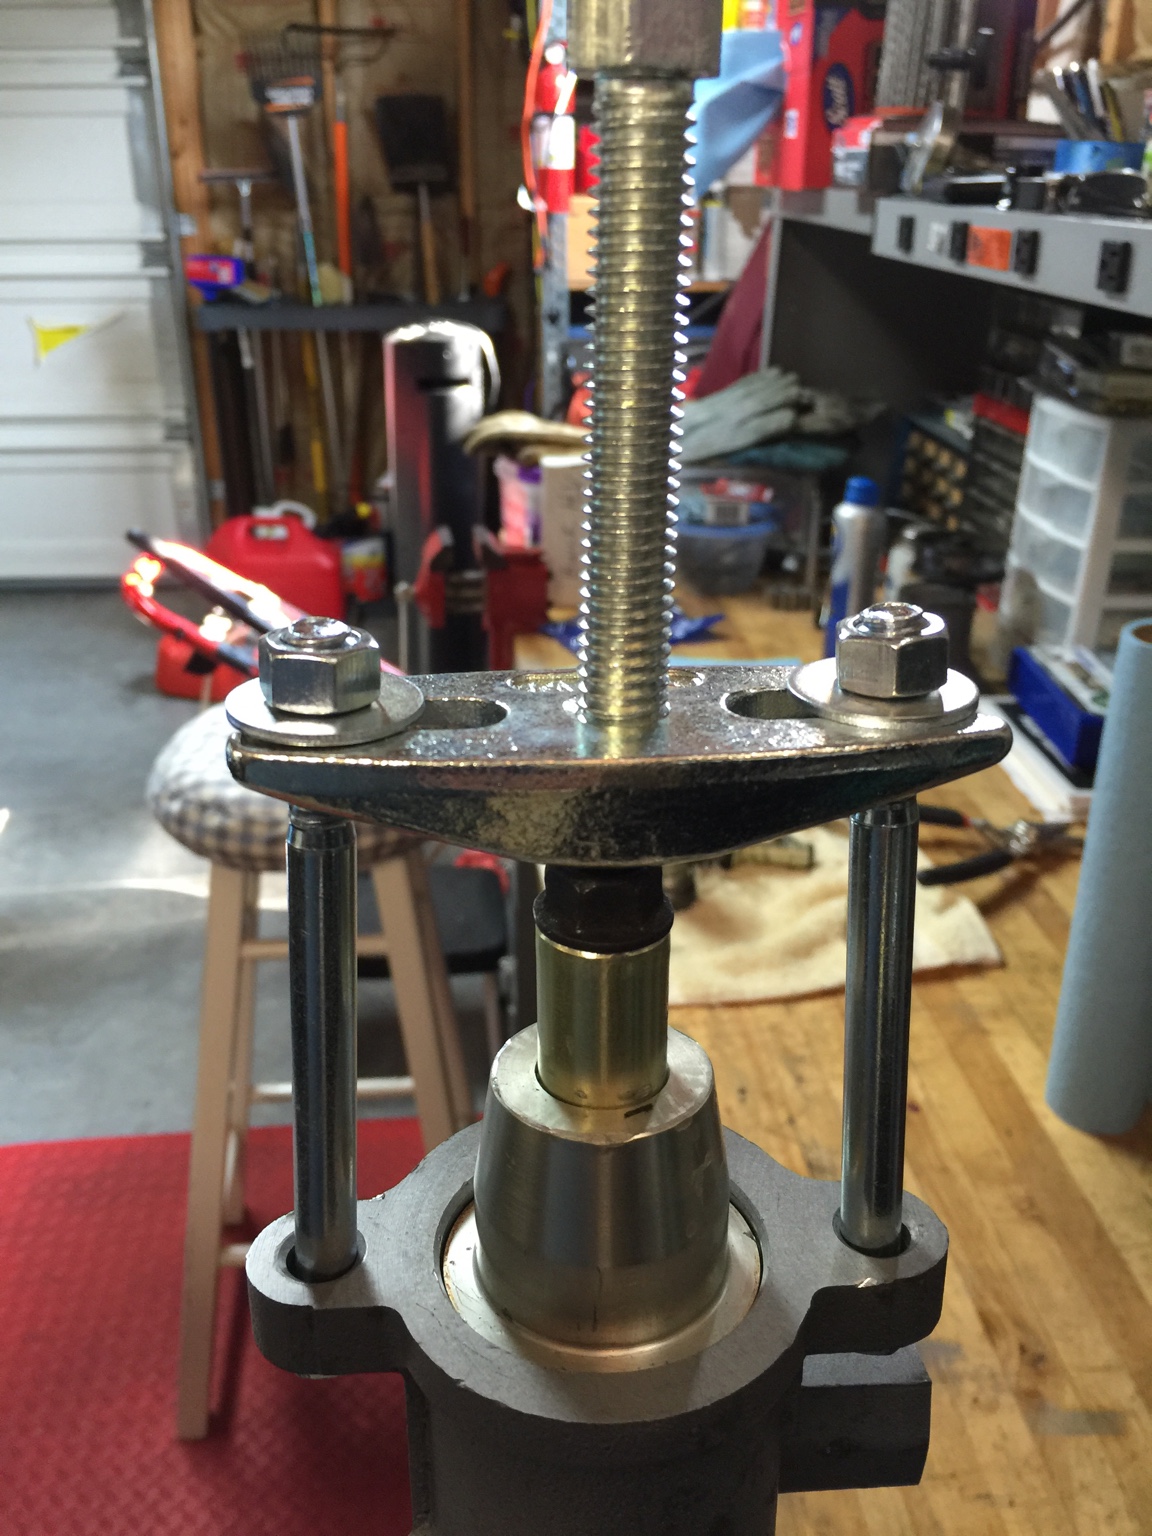
Got it tore down waiting for seals.
Sent from my iPhone 6+ using Tapatalk.[emoji252]
- Joined
- Feb 14, 2002
- Messages
- 5,867
Did you order a Kirban seal kit or a Karps seal kit? Karps seems to be "out of stock" permanently, although they won't say that.
BTW, I should add, I wouldn't have had the courage to try this without the help of the new power master service manual co-written by Richard Clark and John Norton.
Sent from my iPhone 6+ using Tapatalk.[emoji252]
Sent from my iPhone 6+ using Tapatalk.[emoji252]
- Joined
- Feb 14, 2002
- Messages
- 5,867
I've done quite a few. re-assembly has to be very clean. Use compressed air to blow the parts clean.
Any little bits of lint or debris will make the check valve leak like crazy, especially when warmed up.
to check the check valve for a leak, just place your finger over the pump supply port in the bottom of the reservoir. if it's leaking you will feel the backflow..
Any little bits of lint or debris will make the check valve leak like crazy, especially when warmed up.
to check the check valve for a leak, just place your finger over the pump supply port in the bottom of the reservoir. if it's leaking you will feel the backflow..
I've done quite a few. re-assembly has to be very clean. Use compressed air to blow the parts clean.
Any little bits of lint or debris will make the check valve leak like crazy, especially when warmed up.
to check the check valve for a leak, just place your finger over the pump supply port in the bottom of the reservoir. if it's leaking you will feel the backflow..
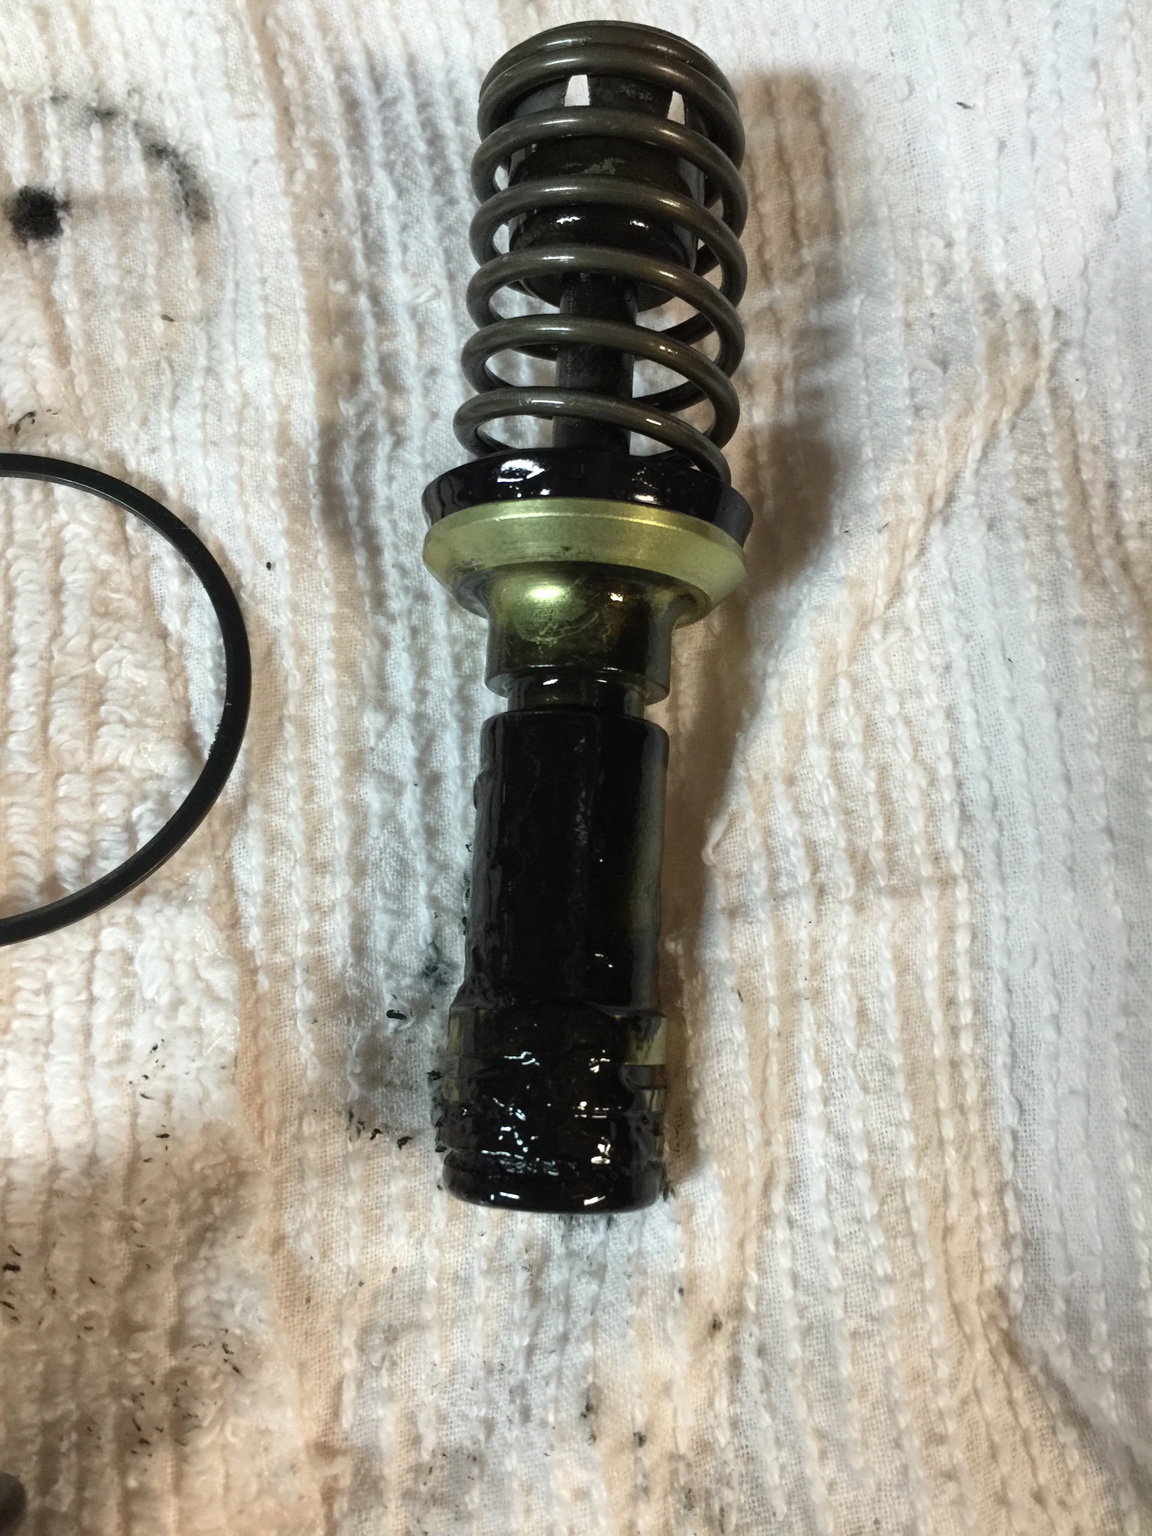
Already did the port B test and it was fine. Port A failed indicating an internal master cylinder leak. Most of the o rings on the power piston are shot.
Sent from my iPhone 6+ using Tapatalk.[emoji252]
OK, got everything re-assembled and the PM loosely mounted on the firewall.
I have two major concerns.
Based on the difficulty getting it off, I'm not sure how I'm going to get the push rod and pin back on the pedal.
And have no idea how to accomplish a "bench" bleed.

Sent from my iPhone 6+ using Tapatalk.[emoji252]
I have two major concerns.
Based on the difficulty getting it off, I'm not sure how I'm going to get the push rod and pin back on the pedal.
And have no idea how to accomplish a "bench" bleed.
Sent from my iPhone 6+ using Tapatalk.[emoji252]
If it were me I would call Richard and ask him about the bench bleed. You have more nerve then me. My car is at Richards shop for other things however I did ask him to check out the PMOK, got everything re-assembled and the PM loosely mounted on the firewall.
I have two major concerns.
Based on the difficulty getting it off, I'm not sure how I'm going to get the push rod and pin back on the pedal.
And have no idea how to accomplish a "bench" bleed.
Sent from my iPhone 6+ using Tapatalk.[emoji252]
It's done the same way as any master cylinderAnd have no idea how to accomplish a "bench" bleed.
TexasT
Texas, Where are you from
- Joined
- Sep 10, 2002
- Messages
- 7,209
I had to unbolt the pedal from the firewall when we did the hydroboost swap. I imagine you will too to get the powermaster hooked back up.
It's done the same way as any master cylinder
That's why I asked. Never done it before. [emoji849]
Sent from my iPhone 6+ using Tapatalk.[emoji252]

Zeus 1
New Member
- Joined
- Oct 5, 2015
- Messages
- 5
http://turbobuick.com/threads/the-powermaster-bleeding-procedure.218912/
Detailed procedure
Sent from my XT1585 using Tapatalk
Detailed procedure
Sent from my XT1585 using Tapatalk
Finally got the rebuild done! First one failed for unknown reason. Second tear down and reassembly didn't reveal much so reassembled and reinstalled, now everything is perfect! Great pedal and a lot less leverage required!
I've become something of an expert at removing and re installing a PM in the car.
And thanks to a hint from my Son-In-Law John Norton I now know you don't even have to get under the dash to disconnect the push rod from the pedal !!!!!!
Sent from my iPhone 6+ using Tapatalk.[emoji252]
I've become something of an expert at removing and re installing a PM in the car.
And thanks to a hint from my Son-In-Law John Norton I now know you don't even have to get under the dash to disconnect the push rod from the pedal !!!!!!
Sent from my iPhone 6+ using Tapatalk.[emoji252]
No-fair, how do you remove from the pushrod from the pedal without getting under the Dash?????Finally got the rebuild done! First one failed for unknown reason. Second tear down and reassembly didn't reveal much so reassembled and reinstalled, now everything is perfect! Great pedal and a lot less leverage required!
I've become something of an expert at removing and re installing a PM in the car.
And thanks to a hint from my Son-In-Law John Norton I now know you don't even have to get under the dash to disconnect the push rod from the pedal !!!!!!
Sent from my iPhone 6+ using Tapatalk.[emoji252]
- Joined
- Feb 14, 2002
- Messages
- 5,867
just give the PM a yank and the pushrod pops right out. pushrod stays with the pedal when doing it that way.
Thank youjust give the PM a yank and the pushrod pops right out. pushrod stays with the pedal when doing it that way.
My method is I bit different. I loosen the two nuts holding the PM to the firewall with just a couple threads hanging on. Grabbed a couple of my flair nut wrenches because they're thicker than the average open end wrench.
Stick them between the PM and firewall as spacers.
Got in the cabin and started pulling on the brake pedal until the push rod pops out of the PM.
Sent from my iPhone 6+ using Tapatalk.[emoji252]
Stick them between the PM and firewall as spacers.
Got in the cabin and started pulling on the brake pedal until the push rod pops out of the PM.
Sent from my iPhone 6+ using Tapatalk.[emoji252]
Similar threads
2
4K
Online statistics
- Members online
- 1
- Guests online
- 11,753
- Total visitors
- 11,754
Totals may include hidden visitors.