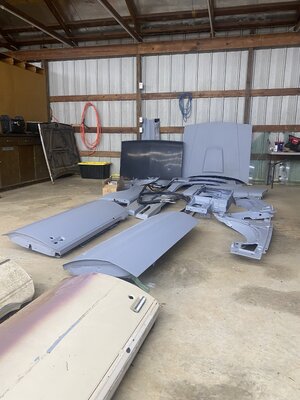
Sitting at the paint shop

Update - I haven't been able to work on the car as much. I had purchased a ttop weatherstrip holder trim for the driver's side from GBodyParts and needed to install it. There were several ways to install , bond it, screw it or weld. I chose to weld it, drilled a few holes , cleaned the primer off the header, then grinded the weld spots down. The original seam sealer that I used was out of date and always remained tacky so after a couple of weeks I just cleaned it all off and will apply some newer stuff. Hopefully this week all of the black primer will be sanded off and the car can be reprimed again with the Epoxy primer and then wet sanded. One thing to take note of that caused me a little extra work is that the top of your car has a lead seam line where it attaches the roof to the a pillars and slightly above your quarter windows. If you are aggressive on your sanding , you will remove some lead and have to use body filler.
 

Attachments

  • IMG_2081.JPG
    IMG_2081.JPG
    1.1 MB · Views: 115
  • IMG_2093.JPG
    IMG_2093.JPG
    1 MB · Views: 116
  • IMG_2094.JPG
    IMG_2094.JPG
    630.7 KB · Views: 113
I had to remove the rattle can primer off of the car to go back over it with epoxy for the bare spots. On the car where I had the black primer it was easy to see reworked body lines and deep scratch marks but it was a pain to sand back off. It kept gumming up the 180 grit sandpaper. So I prepped the car and removed the primer on a Wednesday evening getting it ready to prime on Thursday evening and some one from another class was in the paint booth with their car painting. Screwed my plans all up and I had to rattle can prime my car again. I didn't want to use the black primer again so I used a gray primer to get me thru to the next week with no rust. I almost believe it was worst because it was harder to see where I had primer at and it took even longer and I probably remover more existing epoxy primer than I should have. Needless to say I only primed the back half of the car but I killed 2 birds with one stone and came back over the wet epoxy with a high build 2K primer. So depending on the weather next week I plan on removing the doors and working them to near perfection and then getting the ttop area 's black primer sanded off to put epoxy and 2K on it. It sucks that it has to be done in stages like this but oh well.
 

Attachments

  • IMG_2094.JPG
    IMG_2094.JPG
    630.7 KB · Views: 85
  • IMG_2118.JPG
    IMG_2118.JPG
    795.5 KB · Views: 84
  • IMG_2119.JPG
    IMG_2119.JPG
    854.9 KB · Views: 89
  • IMG_2120.JPG
    IMG_2120.JPG
    910.7 KB · Views: 90
  • IMG_2133.JPG
    IMG_2133.JPG
    957.5 KB · Views: 84
  • IMG_2135.JPG
    IMG_2135.JPG
    623.6 KB · Views: 86
  • IMG_2137.JPG
    IMG_2137.JPG
    637.9 KB · Views: 85
love the pics
a little tip you probably already know but after the paint job is done only use a hand glaze on it to allow the paint to cure
usually takes two months before you seal or wax it
I like 3m hand glaze in lemans terms it feeds the paint it doesn't seal or protect it
jescar power lock plus (formerly menzerna) is the best product I have found to seal and protect your paint job and you can also wax after that
but that sealer is slicker than my expensive carnauba wax
 
I did not know that. Good info. Class is done for the semester until next year. I plan on going there and putting a different set of wheels on it so that I can polish up the convo pros and put new tires on it front and rear. I still have to work the doors and prime them again, I simply ran out of time at 8 (if iI am lucky)hours per week.
 
The hood. I have spent more time on the two hoods that I have than the entire body. I still have a fiberglass hood that was prepped already for paint when I do paint the car. Do yourself a favor and treat your hoods with kindness when you shut them.
IMG_2147.JPG
IMG_2149.JPG
 
class not over they also make a clear coat that has no uv inhibitors in it for concours paint jobs the uv inhibitors have a yellow hue to them so they are not really a true clear but you can't really see it , no one really uses them but thats on the extreme end
 
For everyone's info, one of the oddest thing that I had to learn doing body work is for every action there is some sort of an opposite reation. If there is a dent here, there probably is a slight bulge there and if there is a bulge here there is probably a low spot there. It's almost like fixing the visible defects that you can see and then feeling the ones that you can't see and fixing those. It definitely takes a "bodyman's hand rub" to feel the defects. Sometimes it is very obvious, then other defects you can have 8 people come by and rub it but only 5 people can feel what you are trying to describe.
 
I will definitely look at that video. This is some of the extra work that was required on the hood. This is from using inferior hose clamps on my piping at the throttle body
IMG_1461.JPG
IMG_1462.JPG
and yes you can imagine what my hood liner looks like. Shredded!
 
Sorry that I haven't posted in a while. Work schedules are messing with my paint time. I have removed the core support which included the trans cooler, ESP front mount, and dual electric fans so that I can pull the engine and trans out to paint the frame rails and stuff. It is a classic case of I didnt really want to take it this far but while I'm here, might as well.
 
Can't turn back now! Keep going, your inspiring me.
 
Top