wbzautocustomiz
Want my GN to go 11's one day
- Joined
- Feb 11, 2007
- Messages
- 468
crank sensor install anything special to look forward to? Is it pretty much R&R? or is this difficult to do but I do have lift to use to get a good look to work though.
By registering with us, you'll be able to discuss, share and private message with other members of our community.
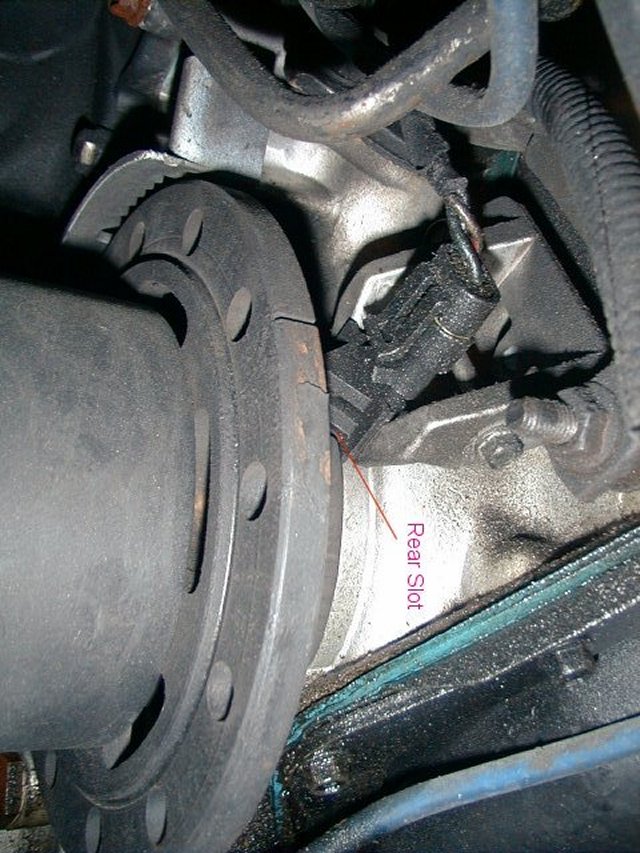
SignUp Now!I pulled the old sensor last night and you can clearly see where it has been rubbing the reluctor wheel. I need to get a 28mm socket, so I can rotate it.It's not that critical. Just make sure it NEVER touches the reluctor ring.
and NEVER assUme the ruluctor ring runs true. Turn the crank one full revolution and make sure there's no scrapies before locking it down.
If the plugs are out you can turn it with the alternator bolt (or the intercooler fan if you're careful and still have it.
Or if you have a 1-1/8" socket for trailer balls, that'll work too.

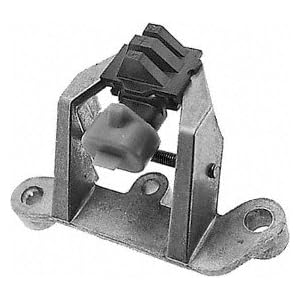
Wait, what is the ALT wire? Is that the wire that is in the plastic that bolts on or should have an o-ring terminal connected to a wire and it bolted on? Because I don't. The stuff wasn't powdery, it was a little runny. I was thinking of putting some high temp thread lock with PTFE on the bolt and factory stud, but with all the oil on the bolts and in the bolt holes it probably wouldn't cure.The factory bolt is a stud with a nut in the middle of it (or a bolt with a stud sticking out the top. It holds the crank sensor down. Then you add the intercooler bracket and then the ALT wire on top of that.
If the white stuff was powdery, it's probably galvanic corrosion from a steel bolt touching aluminum. If that's the case you're driver side valve cover doesn't leak enough oil
")
Earl, when you say loosen the bracket, you're not talking about the bracket that mounts to cover or block are you? If you mean sensor, I can loosen it and slide it parallel to the reluctor blade and balancer. However it just doesn't seem like the blade penetrates far enough between the two ridges of the sensor to interrupt the magnetic field. Below is a picture I took of my white board to illustrate what I am seeing. This is an actual representation of what mine looks like.Why can't you loosen the bracket and slide the sensor into the right place?
I get what you are saying now. If I loosen the bracket, I can move the sensor up and down. I didn't realize that the bracket had any play in it.Why can't you loosen the bracket and slide the sensor into the right place?
The picture of the posted above is not of my engine, I failed to mention that. It is the from the http://www.vortexbuicks-etc.com/cranksensor.htm page.No he means the bracket that bolts to the block
It just has to be deep enough to interrupt the magnetic field inside the sensor. The signal here is just a square wave to the ECM it only cares if there is voltage or not. It's hard to tell from the angle but your's looks OK to me.
It the reluctor ring isn't touching the sensor turn it over and see if it fires.
Earl, when you say loosen the bracket, you're not talking about the bracket that mounts to cover or block are you? If you mean sensor, I can loosen it and slide it parallel to the reluctor blade and balancer. However it just doesn't seem like the blade penetrates far enough between the two ridges of the sensor to interrupt the magnetic field. Below is a picture I took of my white board to illustrate what I am seeing. This is an actual representation of what mine looks like.
View attachment 232817