That looks good thanks for the pic
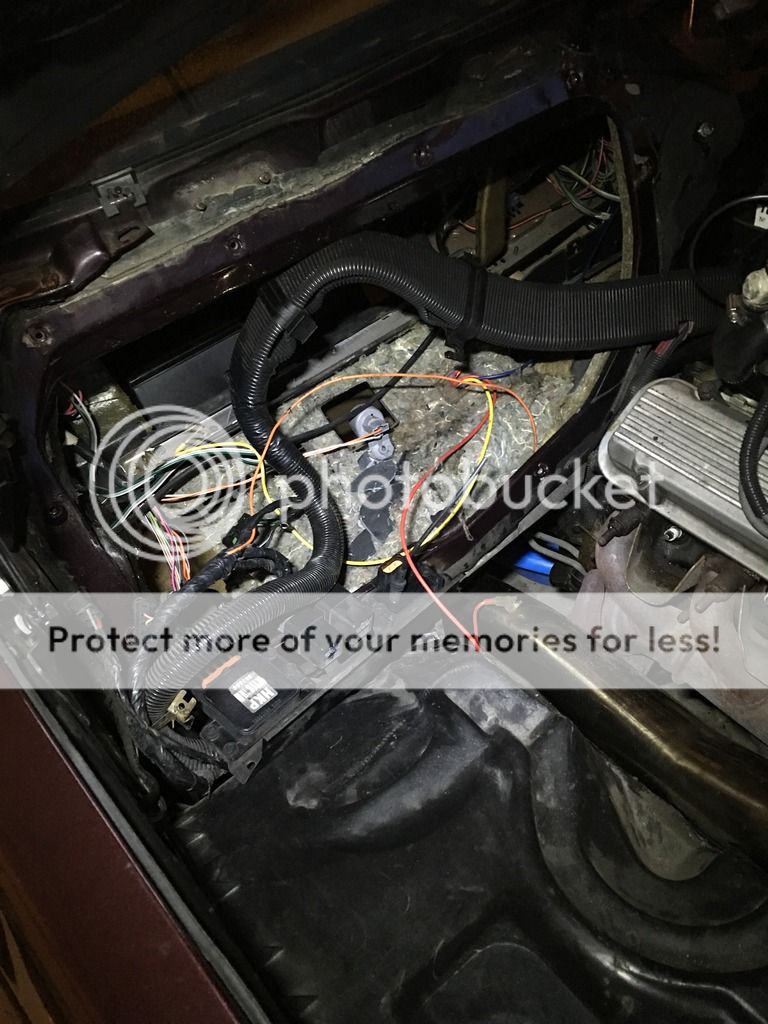
I did what Turboelky did. I replaced the oval wire loom with the standard round stuff and then I fabricated a bracket to support the heater box extension to the cowl. I also added a continuous piece of metal down the entire length of the cowl and some weatherstrip to complete the line. 'm happy with this set-up now. However.............................
These days, If I did it again, I would try something different. I would bring the harness back into the dash and pop it back out behind the coil pack. This would be a lot of work. Because I would find some slick harness connection to splice into the design at the firewall. And also eliminate the existing grommet down low near the ECM. Mike Rickets has recently done a wonderful job showing us how he is rewiring his Buick "Brutus" right now in another thread on the board.
Anyway, here is a pic of my current set-up.
View attachment 299999
I knew if I said your name (just like Beetlejuice) you would come to the rescue!If your keeping your factory harness, it already has hooks on it that you can use to support it on the AC delete panel. Allow the harness to stay level with the way it is routed along the back of the engine across your AC delete panel and drill a small hole and secure it. Don't allow it to sit too low because your downpipe is routed near the firewall at the back. I had a Caspers harness in mine that didn't have the factory loom like yours, so mounting it will look cleaner than how I did it before I revamped my harness with something custom that was made. Here is a pic of the way I ran it.
If your looking for a idea of how to revamp your harness with something custom. I tore my Caspers harness apart and used it as my template to remake a custom harness from scratch that allows me to disconnect it with a weather proof multi pin bulk head connector at the firewall behind the intake.
![]()
I actually used the real ventilated heater box top for the fill in. It provides a little escape for under hood heat while moving along. But I was certain to use sealant around the firewall plate and all other areas around that section to prevent water infiltration.I'm currently in the middle of this very thing. I have fabricated a cowl plate and working on the wiring now. I'm cleaning up the harness and am going to keep it inside the cabin and come out under the coil pack and then route all the sensors - wiring going thru the intake. I've also routed the injector wiring to do the same.
I'll post pics as it progresses further.
It can be as nice as you want!Mine was butchered and busted up by the time it was all out so I didn't have that option. The cowl isn't tight to the hood so will still vent some hot air and I have functional GNX vents too so not much of an issue with them. Great to see some of these cleaned up engine bays! The pics so far are out of this world nice! Hope mine turns out 1/2 as nice!
I can be as nice as you want! Just give up women, TV, alcohol and/or drugs, sleep, vacations, children, and in some cases......even work.![]()
Thanks! Looks goodHeres what i did. Like most i replaced the oval loom for round loom and basically pulled the harness back into the glove box through the stock firewall grommet. No need to cut or shorten any wires. It tucks nicely back in there and theres plenty of room.
I didn't plan on using a connector bulkhead. Just a rubber grommet. That's right about the position I thought of that looks like it would work best and come out above the intake and yet under the coil pack.
You think the wires are going to be bent up and contorted too much?