highboostgn
Well-Known Member
- Joined
- May 24, 2011
- Messages
- 1,590
nice!!!
By registering with us, you'll be able to discuss, share and private message with other members of our community.
SignUp Now!I would like to warn people not to take that oil fitting off. When I did the BB cartridge shifted and the turbo would not go back together. I had to mail it to precision to put it back together. Also do not run and jump out of an airplane with scissors.

Nope!did you use the same paint on your downpipe also?
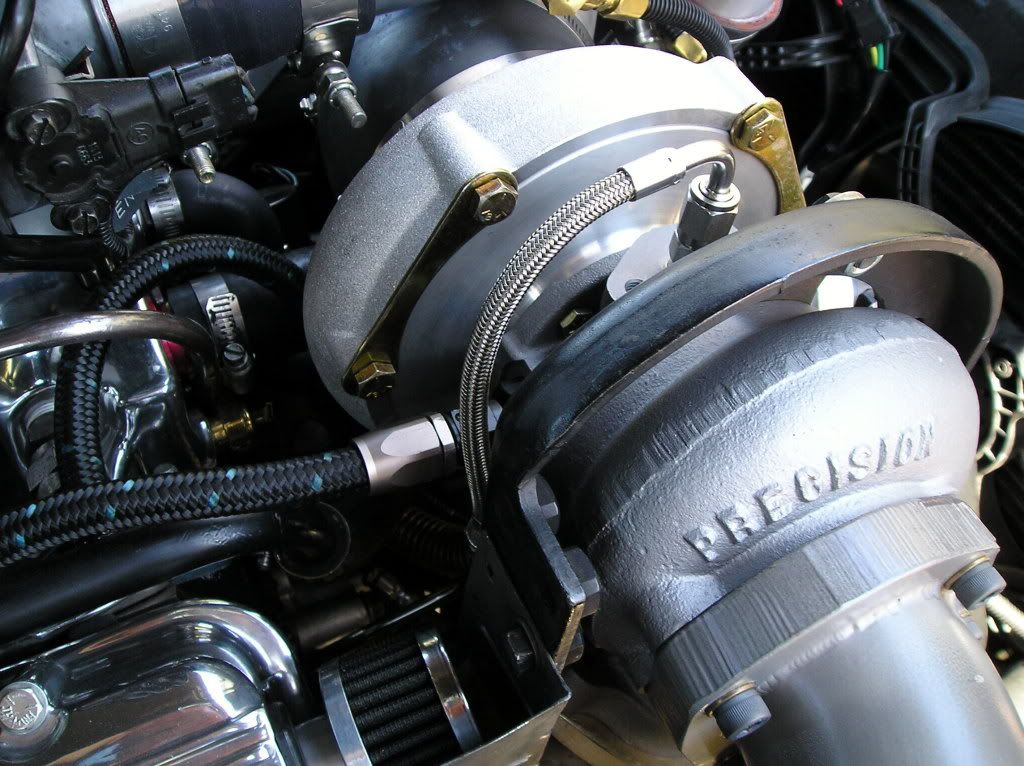
Nothing worse than paying big bucks for a new hairdryer, only to watch it slowly rust away in your nice looking engine compartment. Since it should come apart to port out the waist gate hole anyways, this is the perfect time to paint it too. Here's the Precision 6265 dbl BB turbo on my GN that I did a few years ago. It still lools like new, even after many hundreds of street, strip, and dyno floggings.
First the porting.
---------------------
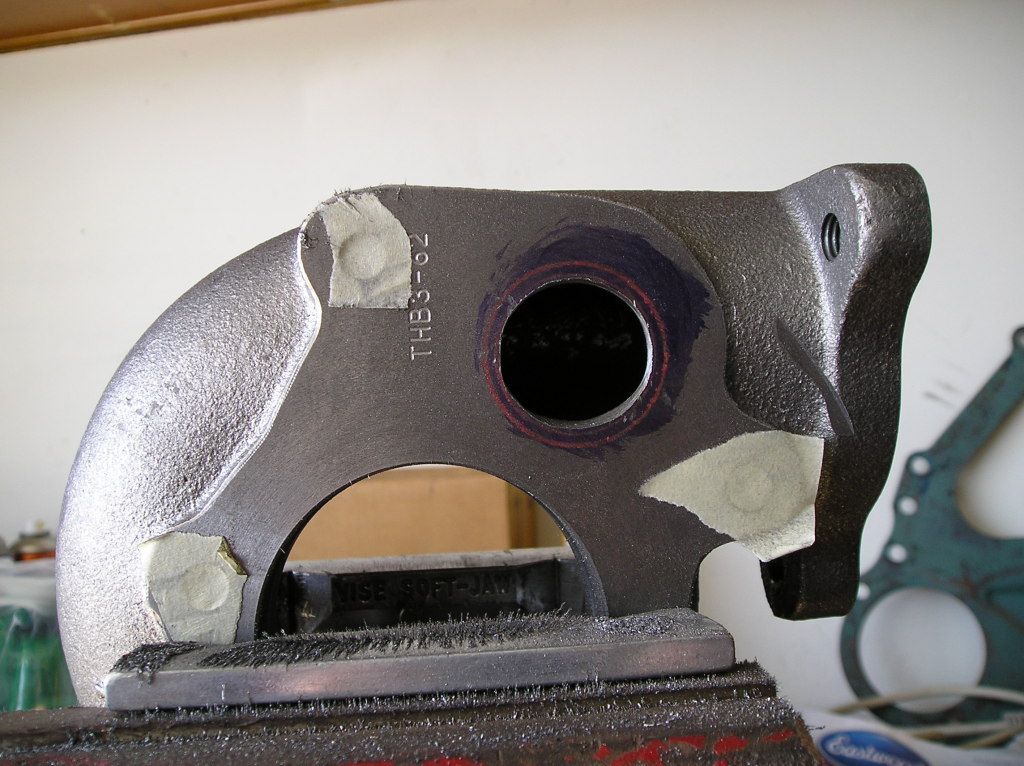
With turbo and downpipe on the bench, remove the compressor and exhaust housings. Use some Dykem blue around the waistgate hole. Scrape off some wax pencil or crayon on the edge of the puck.
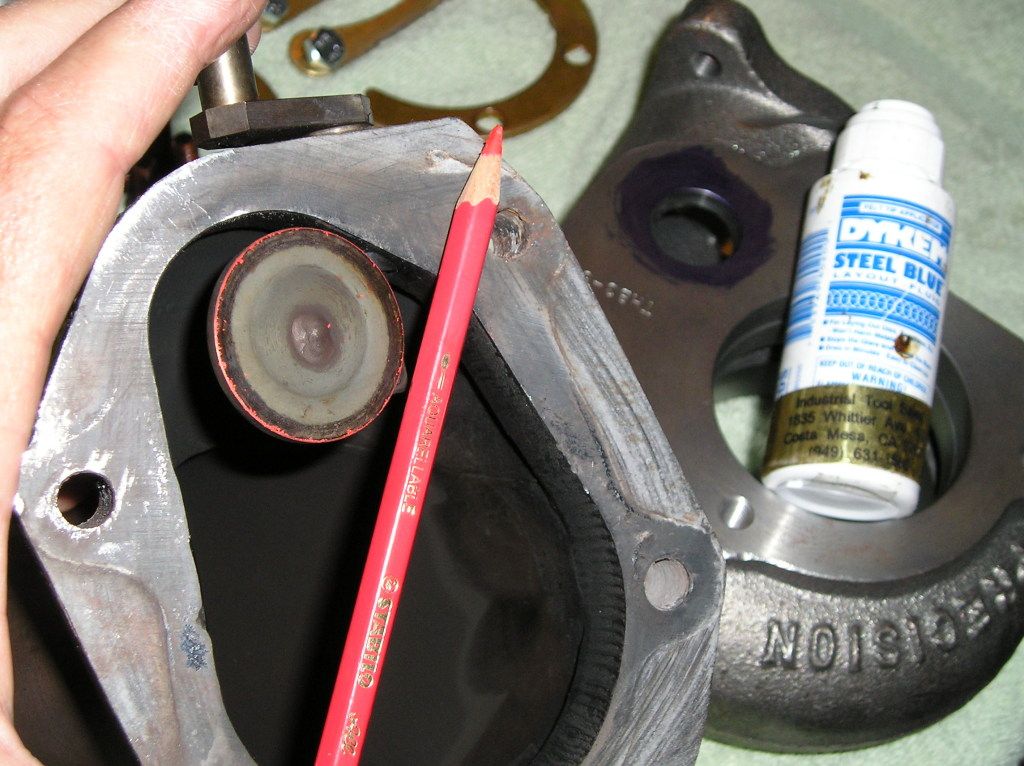
Bolt the downpipe to the exhaust housing and slap the puck against the hole area to make a mark. You can also reach your finger in through the exhaust housing intake and spin the puck while you have it in the closed position.
Remove the downpipe and darken the red mark, using a circle templet if needed. Note, puck will most likely not be centered on the factory hole.
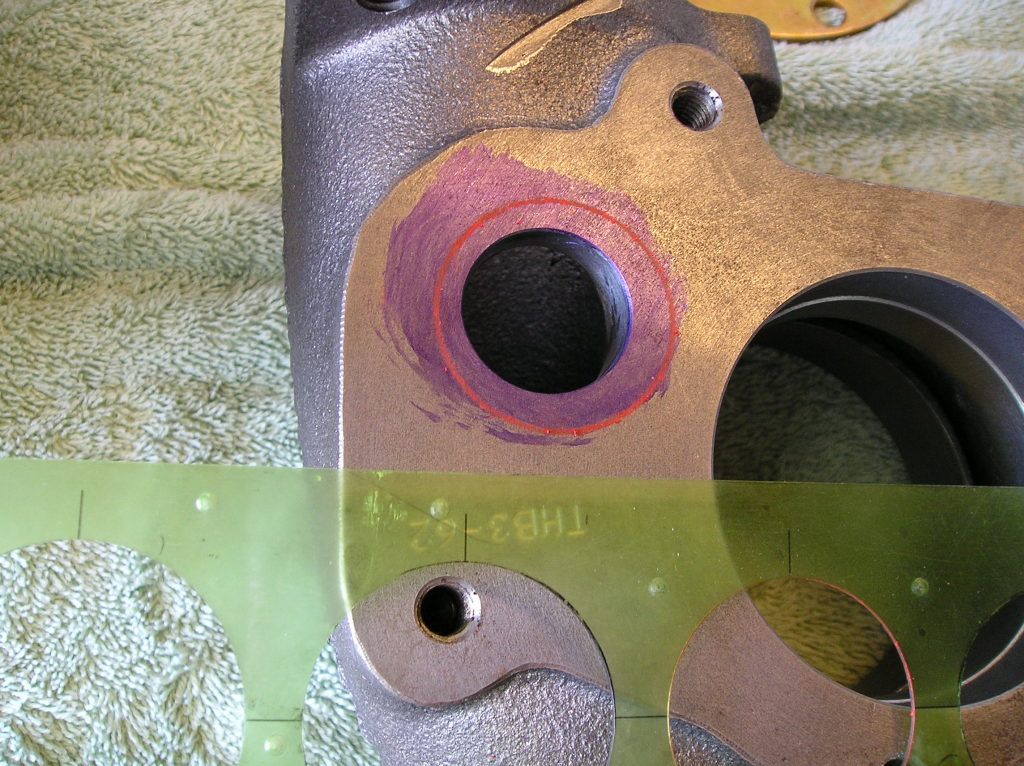
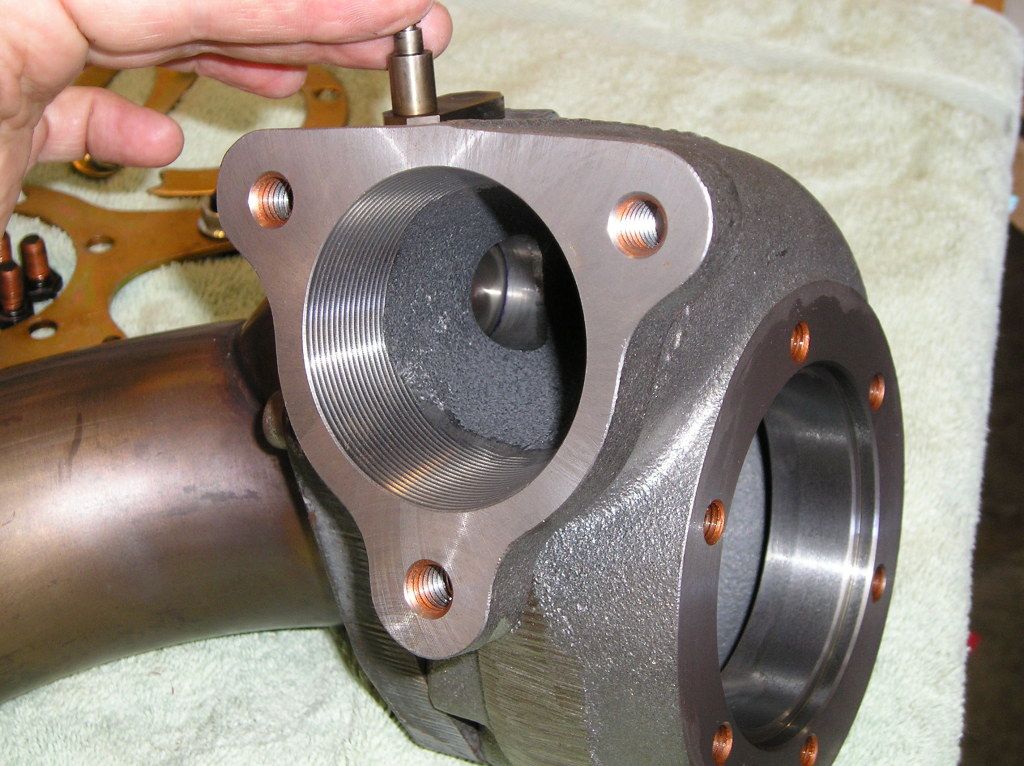
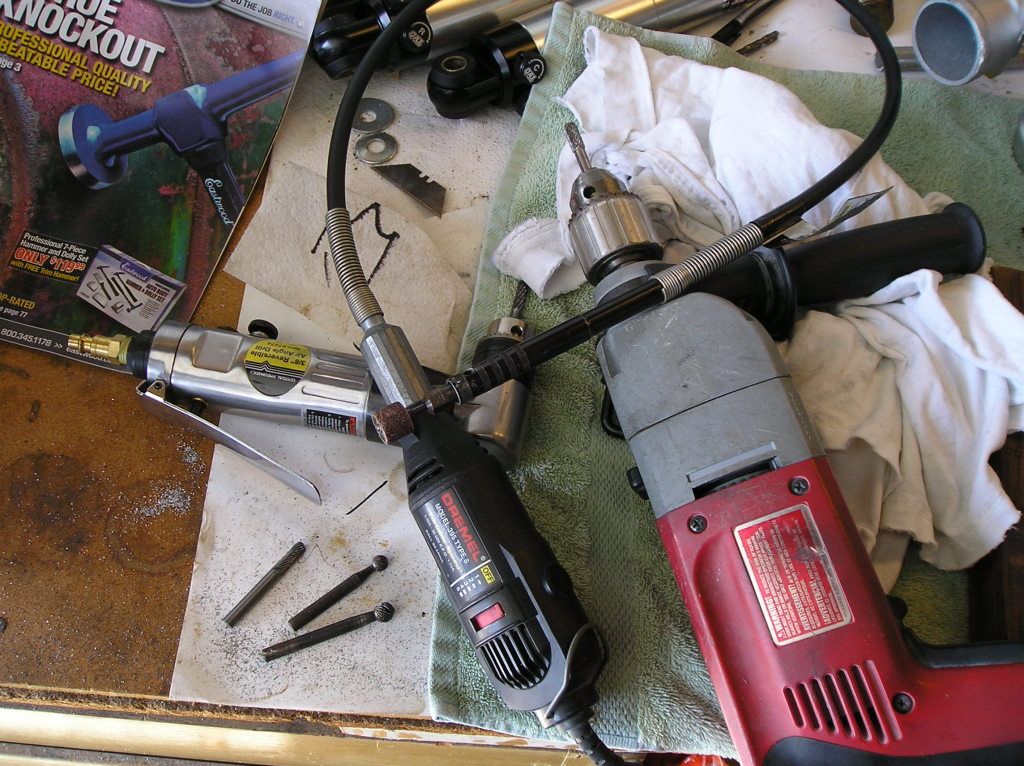
draw another circle 1/16 to 1/8" inside the puck circle. Chose your weapon for removing metal. The 90 deg. air drill shown here likes to jump around. The big drill is very steady and gives you a good hanle to put some weight on. The little Dremmel tool is nice for finish work of smooting things out and getting around corners, as you'll want to round and smooth the inside corners to maximize air flow. It does make a huge difference.
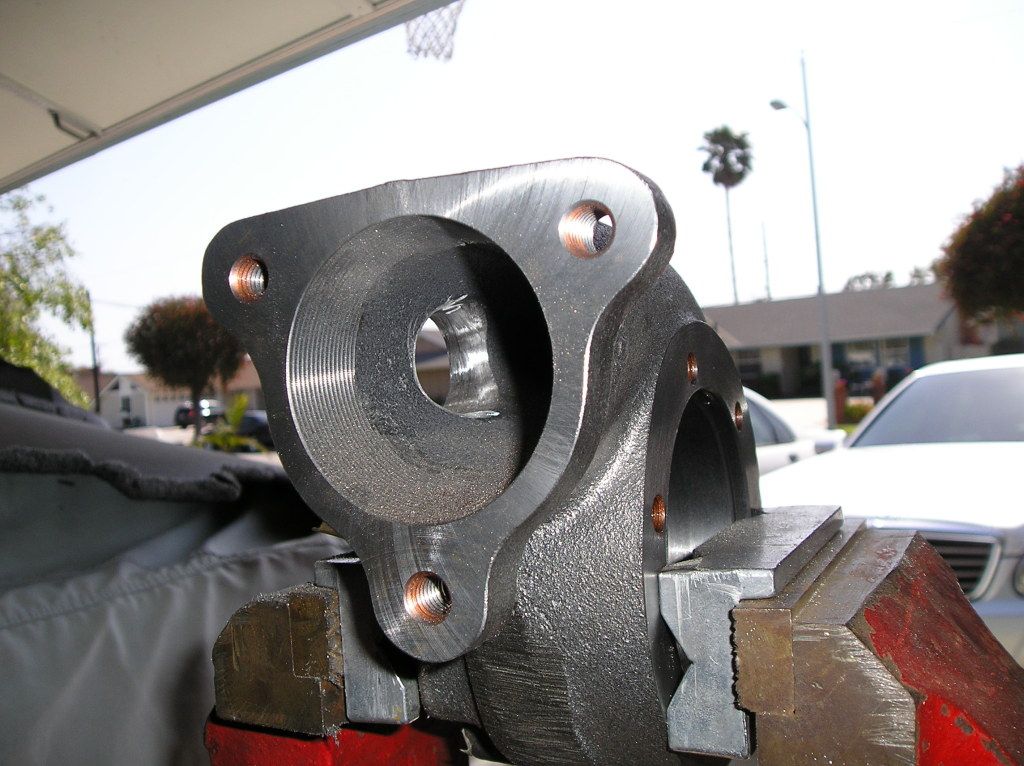
Finished port job.
Next. Painting the center section and exhaust housing.
Mike Barnard[/QUOT
By opening up the puck hole in the elbow what does this do? Letting the waste out faster?Nothing worse than paying big bucks for a new hairdryer, only to watch it slowly rust away in your nice looking engine compartment. Since it should come apart to port out the waist gate hole anyways, this is the perfect time to paint it too. Here's the Precision 6265 dbl BB turbo on my GN that I did a few years ago. It still lools like new, even after many hundreds of street, strip, and dyno floggings.
First the porting.
---------------------
With turbo and downpipe on the bench, remove the compressor and exhaust housings. Use some Dykem blue around the waistgate hole. Scrape off some wax pencil or crayon on the edge of the puck.
Bolt the downpipe to the exhaust housing and slap the puck against the hole area to make a mark. You can also reach your finger in through the exhaust housing intake and spin the puck while you have it in the closed position.
Remove the downpipe and darken the red mark, using a circle templet if needed. Note, puck will most likely not be centered on the factory hole.
draw another circle 1/16 to 1/8" inside the puck circle. Chose your weapon for removing metal. The 90 deg. air drill shown here likes to jump around. The big drill is very steady and gives you a good hanle to put some weight on. The little Dremmel tool is nice for finish work of smooting things out and getting around corners, as you'll want to round and smooth the inside corners to maximize air flow. It does make a huge difference.
Finished port job.
Next. Painting the center section and exhaust housing.
Mike Barnard
B
By opening up the puck hole in the elbow what does this do? Letting the waste out faster?
")
Joey,
Post up some pics when you get the chance.
That's what I've been waiting to see.
Man that's some serious engine porn there[/QUOTE
Boogie Nights baby!!!!!!
Man that's some serious engine porn there
Hard core!