I’ll start this off with a big shout out to TB.com member CharlieF1. He has been a HUGE help both through email and on the phone. I can tell you I would not have been able to do this without his help.
Almost a month ago I started a thread about replacing my front suspension, steering components, rear springs, and doing a front and rear brake job.
It’s taken awhile because I have had to do the work during my days off, the work also competed with time with my wife and kids, preparing for a move across country (Active USN) and life in general. But finally done!!! If I can do this, so can you.
I had noticed that there really wasn’t a definitive thread on how to do this and like many people, pictures on what to do help me feel better about starting something I have never done before. This thread will focus on how to do the front suspension and steering. While I was doing this I tried to take as many pictures as possible. I think I got everything on film, but if I am missing anything, just ask and I can get a shot of it.
**THIS IS A BUDGET BUILD!! NOT A LOT OF FANCY PARTS OR GETTING THINGS POWDER COATED! PLEASE KEEP THAT IN MIND!!!**
Let’s start with some lessons learned. I have done MOST of my automotive work either with “bolt ons” in the engine bay, or equipment in the cabin. Not a lot of work actually under the car beyond changing oil. Soooo..that being said. Holy &^%$ is it filthy under there!!
1) Wear clothes that you don’t mind getting ruined. That will happen. Shoes you can do without as well. 2) GLOVES!!!!!!! I was working on getting my hands clean for 2 weeks after the first few days of work without gloves!! Now I have gloves!!! lol 3) 1/2in drive tools!! I broke THREE 3/8th in extensions because I don’t have 1/2in tools. 4) The spring compressor SUCKS…be prepared for that. Be gentle with it and you won’t die..(that’s a good thing). 5) Install the spring compressor AFTER you have separated the ball joints, I’ll cover why later. 6) If you pay a shop to press in parts, DON’T TRUST THEM!!!! VERIFY everything. 7) MEASURE the new parts! 8) Have a quality jack and stands. I don’t and made it work, but I would have LOVED to have the larger ones. 9) Have a box or something you can put the caliper on. You DON’T want to let it hang unless you are replacing the brake line as well. 10) If it is a castle nut….IT HAS A COTTER PIN!!! This might be hard to find, but it’s there! 11) Sometimes, just walk away and take a break!!
So let’s talk tools. You will need a mix of metric and SAE (because why not! Wouldn’t want to make this simple, right?) and some specialty tools that you can borrow from the Zone. Here’s a list of what I have used.
Jack w/jack stands Spring compressor (Autozone rental, $55) Ball joint separator (pickle fork, Autozone rental, $15) Pitman arm separator (pickle fork with a slightly different width, Autozone rental, $10) 3/8th drive ratchet (recommend using a ½ drive) ¼ drive ratchet Breaker bar 5/8th socket 7/16th wrench 3/4in socket 7/8th socket 11/16th socket 1 1/16th socket 20mm socket 18mm socket 15mm wrench 14mm wrench 14mm socket 13mm wrench 13mm socket 8 mm allen Needle nose pliers Grease gun Flat head screw driver Hammer Penetrating Oil
As far as parts: since this is the ‘How To’ and not the ‘combo’ section I will just say to use whatever you want to. Honestly it makes little difference on what you actually use and the steps I lay out in this thread, with a few exceptions (i.e. going with a front coil over set up). Since this was a budget build for me I had to shop around and get the cheapest I could find parts for.
Here is a break down of what I replaced:
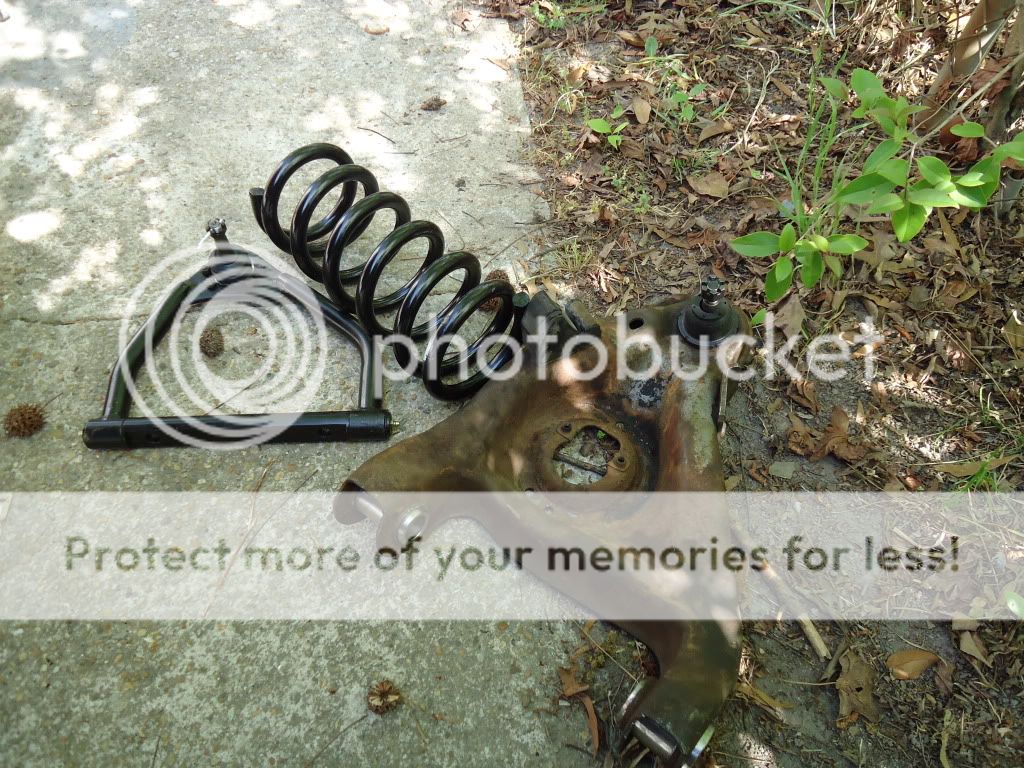
Centerlink Idler Arm Inner Tie Rods Bump Steer kit (vice Outer Tie Rod) Upper Control Arms Bushings for Lower Control Arms Upper Ball Joint Lower Ball Joint Springs all around Front discs Pads
Two terms to know: LCA=lower control arm. UCA=upper control arm
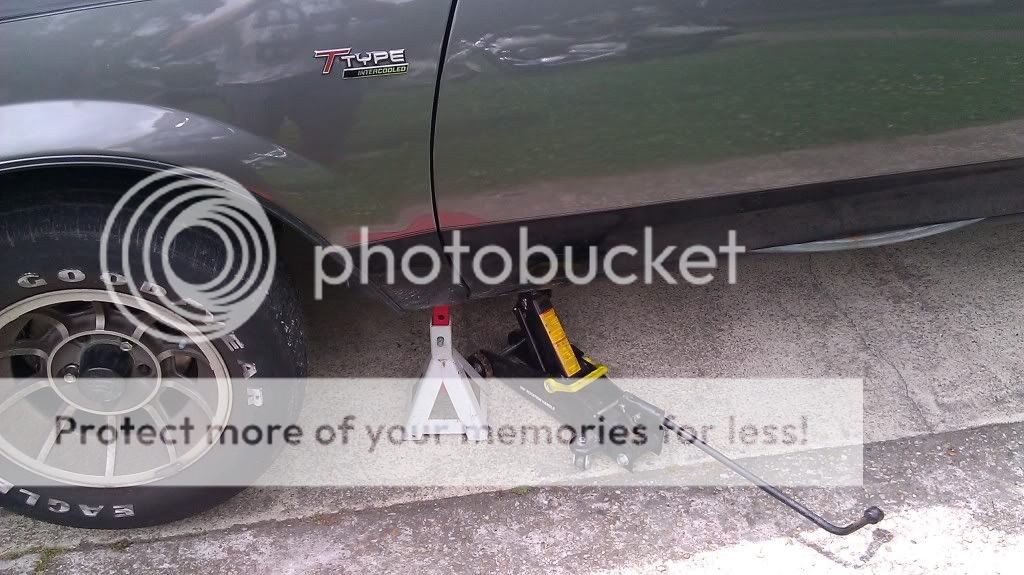
It is best to loosen slightly the lugs BEFORE removing the weight of the car from the tire. This will mean you won’t have to try and hold the tire while loosening the lugs.
Now we jack up the car and place jack stands on the frame. DO NOT leave just the jack to hold up the car. This is not safe, and you will need the jack later
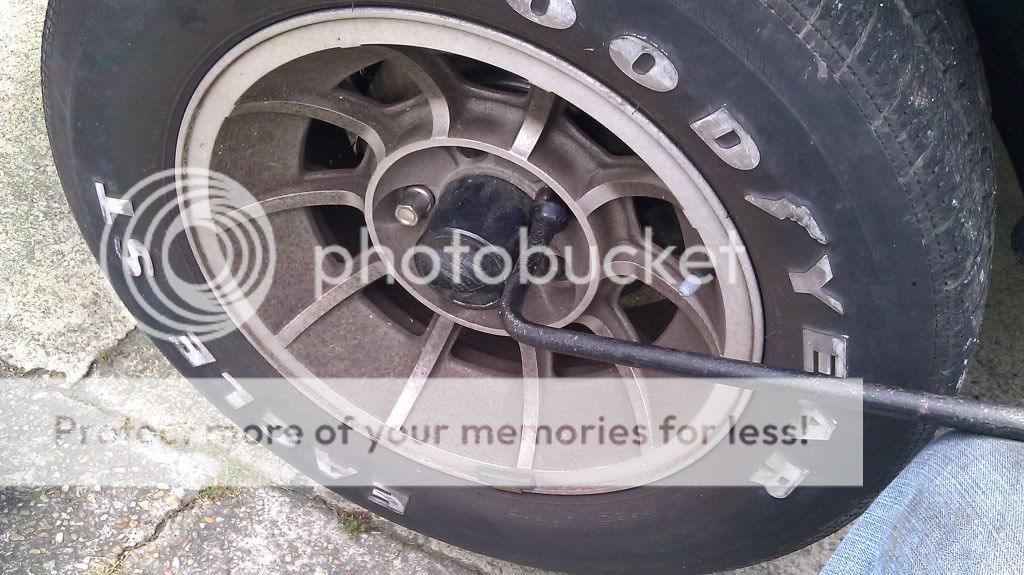
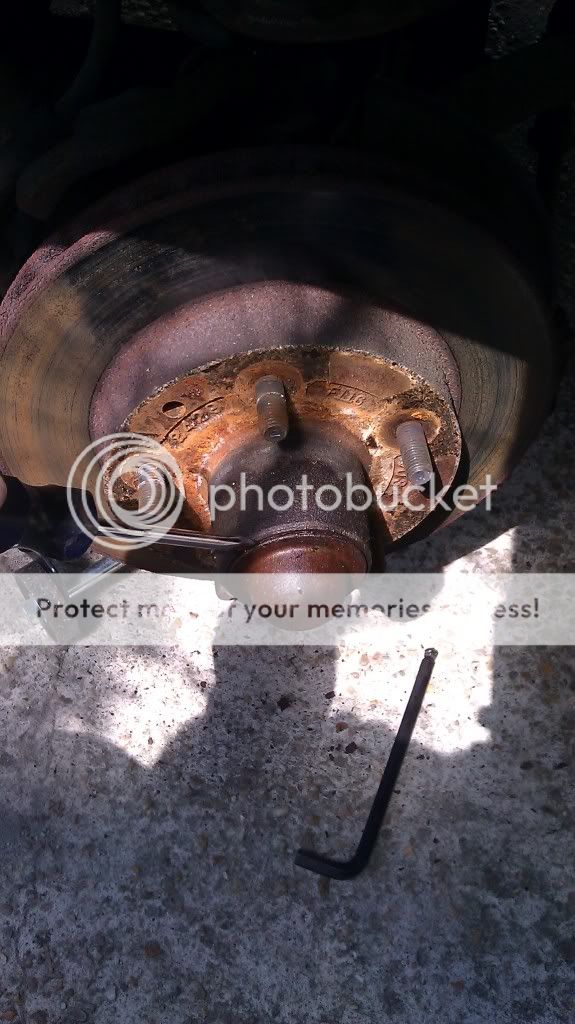
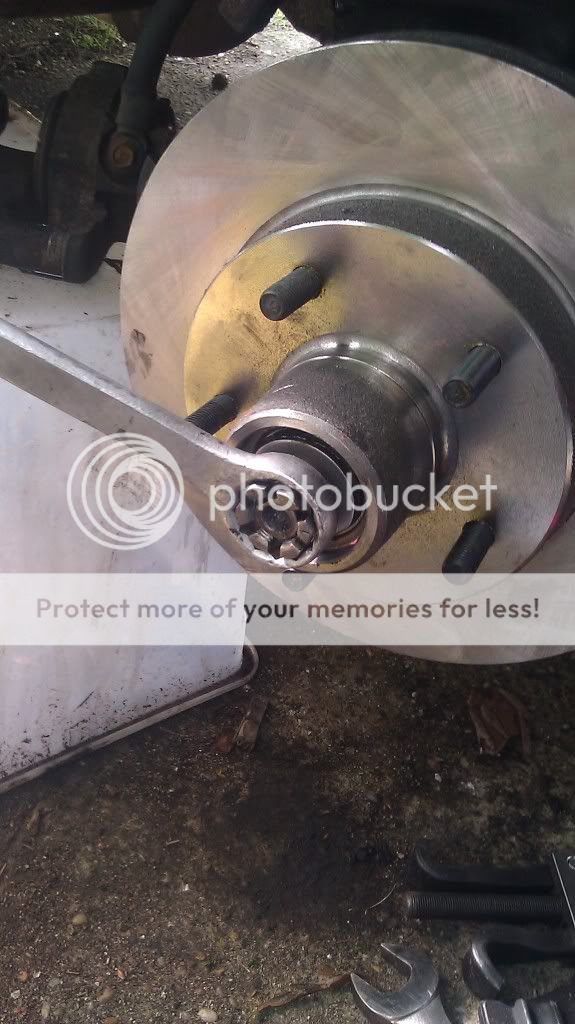
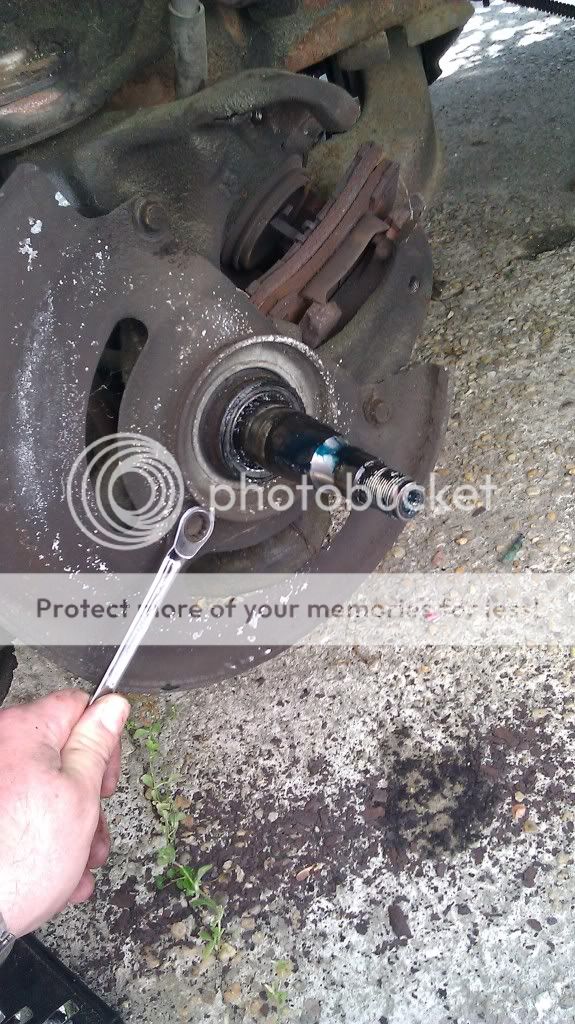
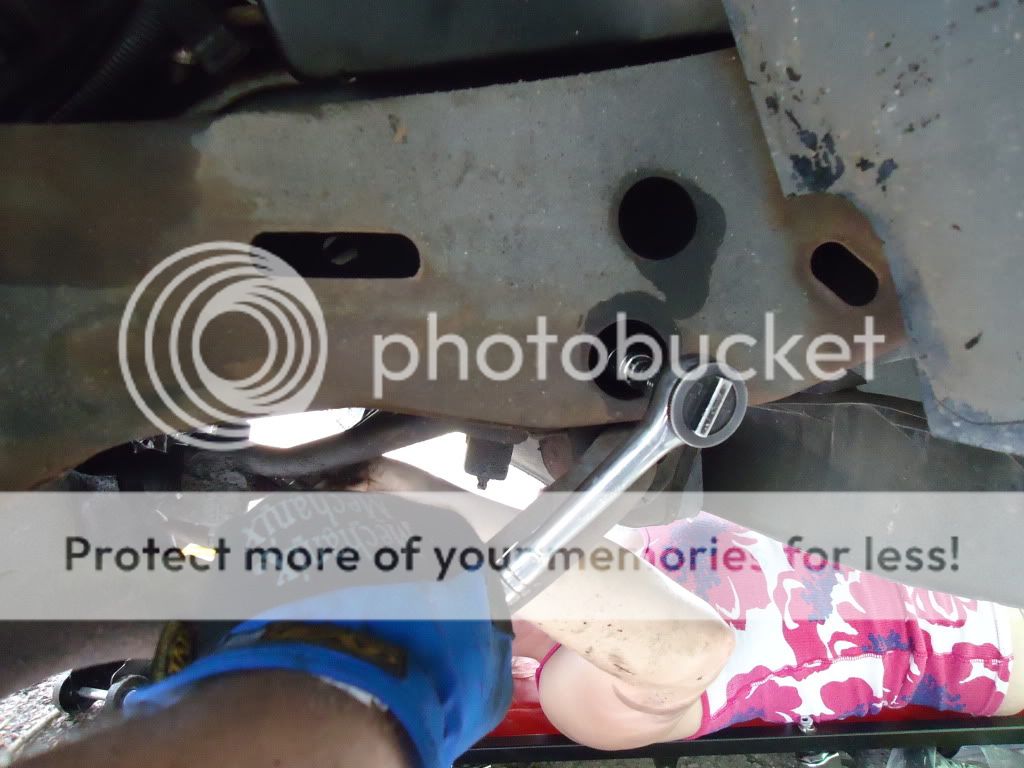
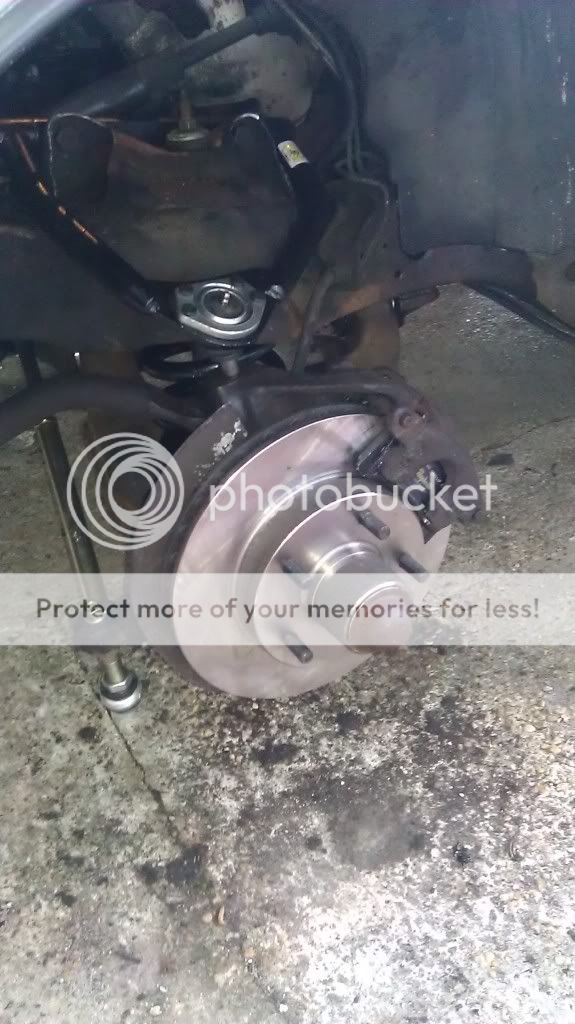
Then take off your tires and use the 8mm allen tool to remove the two allen bolts that hold on the brake caliper. The bolts are on the back of the caliper and have no nuts or anything. The threaded portion they go into is actually the caliper itself. Here’s a pic of the location. (This is the end picture because I forgot to take the during picture, so ignore the new parts!)
Pull the caliper off the disc. Your pads will flop around and you can remove them. I am doing a brake job at the end as well because…well…why not?? Kidding..my brakes suck. We need to either place them on a box or an extra jack, or use mechanics wire and string it up somehow so that they are not hanging by the brake hose. It IS a strong hose, but why take the chance of having it starting to break up just because we didn’t take the time to store them properly?
The discs on these cars WILL NOT just pop off at this point like they will on other cars.
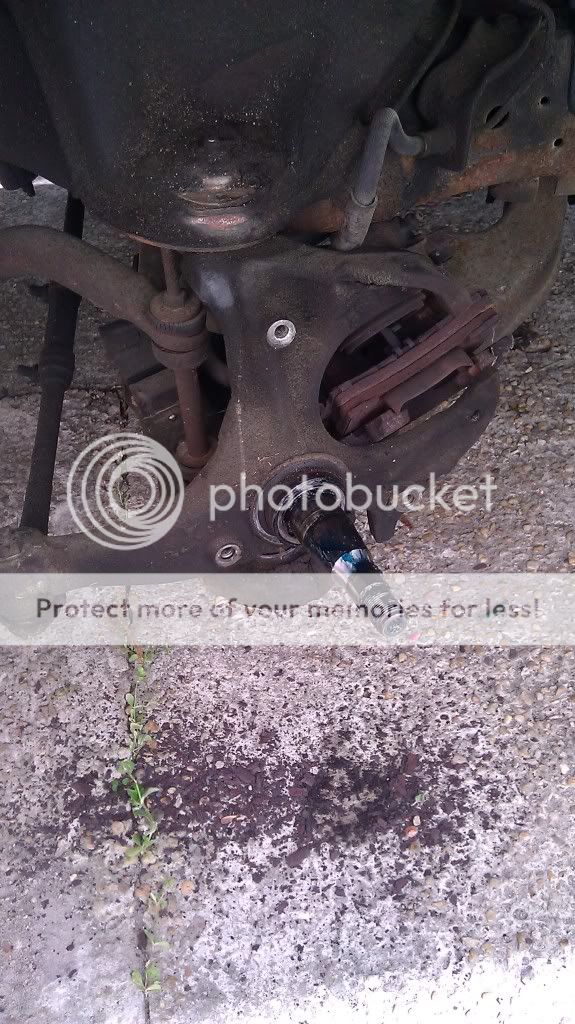
Here is where we should be now.
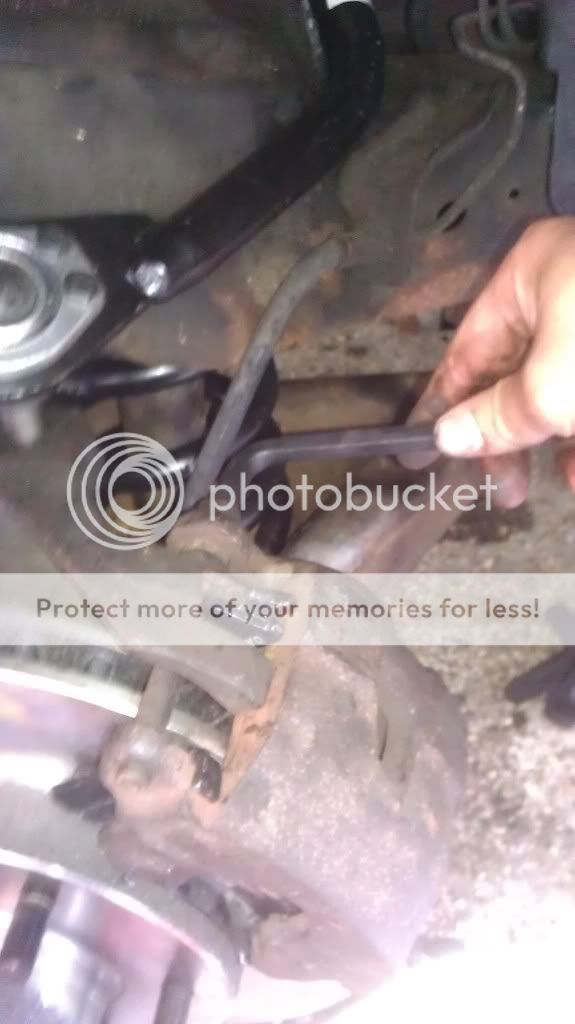
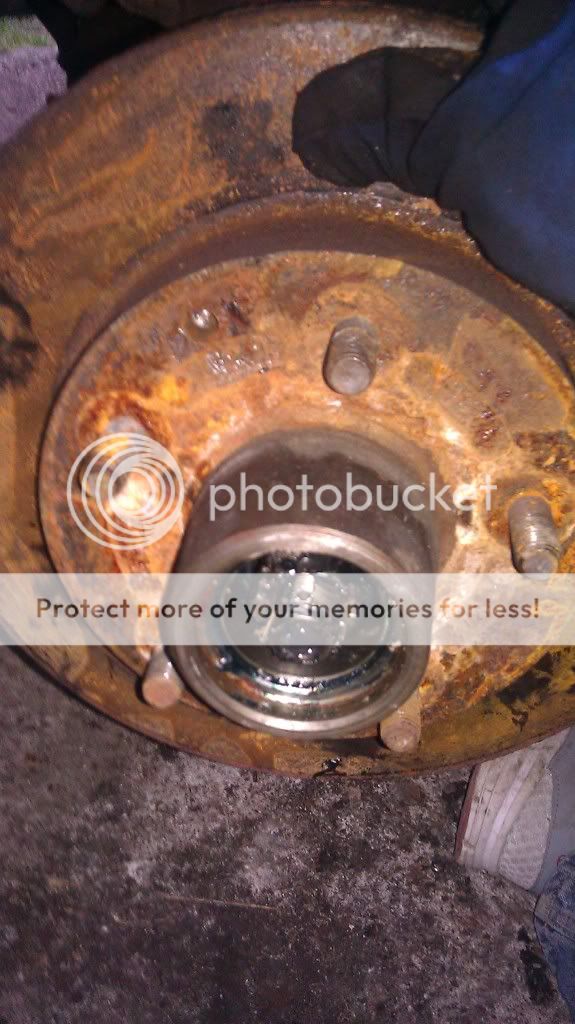
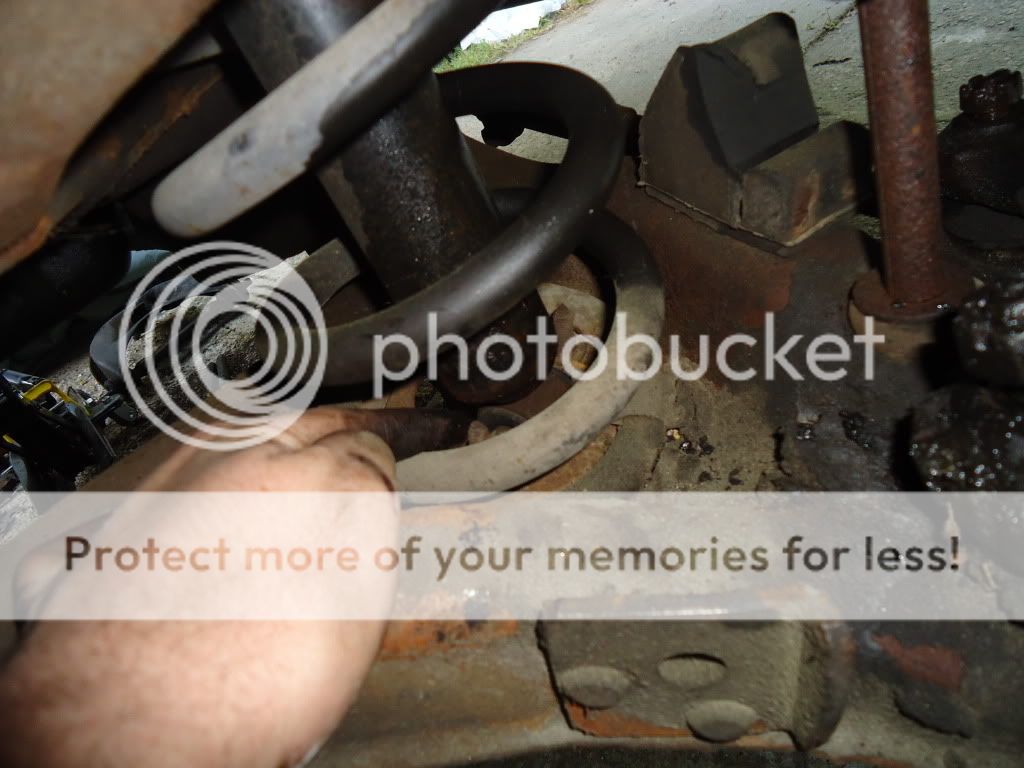
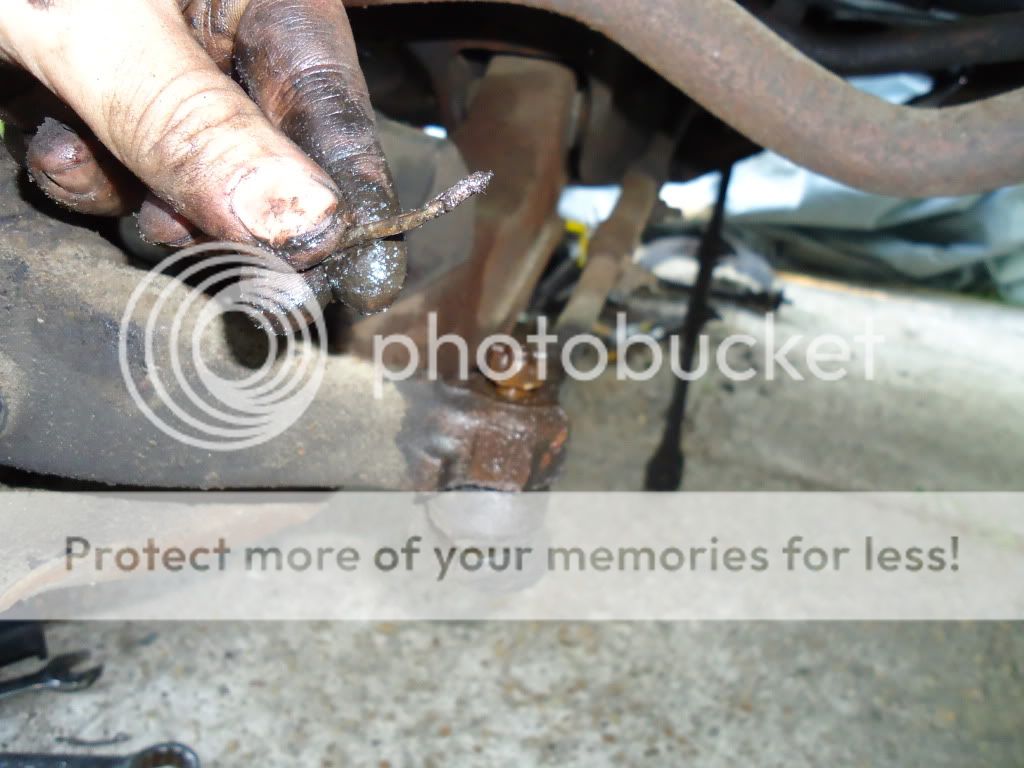
We need to remove the dust cover at the end of them.Using the flat head screwdriver and hammer, gently pry the cap off.
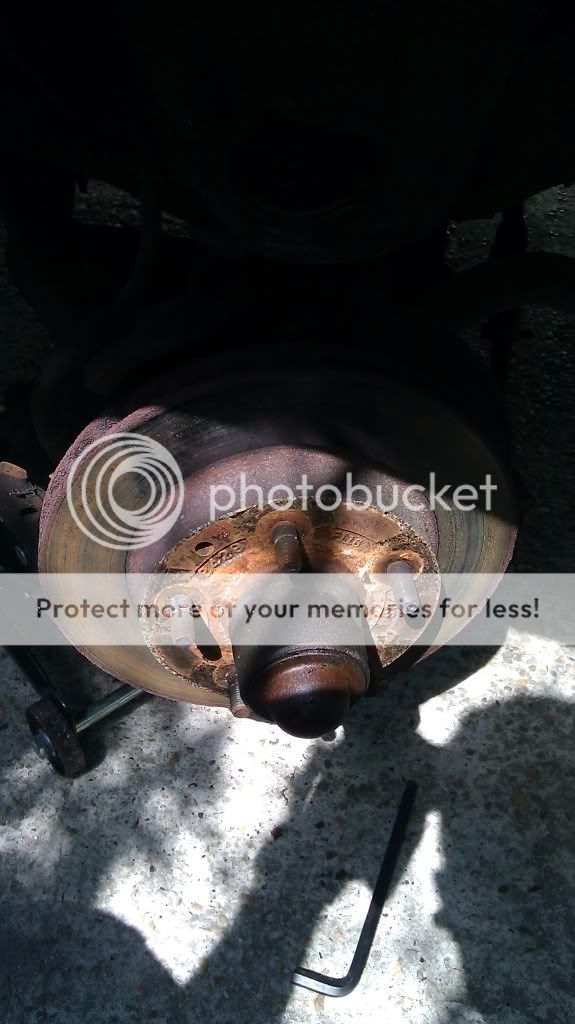
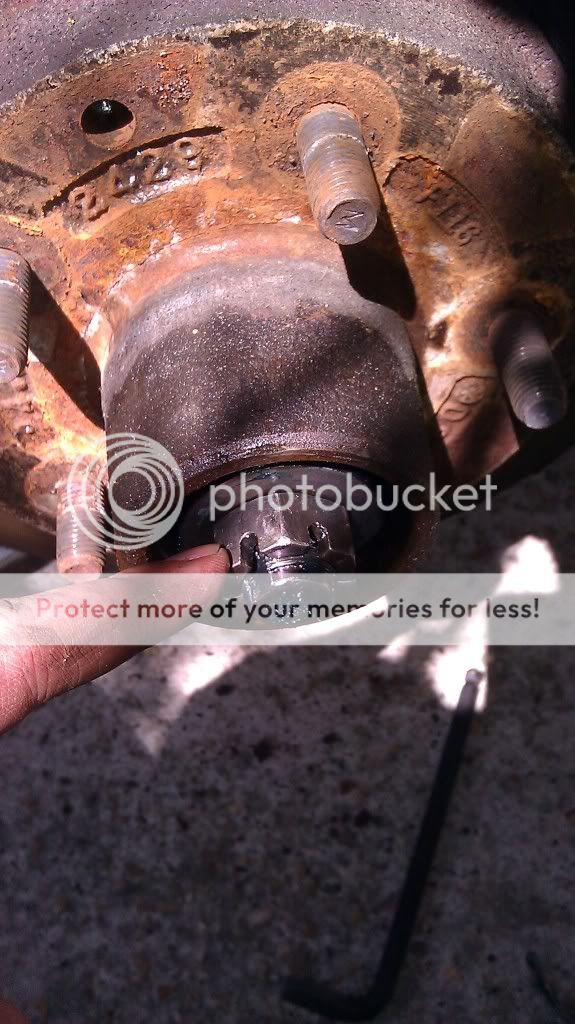
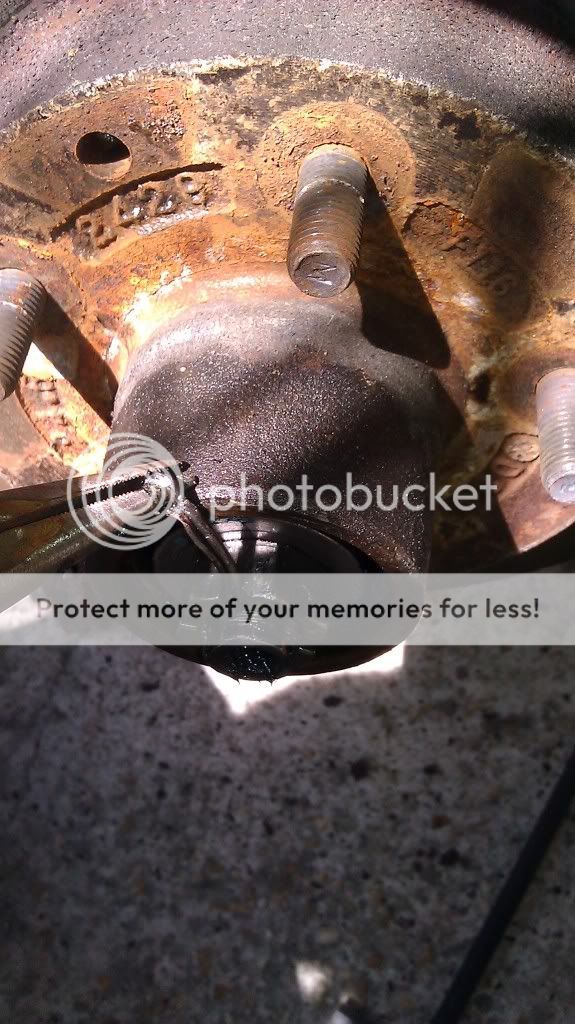
We now have access to the castle nut; this is what is referred to as castle nuts. We will see these throughout the whole rebuild.
It is what is holding the disc on (as well as the outer wheel bearing). Now we start encountering cotter pins, and here it is.
Remove the cotter pin.
Now that the cotter pin is out, using the 1 1/16th wrench, remove the castle nut (forgot to get a pic with the old rotor, so enjoy a pic of the new one again! J )
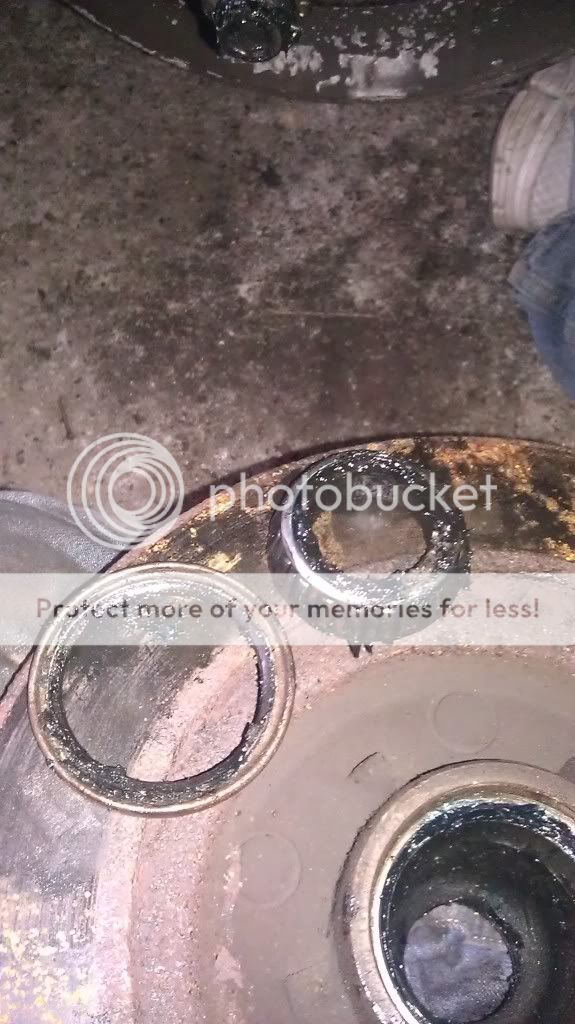
With the castle nut removed, the outer wheel bearing and washer will just fall right out. I forgot to get a pic of this, but they will be obvious.
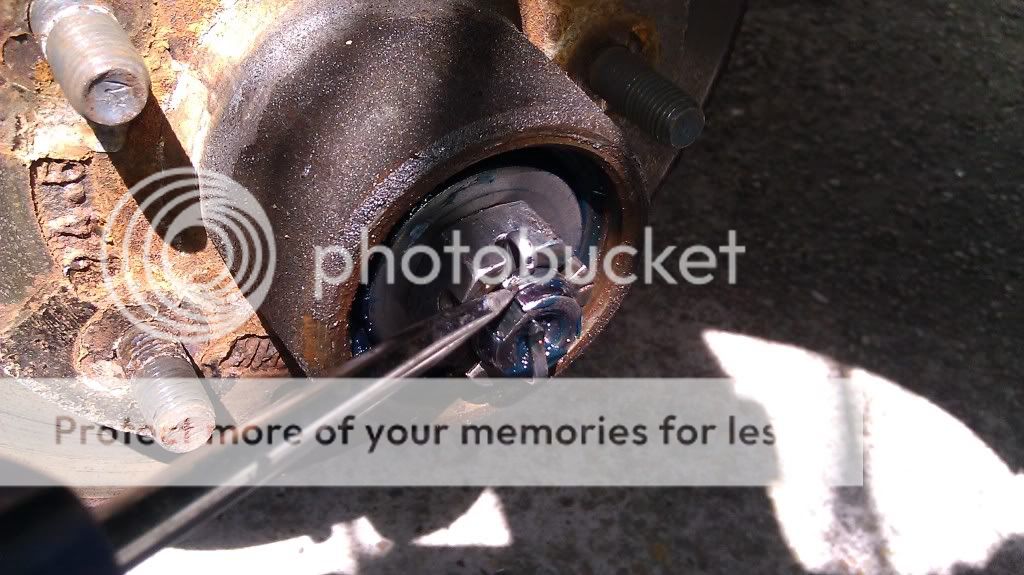
Next we will put the castle nut BACK on, and use it to remove the INNER bearing. Hard to see, but this is a picture with the nut back on.
With it on, tilt the rotor DOWN and pull quickly outwards. This will catch the nut on the lip of the inner wheel bearing and pop it, and the seal, out at the same time. Here is a good video I found on YouTube about it (NOT my video!!)
The castle nut, inner and outer wheel bearings, and the washer will all be reused, so set them aside for later.
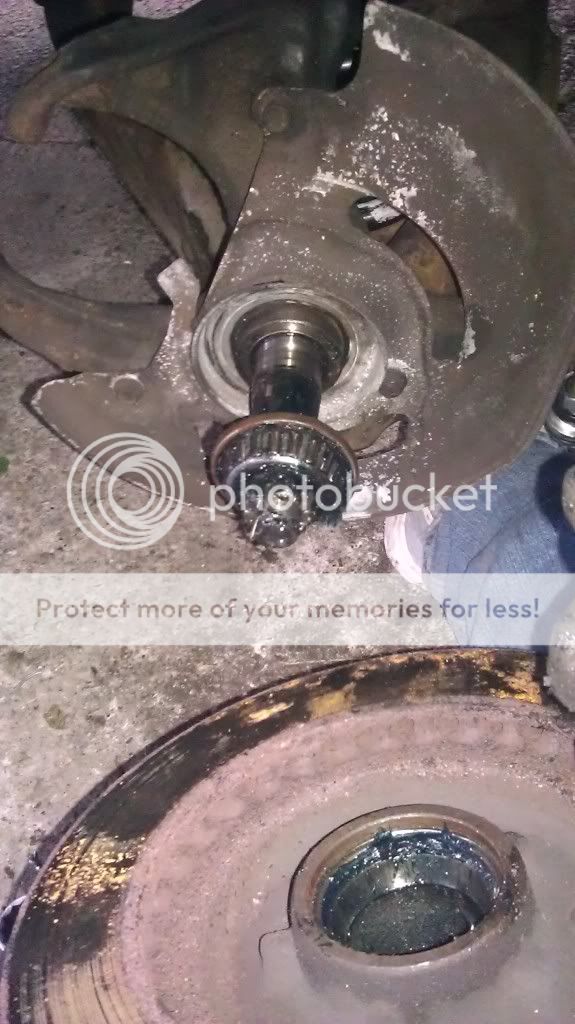
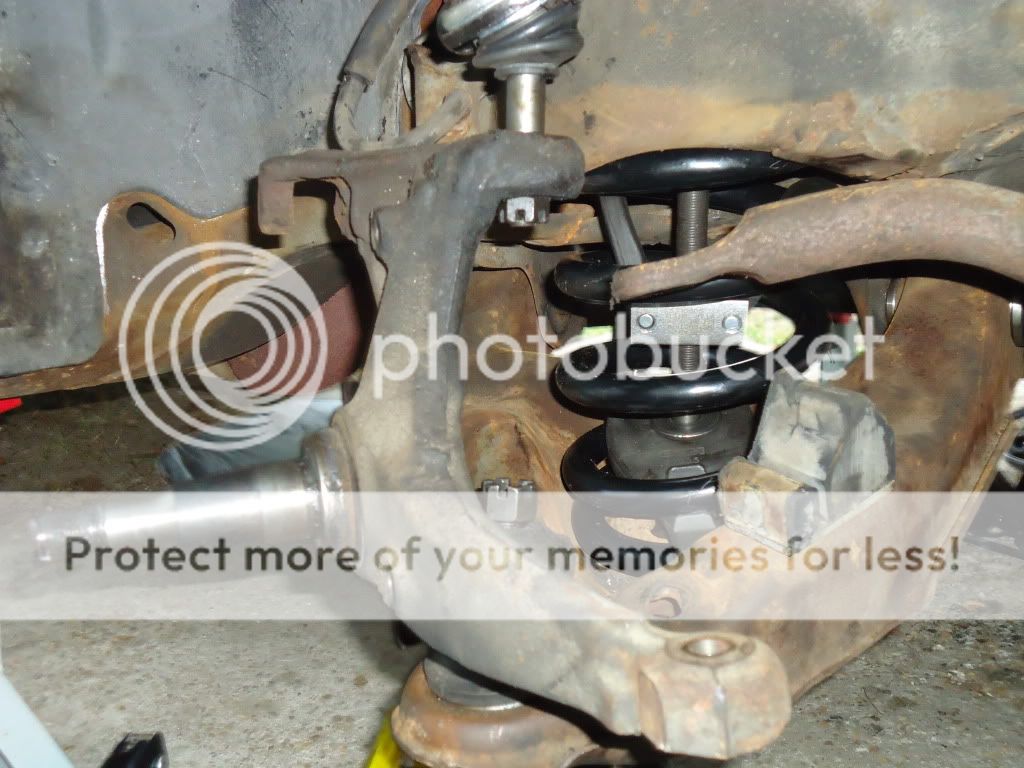
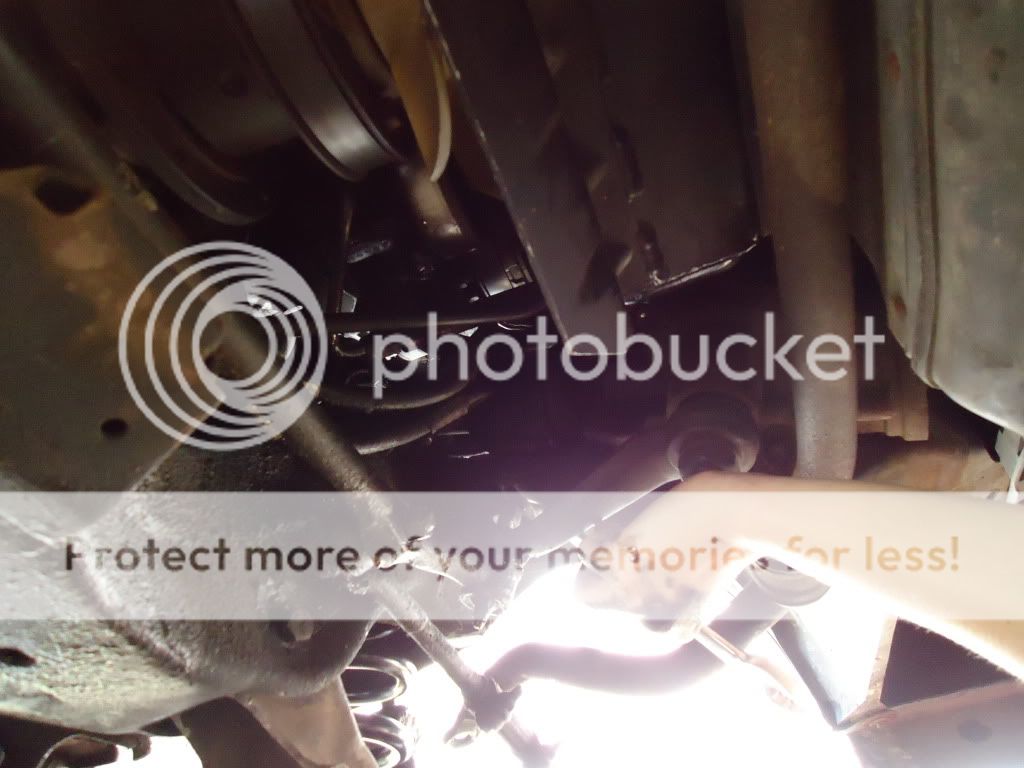
We now have access to the Spindle, sometimes called the Steering Knuckle.
But first, we need to remove the dust protector. This is held on by three bolts that are fairly obvious. Use your 7/16th wrench to remove these.
Set that off to the side as we will be reusing it as well.
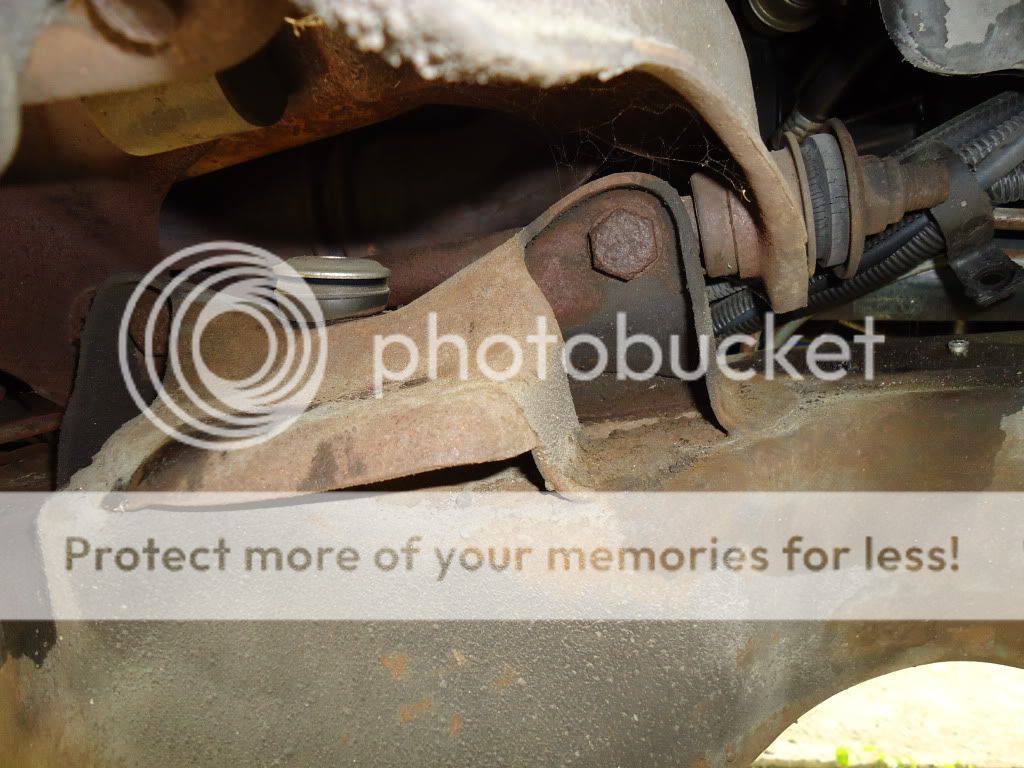
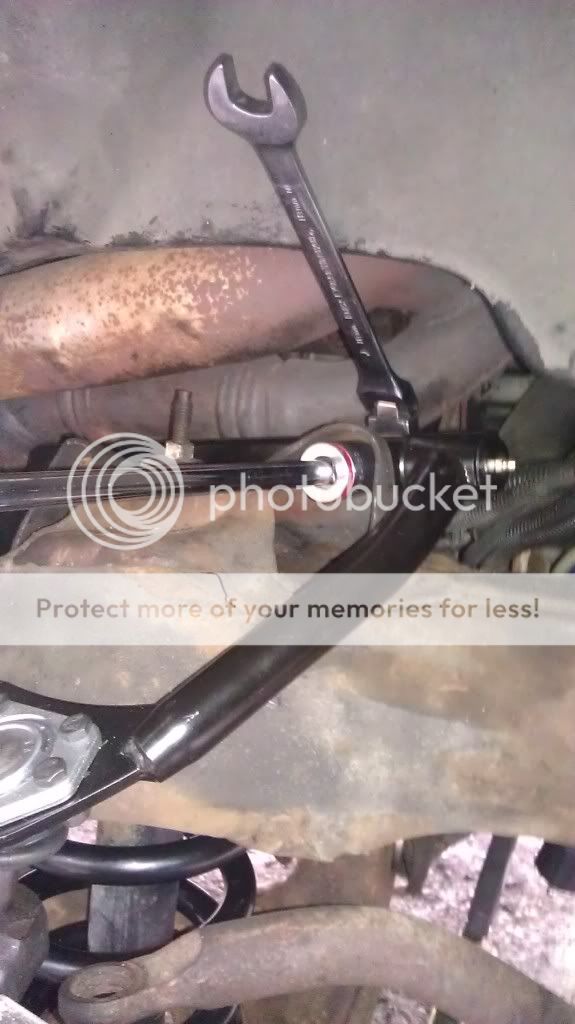
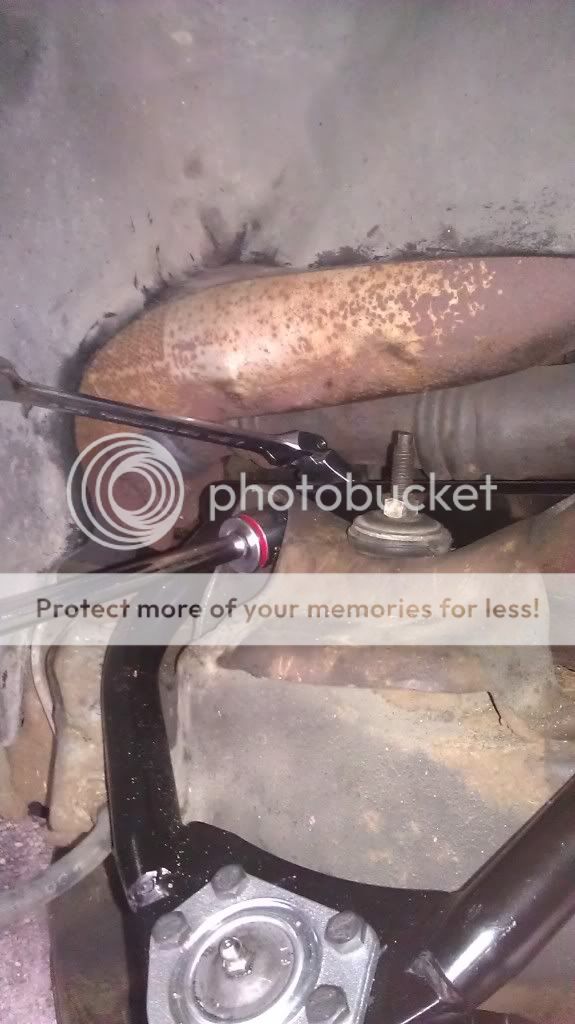
Now we are getting into the nitty gritty of the work. There are two options at this point. You can remove the shock, or you can leave it in to help hold the spring in place when you start loosening the Spindle from the UCA and LCA. I removed the shock. There is one bolt at top going through the frame, use the 15mm wrench to remove this, and two on the bottom going through the LCA which need a 13mm socket to remove. Remove these and the shock will slide right out the bottom. You may have to twist the shock to allow it to come out, but it won’t be an issue.
This is a pic of the upper bolt on the Passenger side, so the downpipe makes it tight.
Lower bolts
Don’t worry about getting a wrench on the nuts, they are clips that hold onto the LCA, so they won’t move. Here is a pic so you can see what I mean.
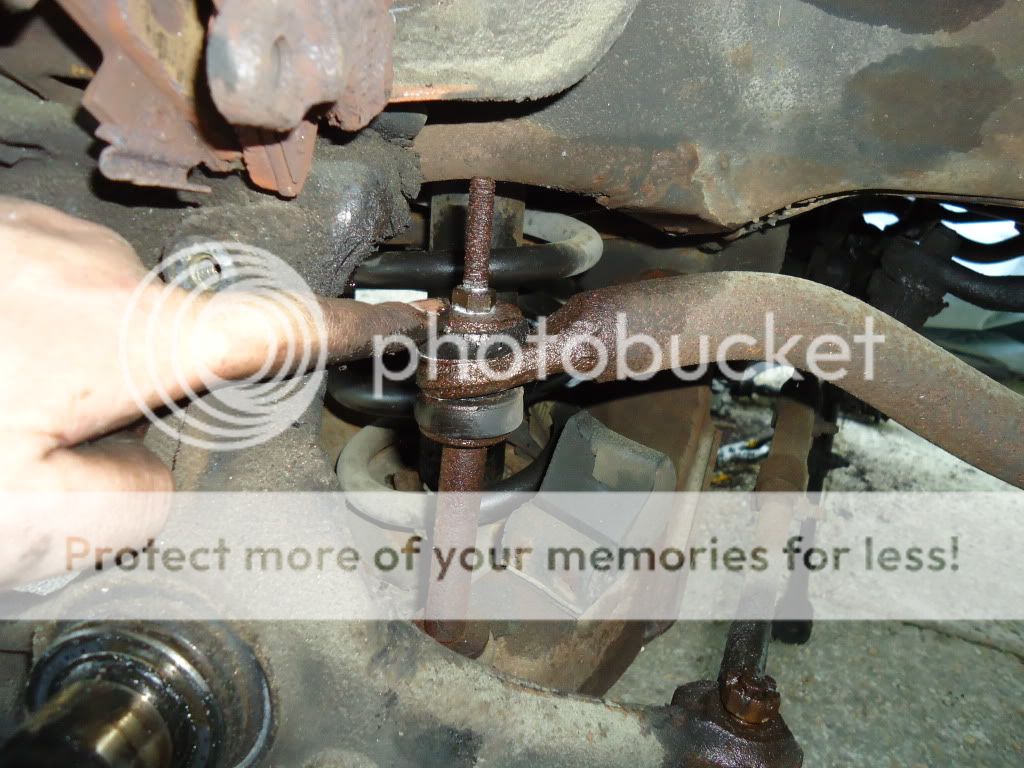
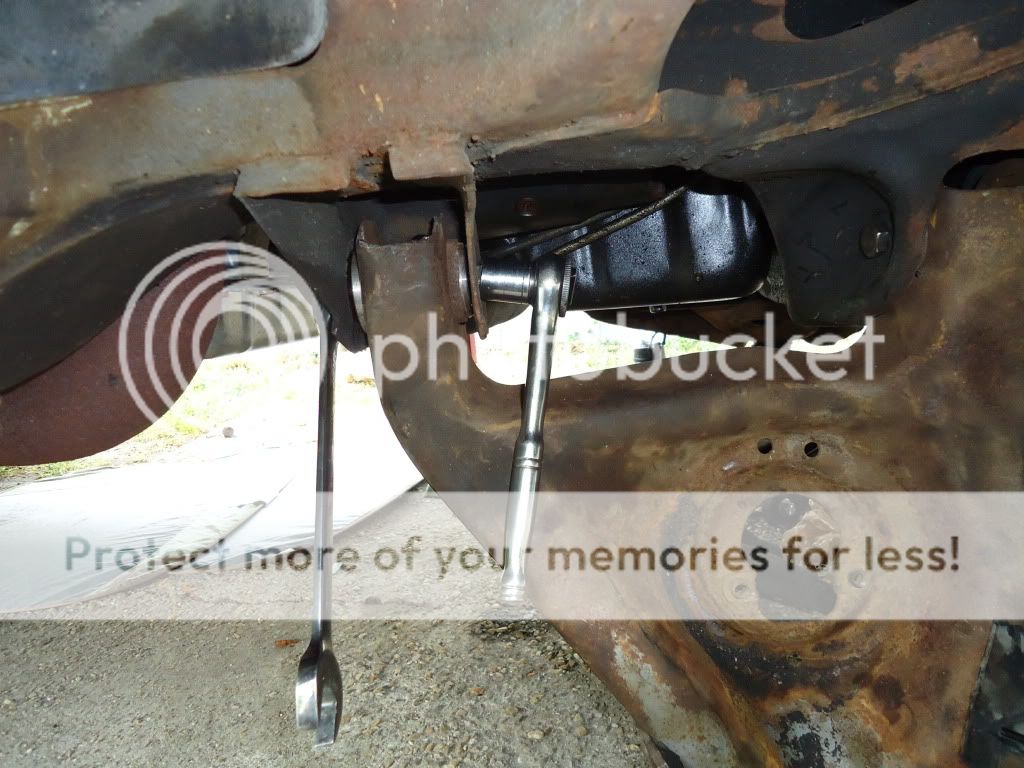
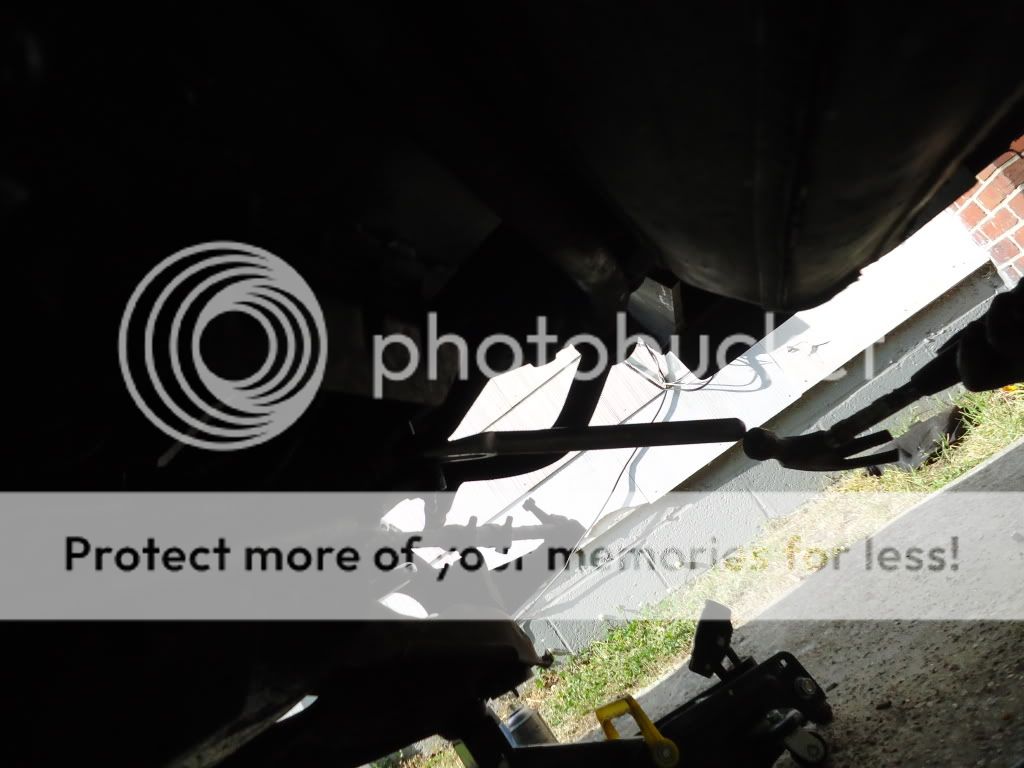
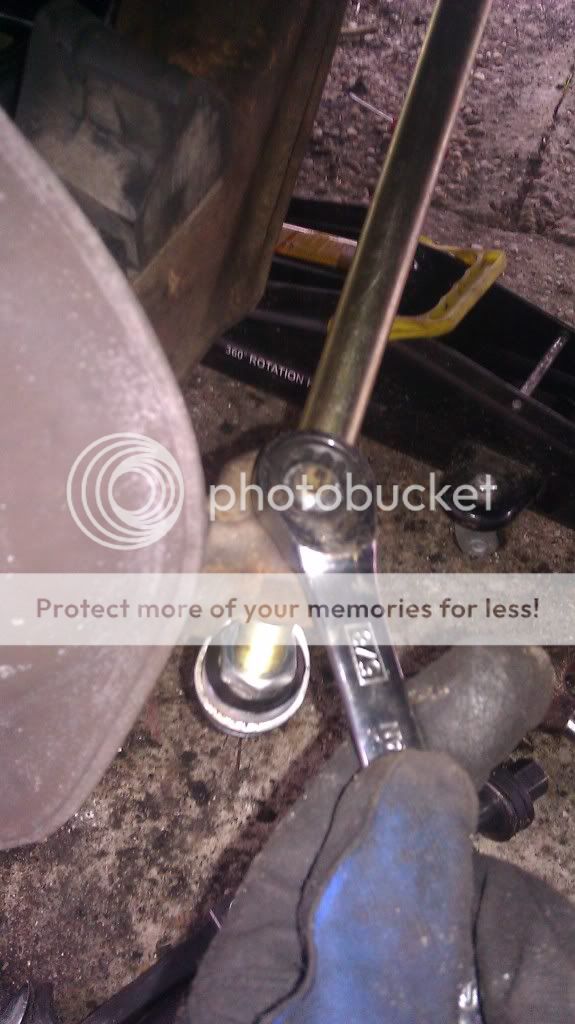
Now we need to remove the sway bar linkage. This is a long a$$ bolt that goes from the underside of the LCA to the sway bar. Depending on how long it has been since yours has been removed, THIS WILL MOST LIKELY BREAK!!! I hit mine with some penetrating oil a day before and it still broke. But we can try. So place a wrench on the top nut, socket wrench on the bottom, and break! I mean…remove…the nut.
Here is the top of the linkage
Use your 13mm socket on the nut at top while holding the bolt head on the underside of the LCA with another 13mm socket. Sorry, forgot to get this picture. If you check it out, it will be obvious.
Even after soaking in oil for 48 hours and after hitting it again right before I tried, this STILL broke. I will be replacing it.
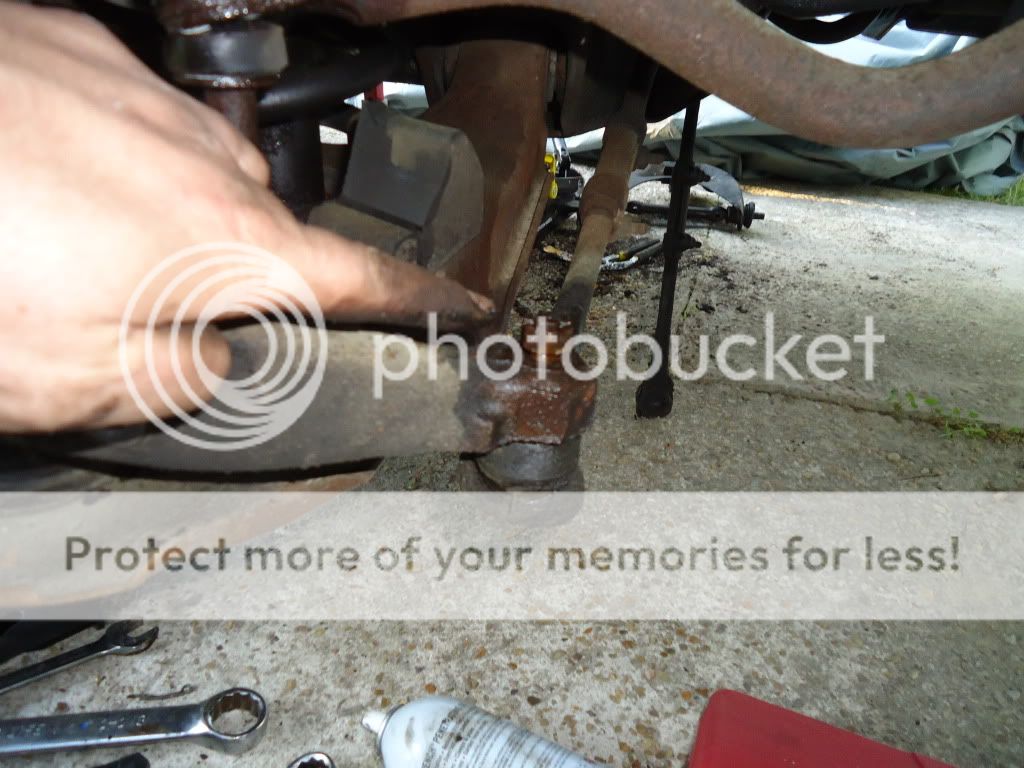
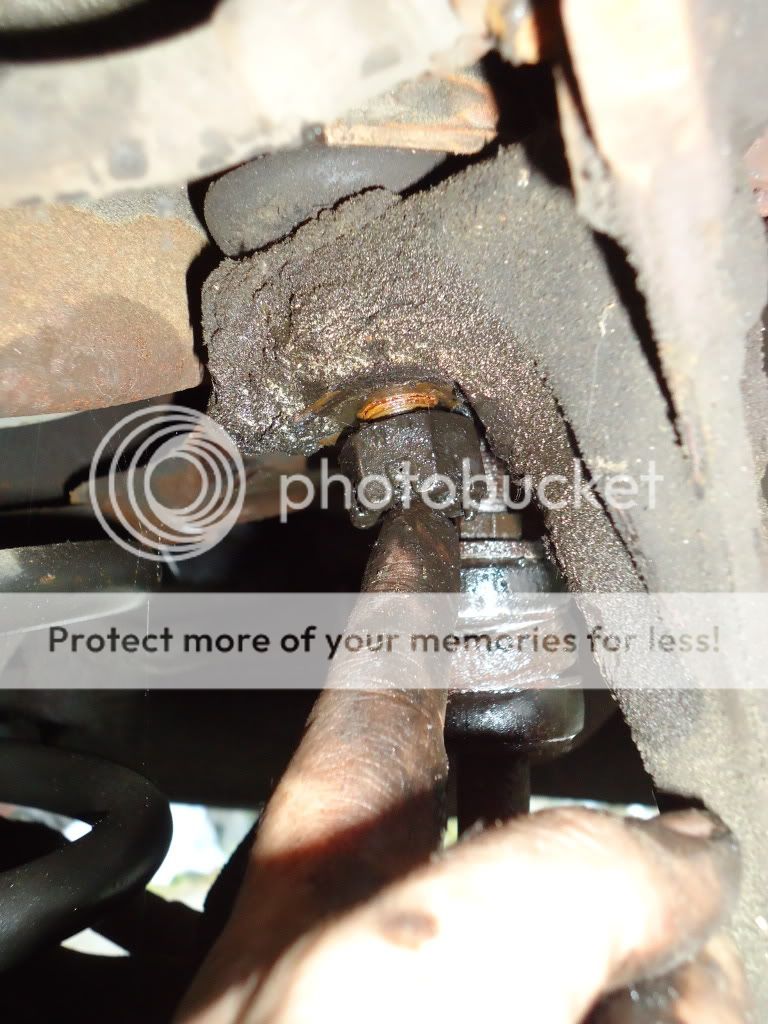
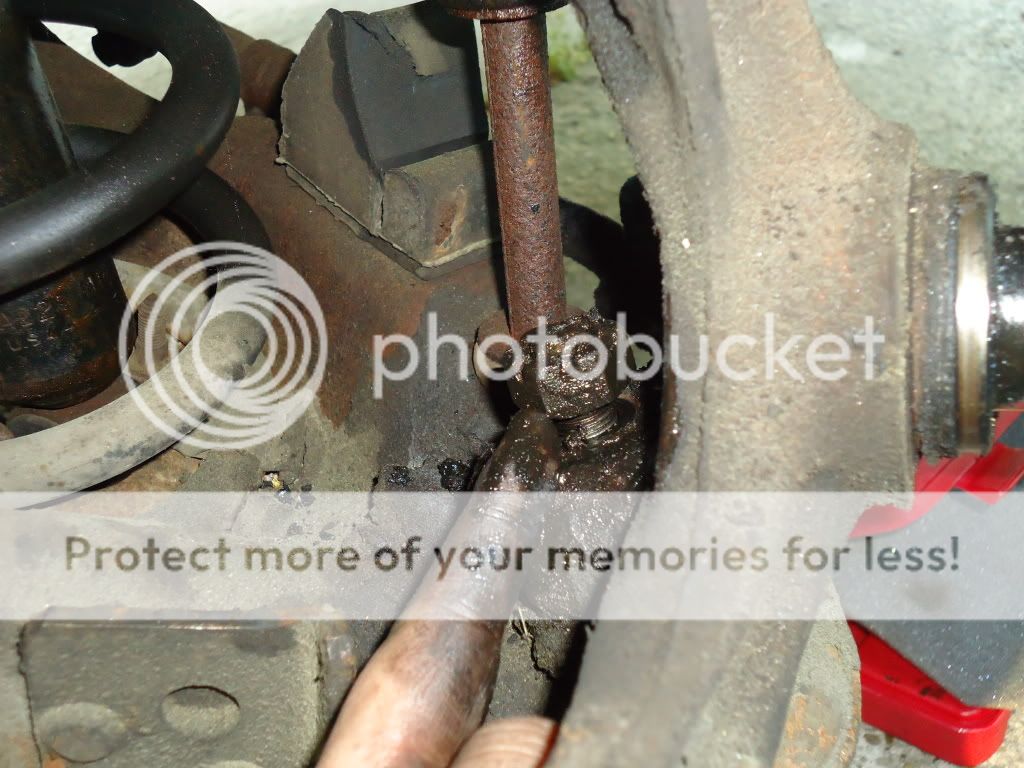
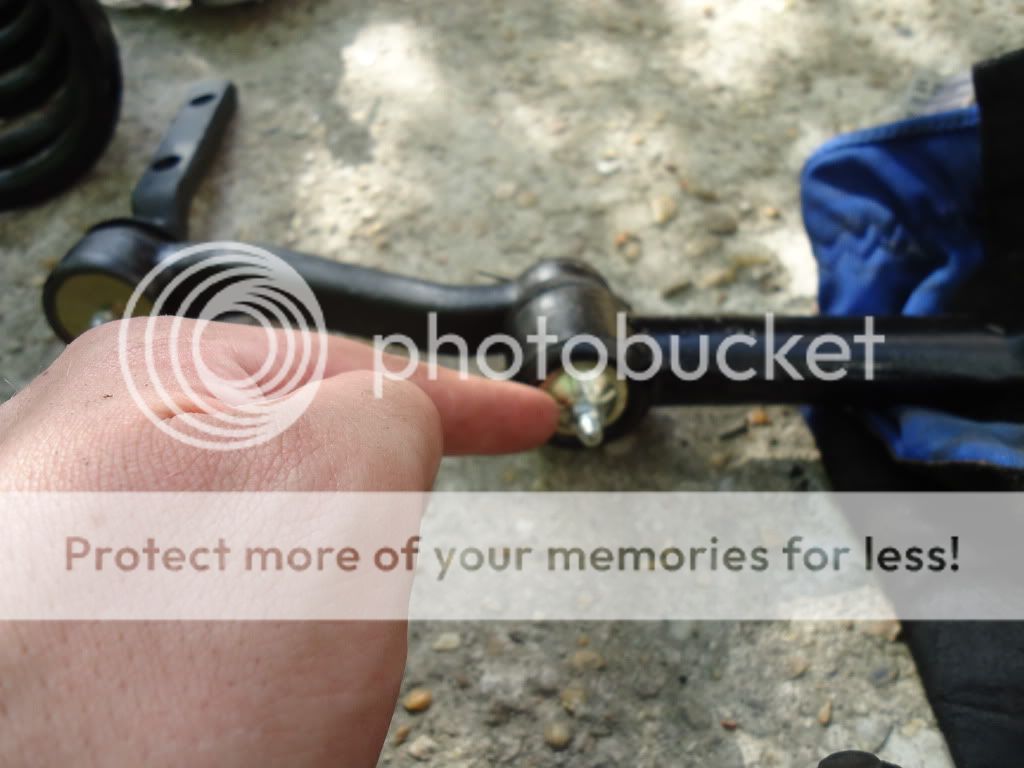
Next we remove the outer tie rod from where it bolts to the LCA.
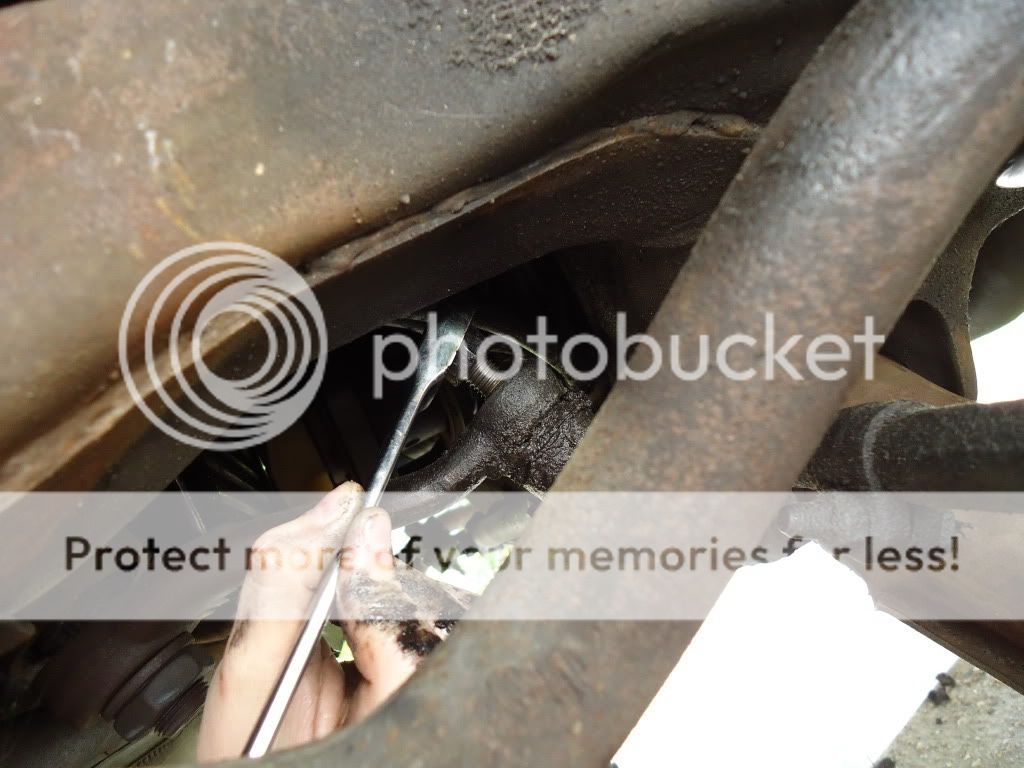
Let’s take out the cotter pin
Undo the bolt using an 11/16th wrench, and then remove it from the LCA. You can get a Tie Rod separator tool (just another pickle fork) or you can do what I did. I just hit the stud with a hammer. I did this because I am replacing the outer tie rod anyways, so I don’t care about the threads on it.
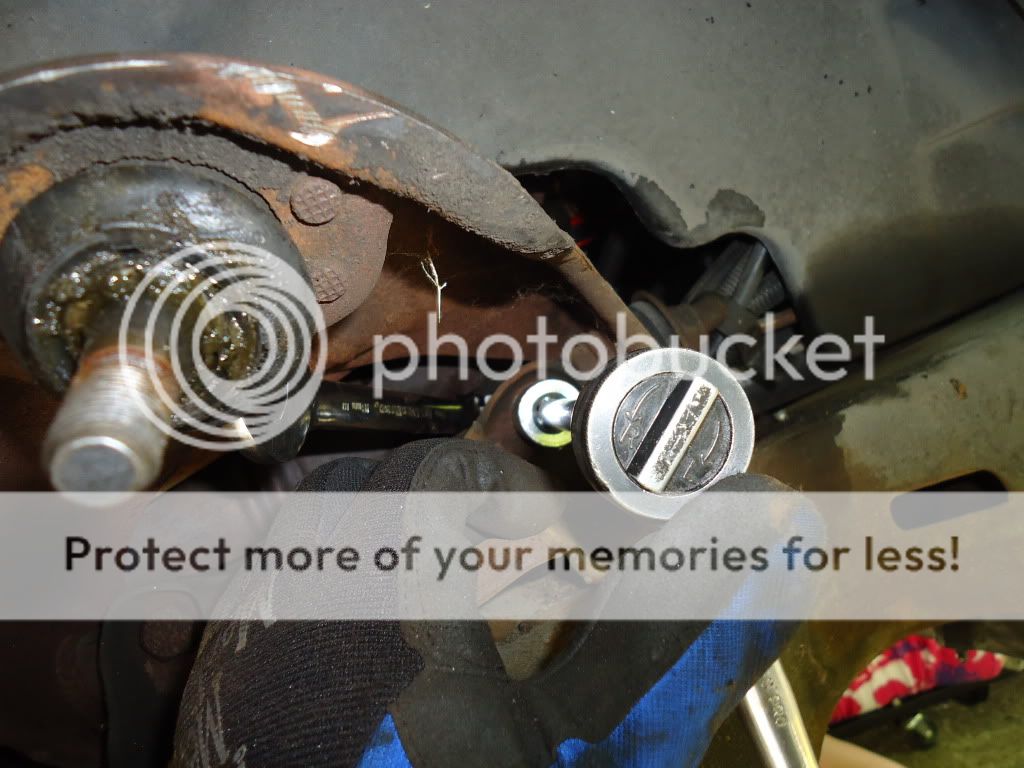
What we are going to do next is to LOOSEN the nuts for the upper and lower control arms. We are NOT going to take them completely off. This way, when we separate the ball joints from the spindle, the nuts will catch the lower arm from flying down and letting the spring pop out (bad).
So, time to take out the cotter pins for the castle nuts that hold the upper and lower ball joints on, and then to loosen the nuts.
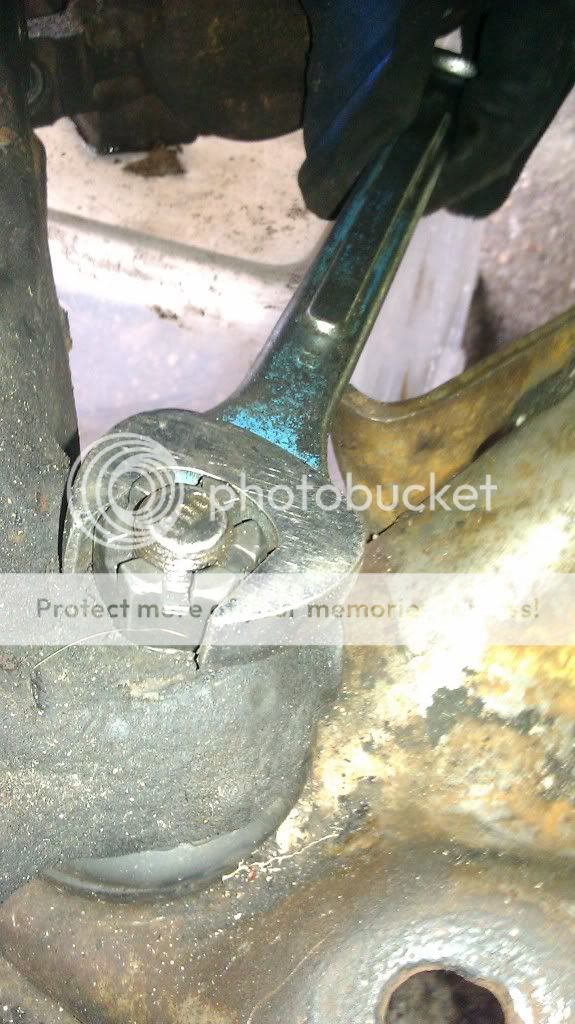
Here is the upper ball joint nut. Use a 3/4in socket to loosen (already loosened in the pic).
And here is the lower ball joint nut. Use the 7/8th socket to loosen this as well (also already done in the pic)
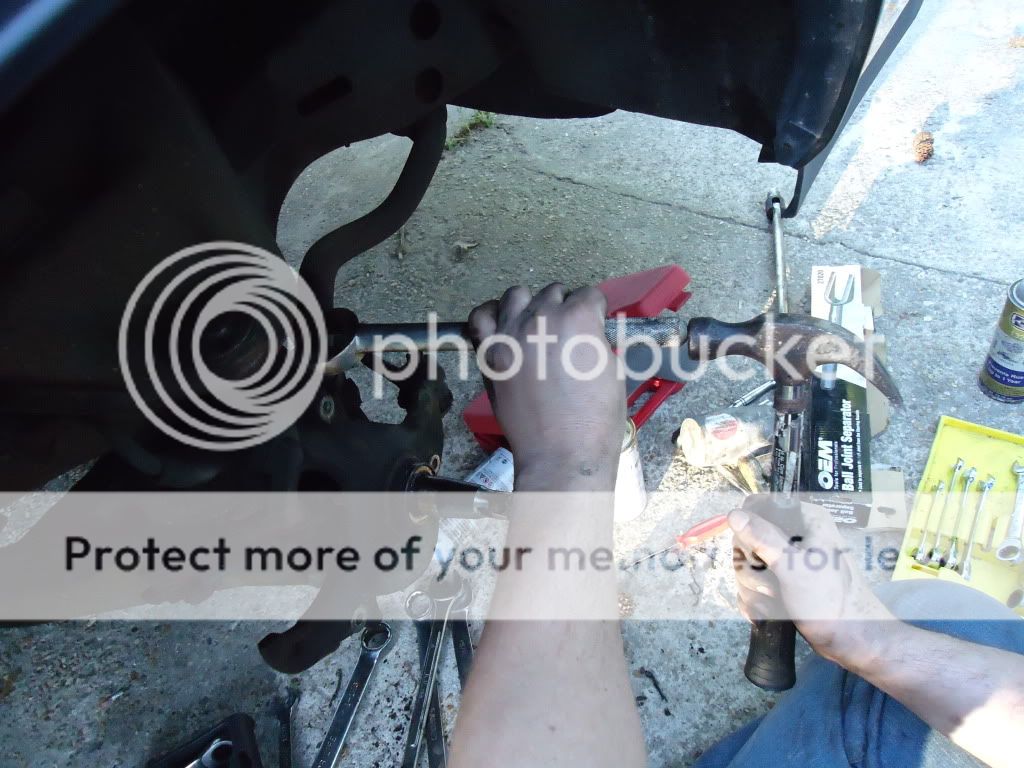
Now that they are loose, there are two ways to loosen the ball joints from the spindle. If you are NOT replacing the ball joints, turn the steering wheel until you can get easy access to the SIDE of the spindle. You will see a flat spot on the spindle right where the ball joint goes through. Give this spot a heck of a whack with a 3lbs mini-sledge a few times and the ball joint will pop out.
If you ARE going to replace the ball joints (like I did) we can use the ball joint separator. This goes in-between the TOP (or bottom, depending on which ball joint) of the spindle and the ball joint. Get the edge of the tool in, and then hit it with a hammer…a lot. And hard. You will be able to tell when it is free of the spindle because it will THUNK and drop down. Use this on both upper and lower ball joints.
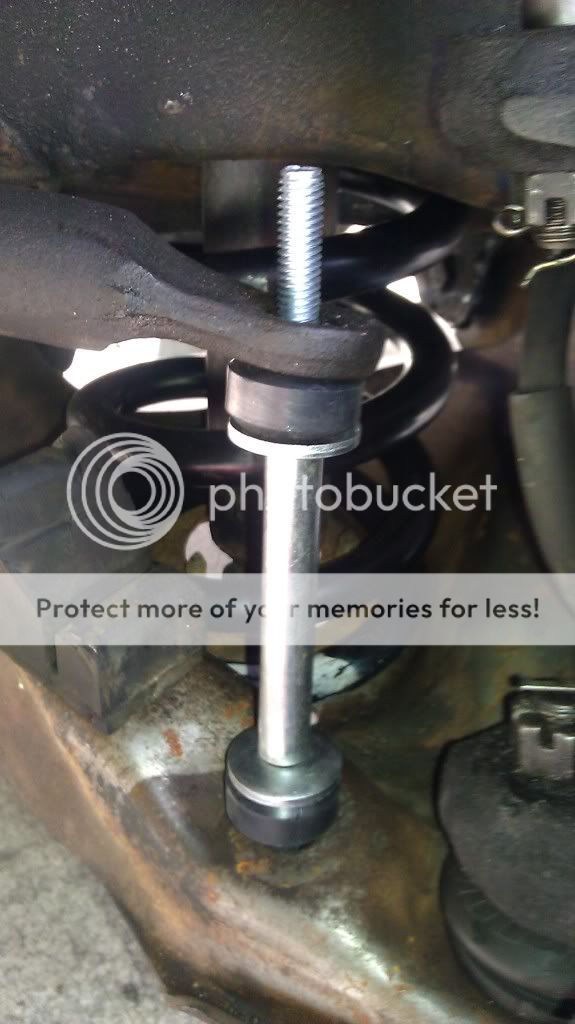
Now that the spindle is loose, but still being held on by the nuts, we will use the spring compressor. The reason I want you to put this in NOW and not BEFORE using the ball joint separator is because IF you put it in before when the ball joint separates from the Spindle and shifts downward, the sudden change in pressure on the spring, coupled with the abrupt movement, can cause the compressor to shift within the spring (remember, it sucks) and cause tension to be released from the compressor and cause a lot of noise (at best) and possibly push the arms farther than you want and possibly let the spring fly (at worst) (if the nuts aren’t on there well enough). So by putting it in AFTER, you don’t have to worry about that.
I forgot to get a pic of putting it the compressor in to take out the spring, but here is one with the compressor in to put the new spring in. So just pretend that the spring is all dirty, and that is what it would have looked like going in the old spring!!
Well, when I first started doing this job there was a really good two part video on how to use a Autozone spring compressor and I saved it. But it appears that the person that posted it deleted it. So the way to use this is simple. It has a threaded rod with two hooks on top that are different lengths. They are different so that they can grip the spring as it swivels down. Then it has a fork piece that slides in the bottom. The end of the threaded rod has a hex head on it to be used by a socket and three washers. Put the rod with the hooks up into the spring and position it to where each hook has a good grip on the spring. Then put the fork through the bottom of the spring above the end of the threaded rod. Tighten the hex until you can get the spring compressed. Part of what makes this tool suck is that the fork that goes on the bottom has grooves to catch the spring coils in. These would be GREAT if they were actually spaced to where they could actually do what they are there for….but at least on our cars, they don’t. So it can shift.
**There is another way to get the spring out WITHOUT using the compressor. You can place the jack under the LCA, remove the nuts holding the ball joints onto the Spindle and take off the spindle, then lower the jack SLOWLY. Your spring will expand and try and push the jack down FAST…so be careful. Once the arm is at the lowest position possible (which depends on how far off the ground you can get it) you can either just remove the spring, or work it out if there is some tension left. I would do it that way if I were to do this again only because of the surprise when the compressor allows everything to move!**
Here is a decent vid on how to do it with a floor jack though. NOT MY VIDEO!! This works great if you can get the car up high enough to let the LCA go low enough as they do in the video. I could not. You can also see them using the ball joint separator.
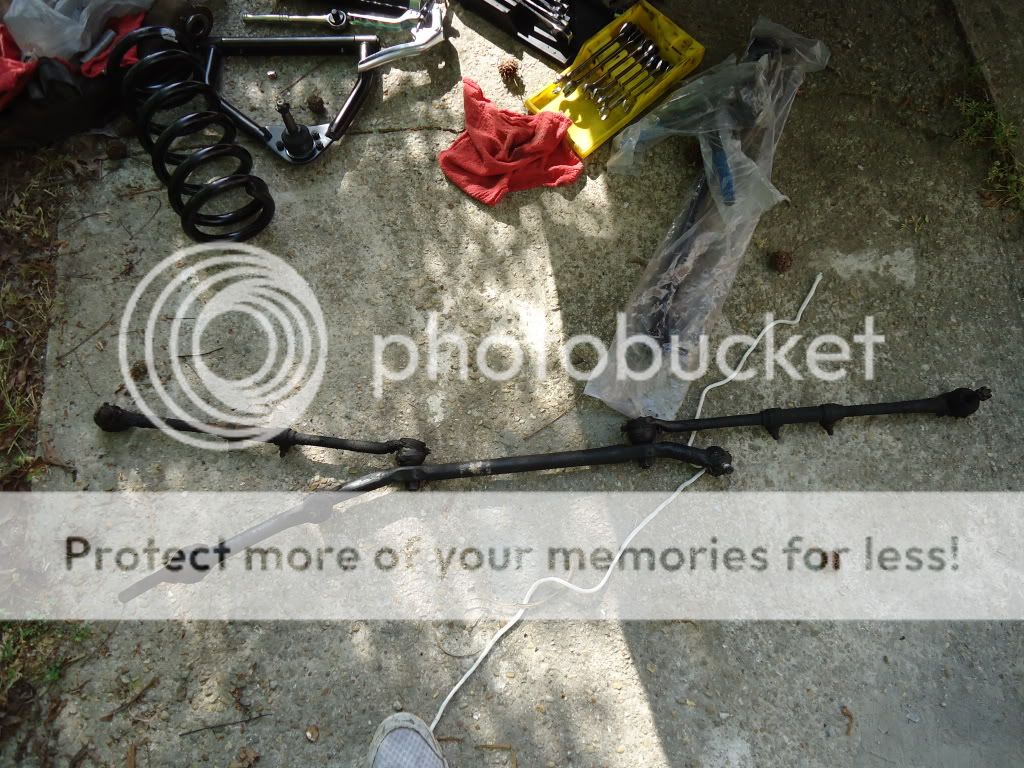
Now that the old spring is out, let’s remove the LCA’s.
Using the 18mm socket and wrench, there are two bolts holding the lower arm on. Remove these and that’s it. Arm is off!
Second bolt is just aft (or forward, depending on which one you took off first) of it.
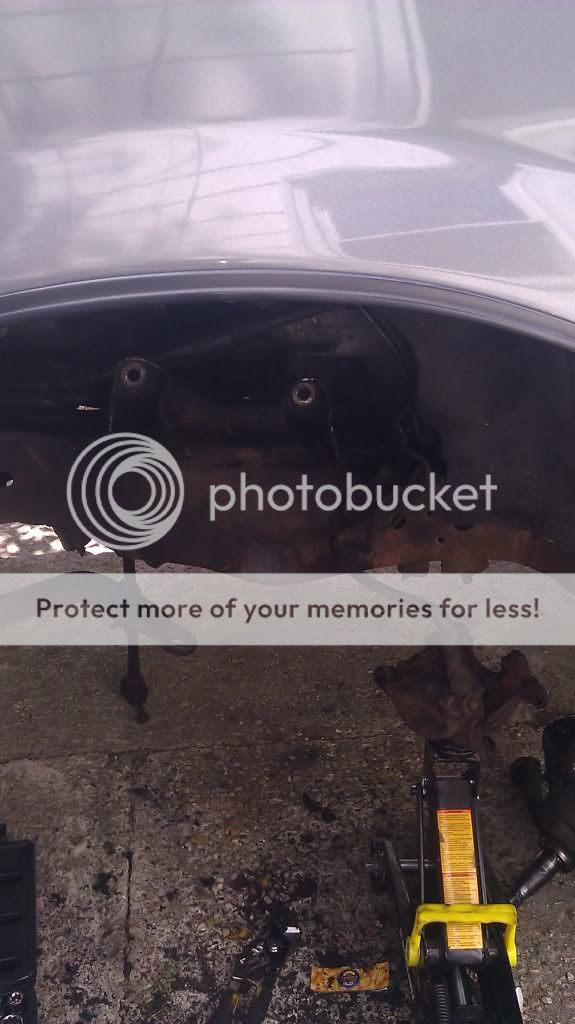
Next we go after the UCA
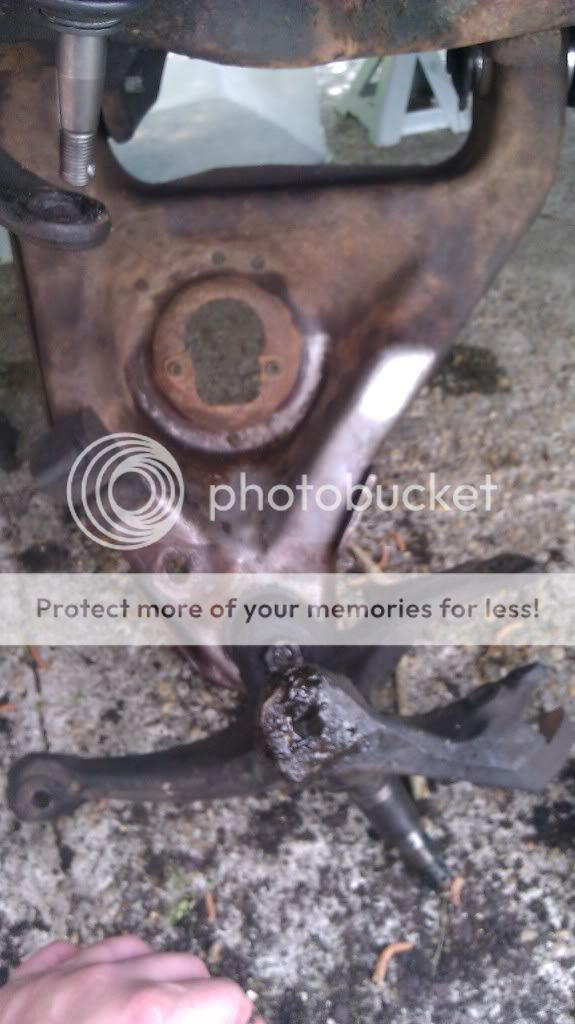
The upper arm is only held on by two bolts as well. You have to lift the UCA to get to these and it has to stay up in order to loosen them. I recommend placing a large wrench or something to prop it up. The nuts you see on the SIDES of the UCA ARE NOT the ones holding it on! Leave them alone!! (i.e. don’t waste your time on……them like I did)
Here it is lifted so you can see them.
The nuts are in the rear and are not the easiest thing to get to.
**THESE NUTS ARE SPLINED WHICH IS SUPPOSED TO LET THE BOLT BE REMOVED WITHOUT SPINNING OFF THE NUT. THE NUT SHOULD BE WHACKED OUT FROM BEHIND. MINE WOULD NOT DO SO, WHICH I ASSUME MEANS THAT IT HAD BEEN REMOVED BEFORE AND THE PREVIOUS PERSON SPUN THE NUT OFF. IF YOU SPIN IT OFF LIKE I DO, ALL YOU ARE DOING IS MAKING IT MORE DIFFICULT FOR THE SHOP TO ALIGN THE CAR. NOT IMPOSSIBLE, THEY WILL JUST BE ANNOYED!!**
I placed an 18mm wrench on the back nut and jammed it against the frame so that it would not turn, then used a 20mm socket with a breaker bar (at first, then to a ratchet) on the bolt head. This is where I broke my extensions because the bolt was on there so tight. So it would be good if you had ½ extensions and drivers here. In this picture you can see my wrench on the back because I also have an 18mm wrench with a hinge on it.
**THERE ARE ALIGNMENT SHIMS ON THE BACKSIDE WHERE YOU CAN’T SEE!! BETWEEN THE NUT AND THE METAL OF THE ARM!! IF YOU WANT TO RETURN YOUR ALIGNMENT TO CLOSE TO WHAT IT WAS BEFORE, MAKE A NOTE OF WHERE THE SHIMS WERE BEFORE YOU REMOVE THEM. IF YOU ARE JUST GOING TO HAVE THE CAR TOWED TO A SHOP AND LET THEM DO EVERYTHING, KEEP THE SHIMS STILL FOR THE SHOP TO USE TO YOU DON’T GET CHARGED IF THEY HAVE TO USE MORE THAN THE NORMAL AMOUNT!! (THAT’S WHAT I’M DOING)**
Here is what happens when using too small of tools for these nuts
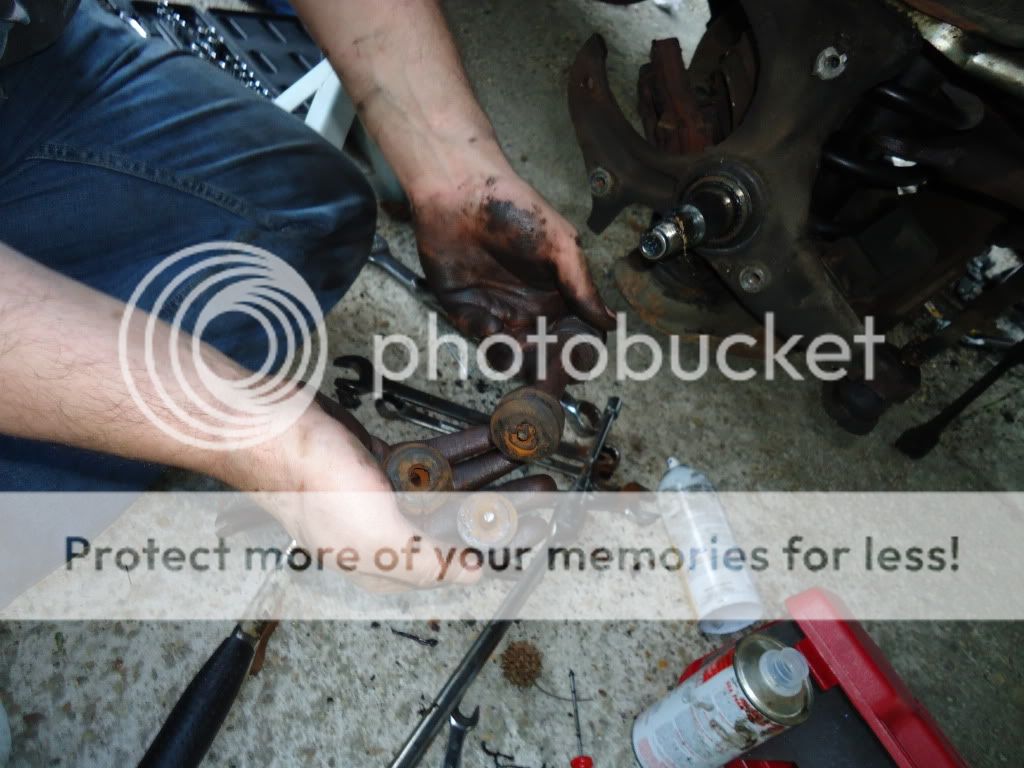
Now we need to get new ball joints and new bushings for the LCA’s. I ATTEMPTED to use the ball joint press that is rentable from the Zone, but it was not big enough to work on these so I ended up paying a shop to press new ball joints and new bushings into the LCA’s. The other option is to find someone selling good used arms and have the new parts pressed in before you even start. That way you get the old ones off, put the new ones on, and then sell your old ones to someone who is going to do the same thing.
Here is an example of why you shouldn’t trust the shop. I was in a hurry when I picked up the parts and didn’t notice what was wrong
In the above pic, compare the LCA to yours. That’s right…that ball joint is UPSIDE DOWN!!They ALSO pressed in the new bushings to where I could not even get to the grease fittings…I am using steel bushings!! I’m GOING to need to grease them!!
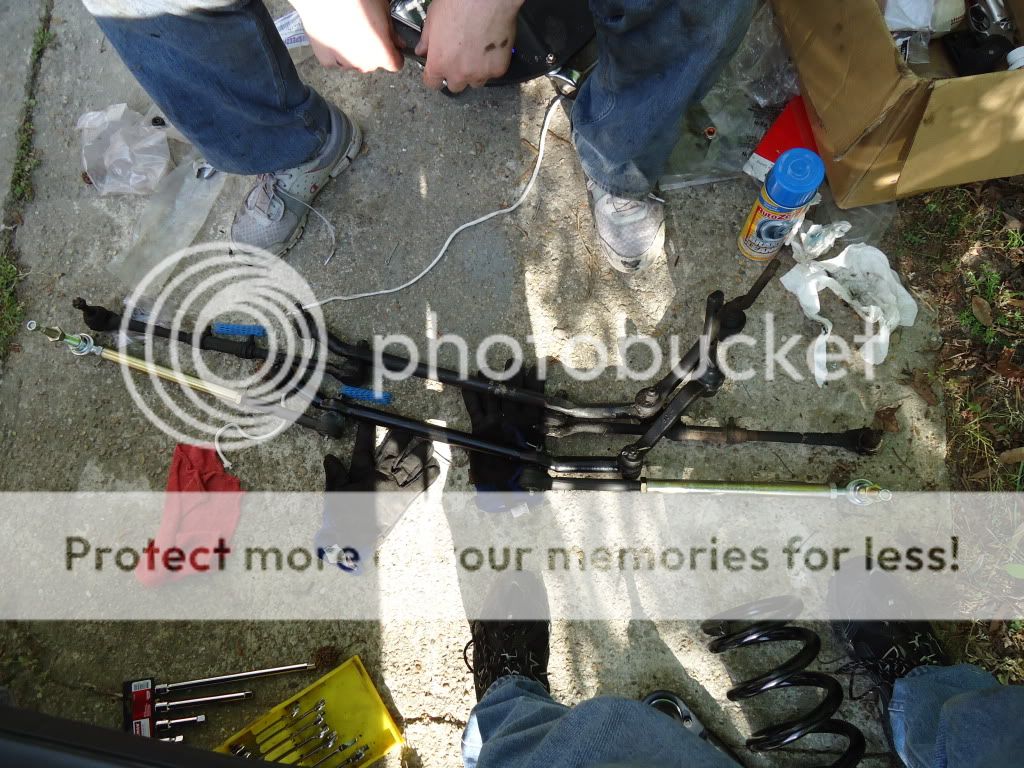
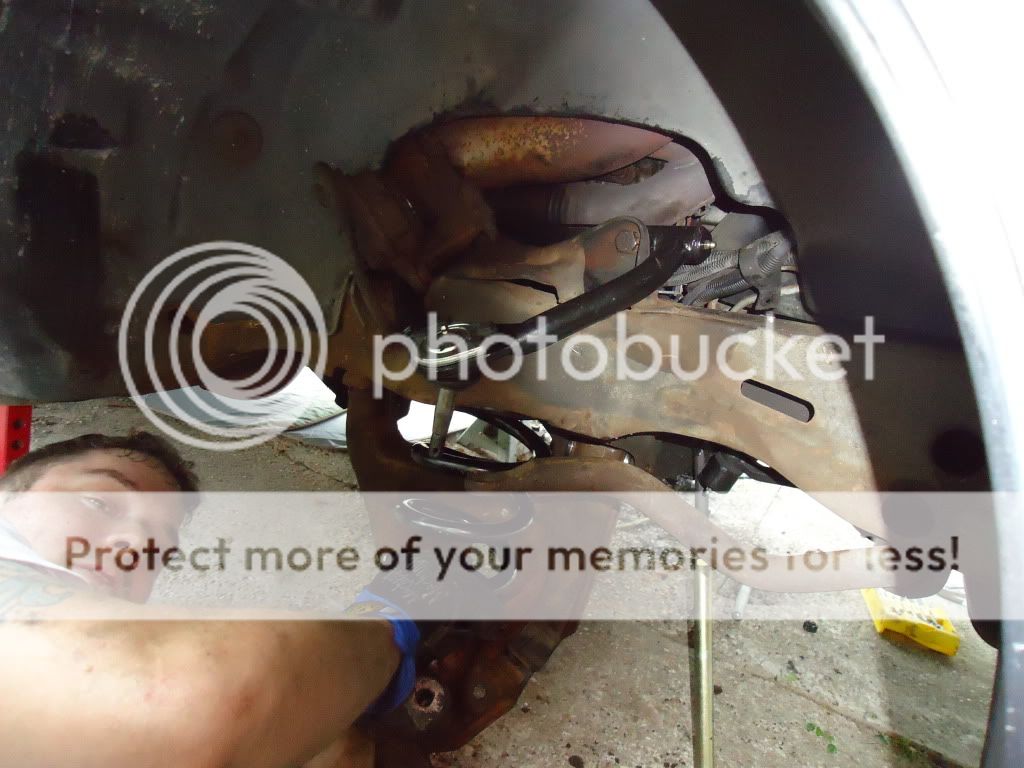
So while the shop was fixing that, I moved on to steering. Something that can make this a lot easier is if you are replacing pretty much everything. The only thing I did NOT replace was the Pitman Arm. The reason it is easier is because you can just drop the whole thing out as one unit, assemble the new stuff right next to the old one and line everything up to how the old stuff was set up. This will put you in the ball park of where you were before and should make driving to the alignment shop a lot easier. It’s nice to have a helper here as well. My wife Chelsey was nice enough to step in and help.
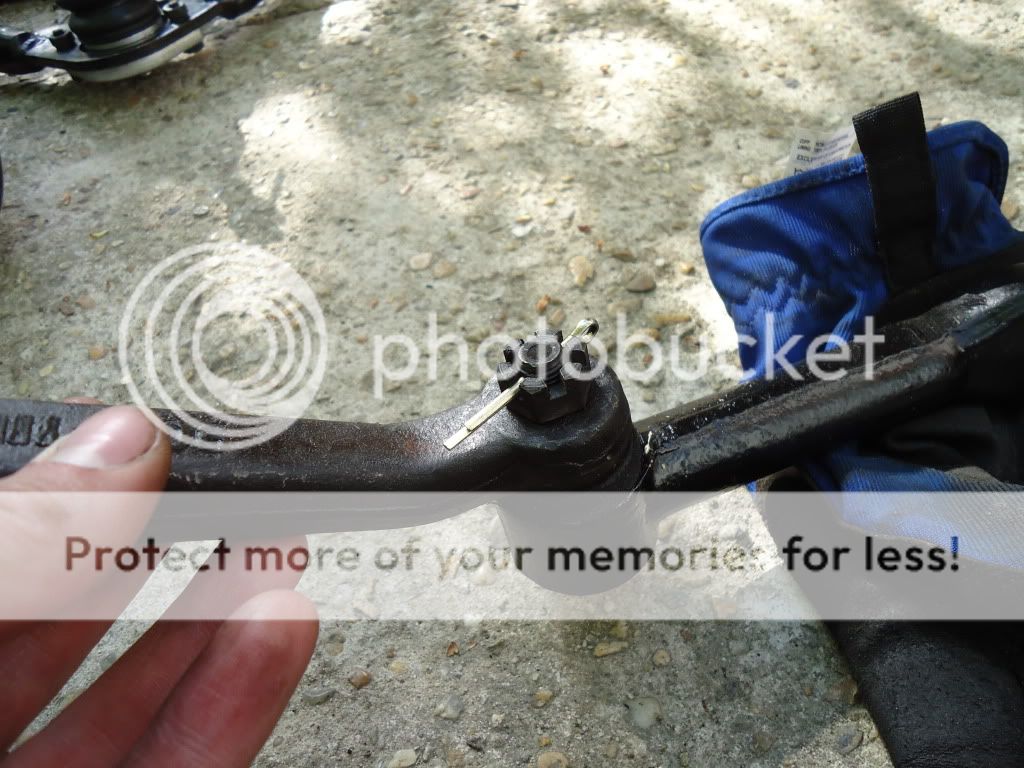
I started by removing the Pitman arm from the center link (drag link)
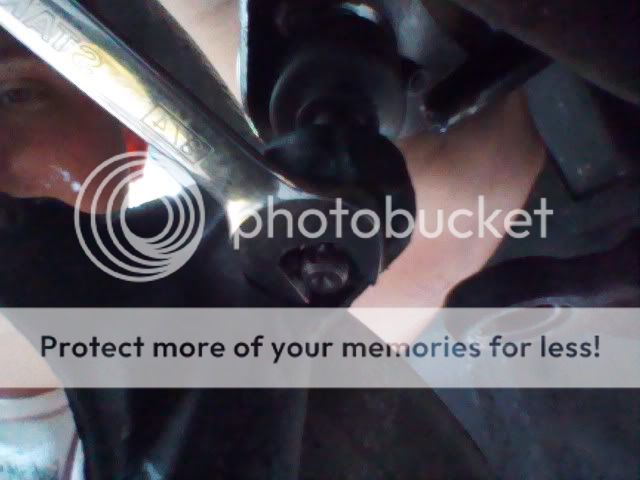
Remove the cotter pin from the castle nut and remove the castle nut using the 11/16thwrench.
Different angle
Then use the Pitman Arm Separator to…well….separate the pitman arm from the center link! Guess you saw that coming, right? Lol This is done the same way you used the separator on the ball joints. Sorry the picture isn’t that great.
That’s it for that portion. Now the Pitman arm is no longer attached to the rest of the steering and we have nothing else to do with it until it is time to reassemble the steering.
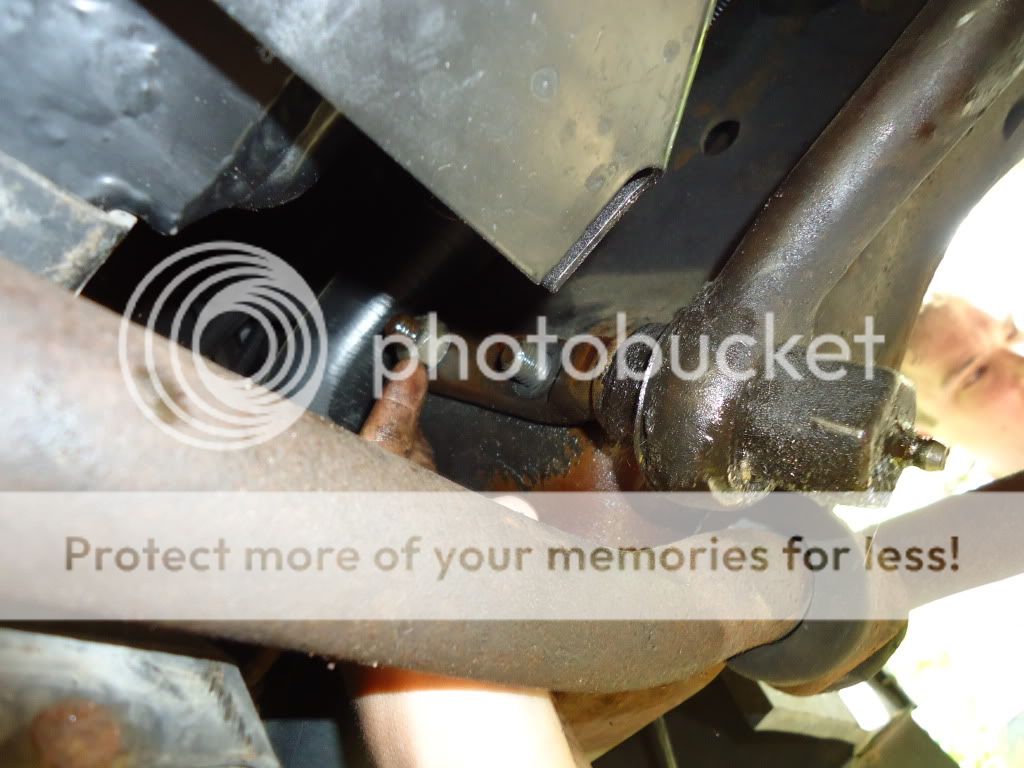
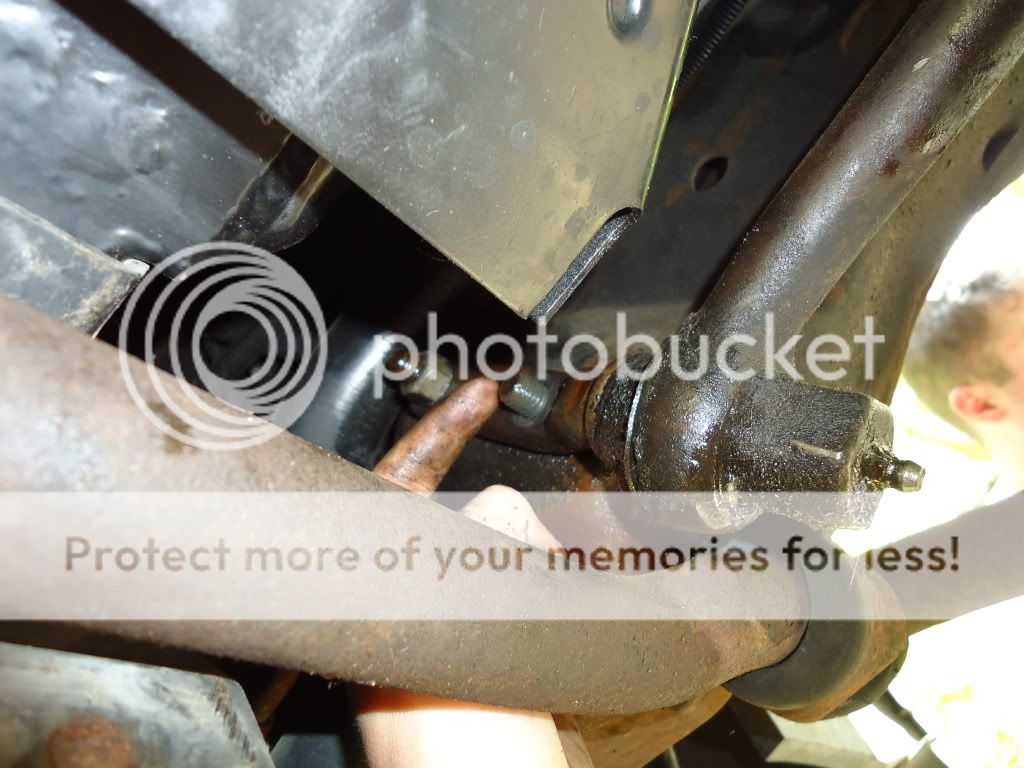
Now we remove the two bolts holding the idler arm on to the frame with 11/16thwrenches and sockets (thinking back, I may have this size off…sorry if I do)
Here are the two bolts which are on the inside of the frame.
And here are the holes on the outside of the frame to get to the bolt heads.
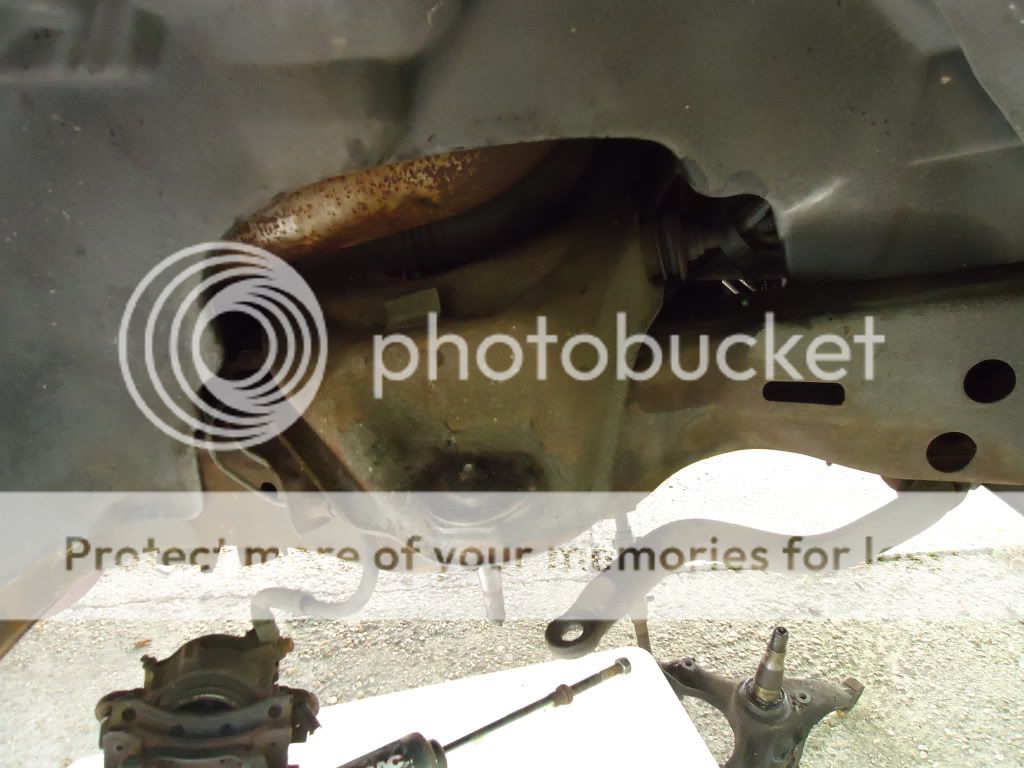
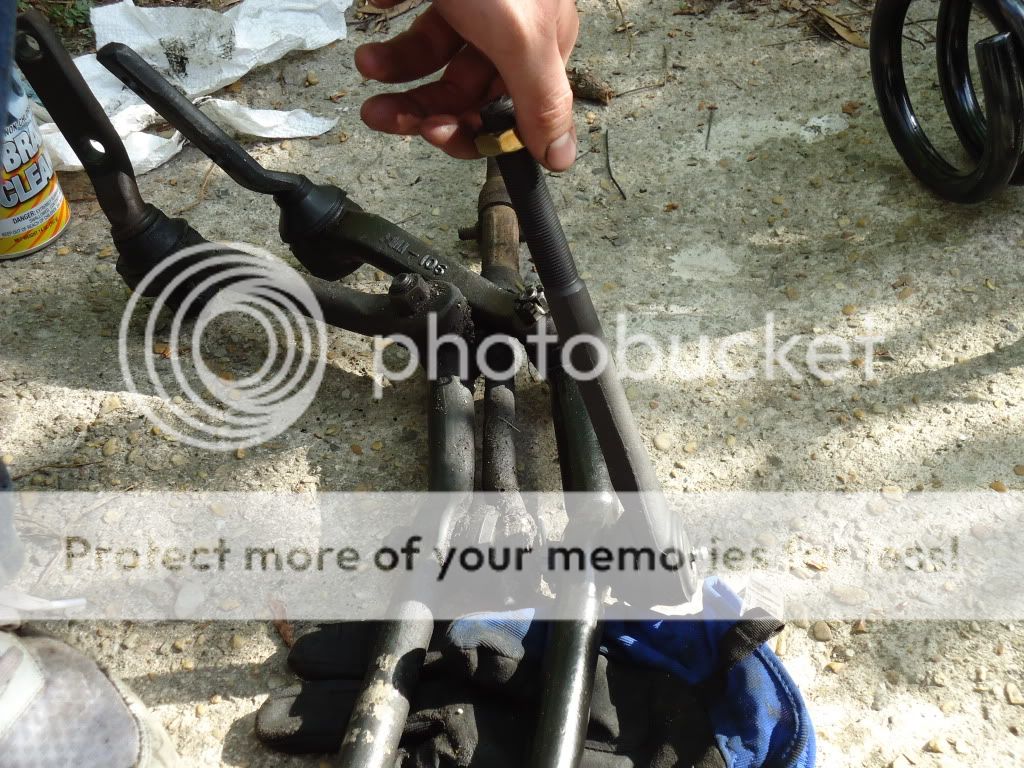
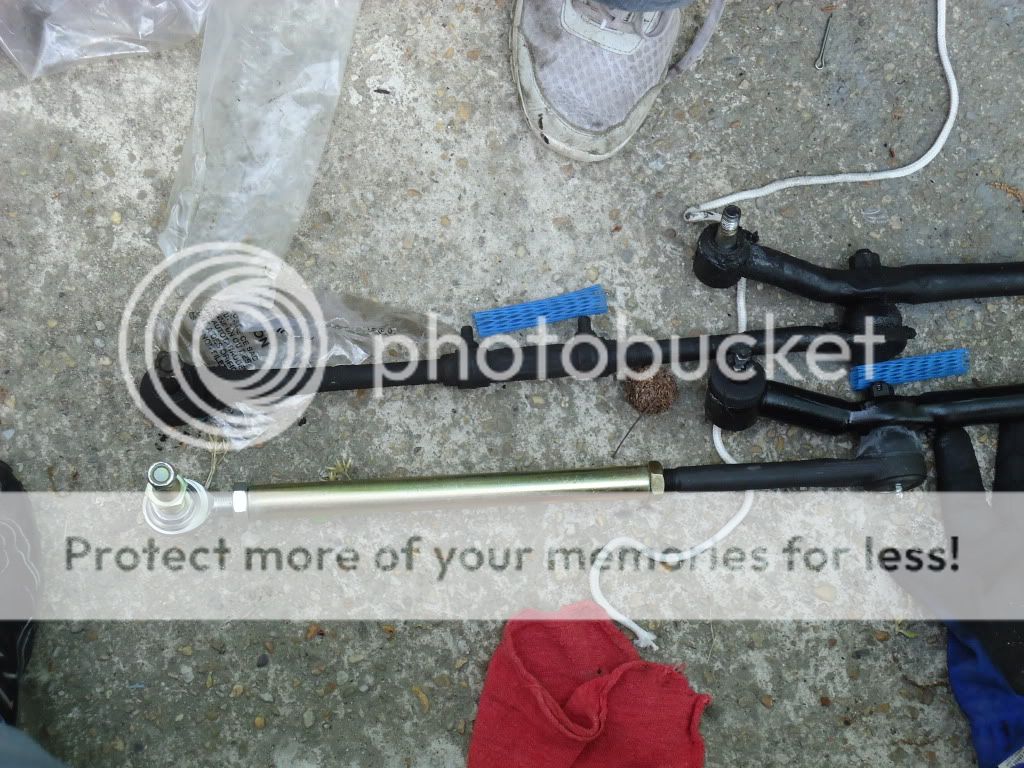
Since we already have removed the outer tie rods from the spindle, now we can drop down the whole assembly
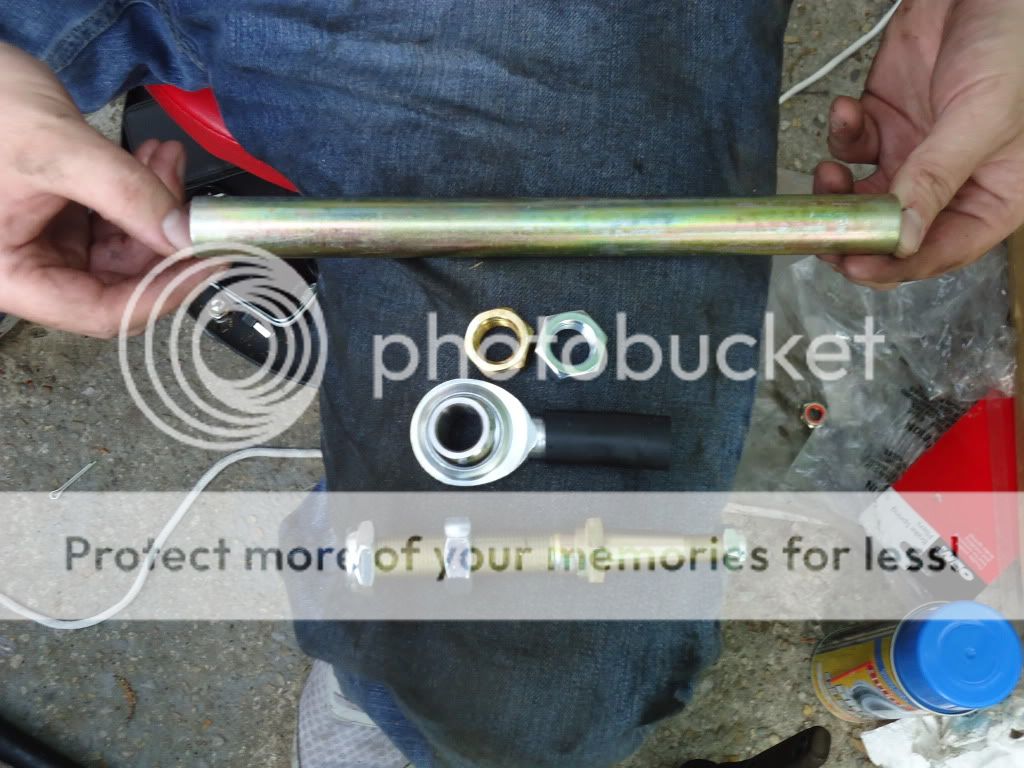
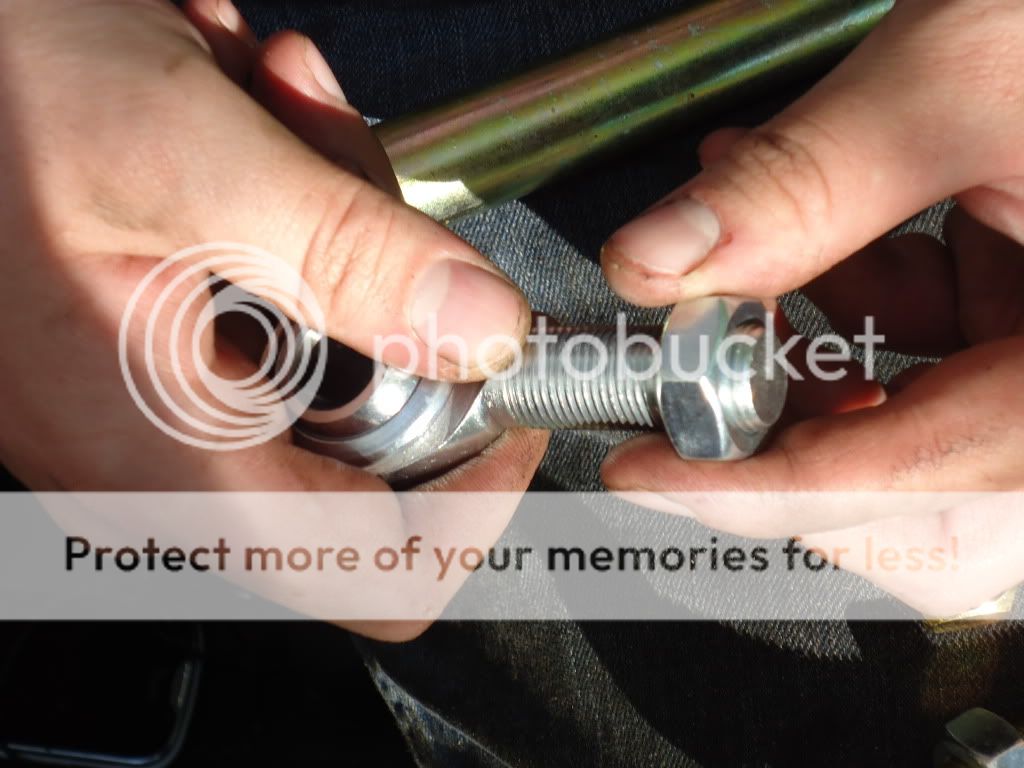
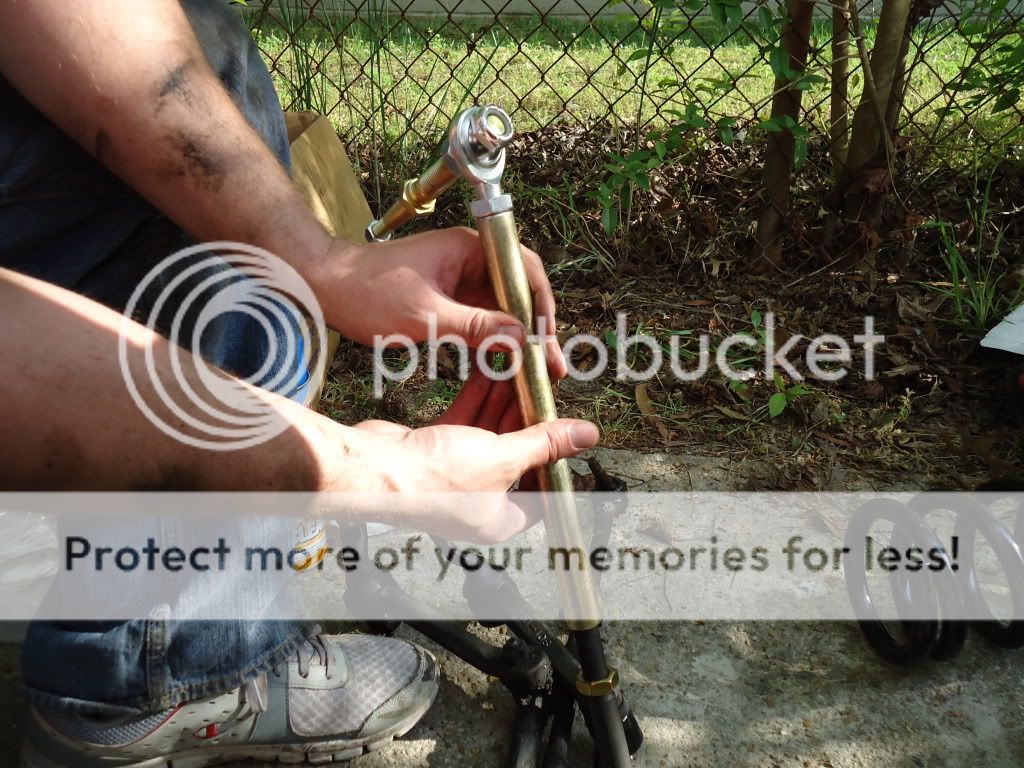
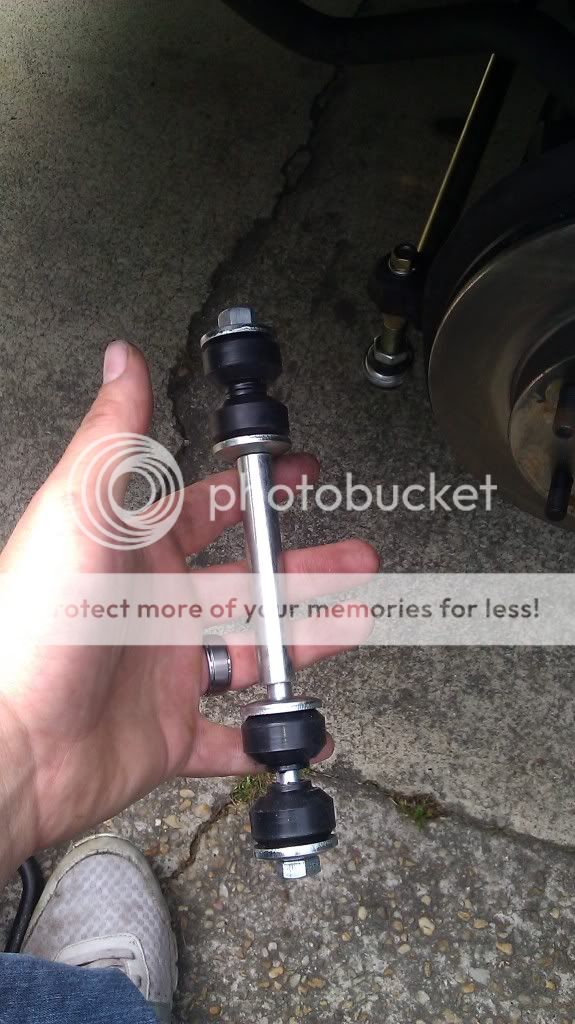
Next it is time to assemble the bump steer kit so we can attach it to the inner tie rod. Here is what it looks like prior to assembly. Remember, one for each side so everything is doubled.
There is a long threaded shaft, a right hand jam nut, a left hand jam nut, a threaded HEIM joint, a stud, a 5/8th lock nut and a 15/16th bottom nut.
Now we thread that right hand thread jam nut (the GOLD one) onto the outer tie rod, as well as spinning the threaded shaft onto it. I did forget to get a pic of that. Sorry. Here is the best picture I could find that at least shows the gold nut threaded onto the inner tie rod
Next we thread the left hand thread jam nut onto the HEIM Joint
thread the HEIM Joint into the threaded shaft.
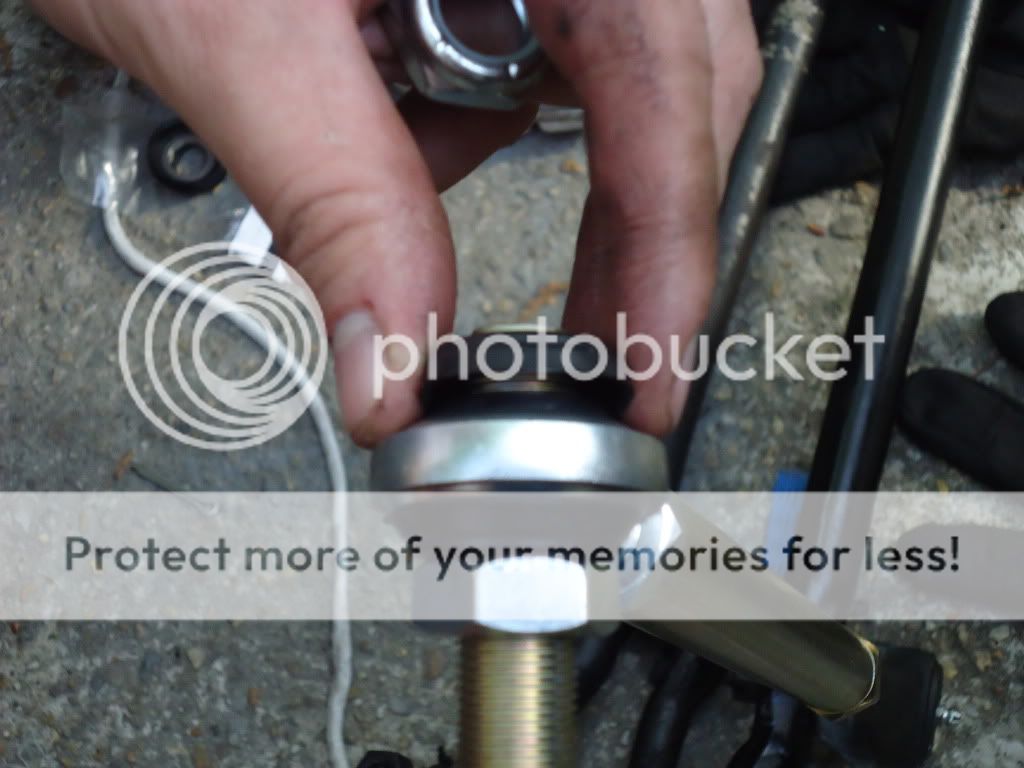
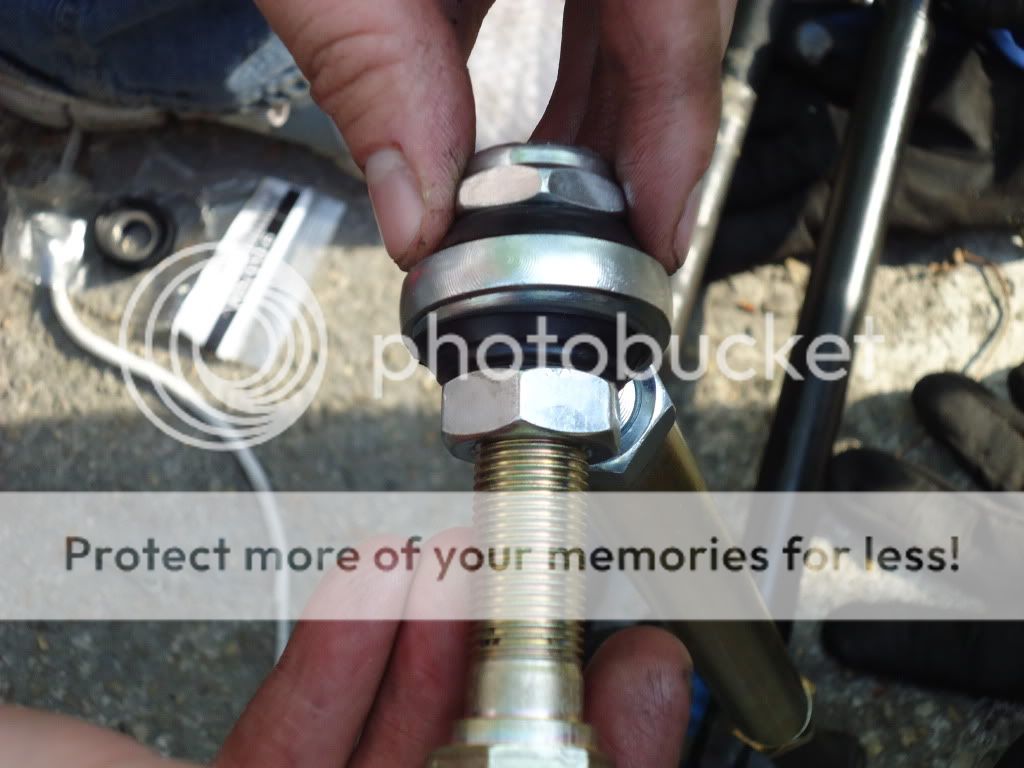
Now we insert the linkage through the HEIM joint bolting it together. When you do this, place the dust protectors over both sides of the joint so that it protects them over time.
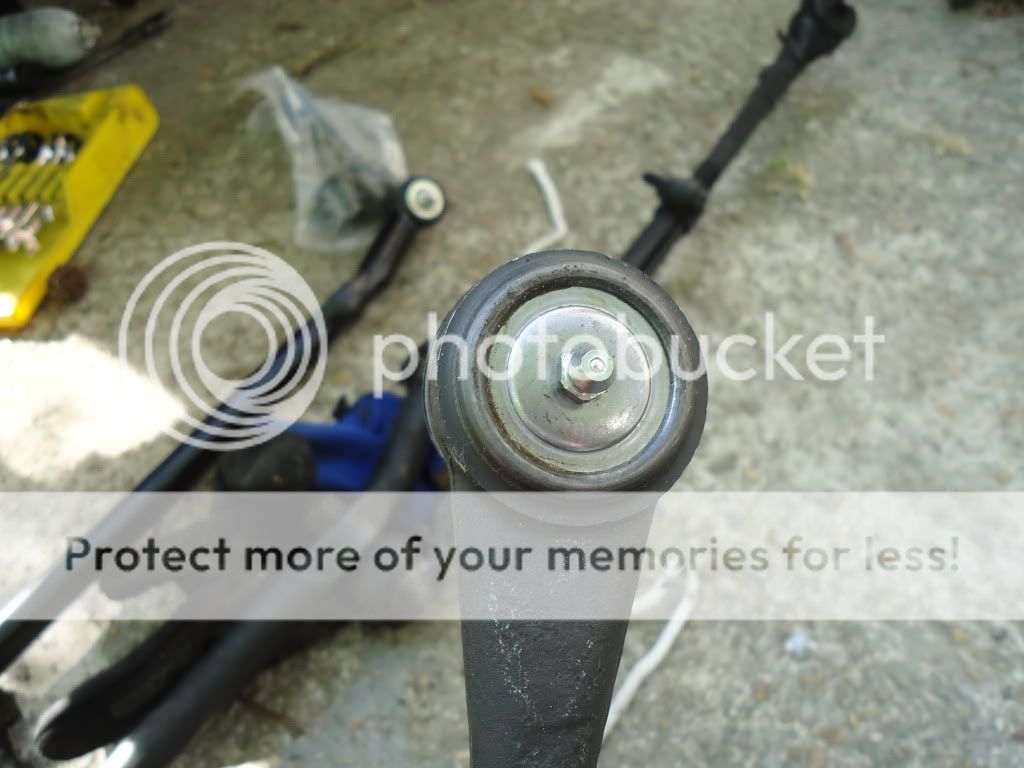
Now that the kit is assembled, we line it up with the old one and match the length of the old inner and outer tie rods to the new bump steer and inner tie rod. This will ensure your toe is at least close to what it was before.With the bump steer, make sure that there is an even amount of threads showing on both sides of the rod. That way the alignment shop can make adjustments without having to take the whole thing apart. I also did NOT tighten these beyond hand tight. The shop will most likely need to move them, and I had it towed there so there was no need.
Here is your completed bump steer!
Time to bolt your idler arm to your center link. 11/16th socket to put the castle nut back on. I put the cotter pin in now just to make sure I didn’t lose it. It would need to be removed later to torque down the castle nut.
Also, put on the inner tie rods to the center link! Guess I forgot to get that picture as well. L
While we have everything out, let’s make sure the parts are greased up. Make sure you hit all the grease joints and ensure they are good.
The whole unit is ready to be bolted back onto the car and have the HEIM joint bolted through the Spindle. Just reverse what you did to remove it. Bolt the pitman arm back to the centerlink, and bolt the idler arm to the frame!
Bolt back to Pitman arm
Bolt idler arm back to frame
Bump steer arms are now hanging and should be ready to bolt on once you have the spindle back in place.
If you are with me so far, we are more than 50% done! Congrats!!
Now the parts are back from the shop and everything is correct. With the steering in, we can go ahead and move forward with putting the suspension back together!
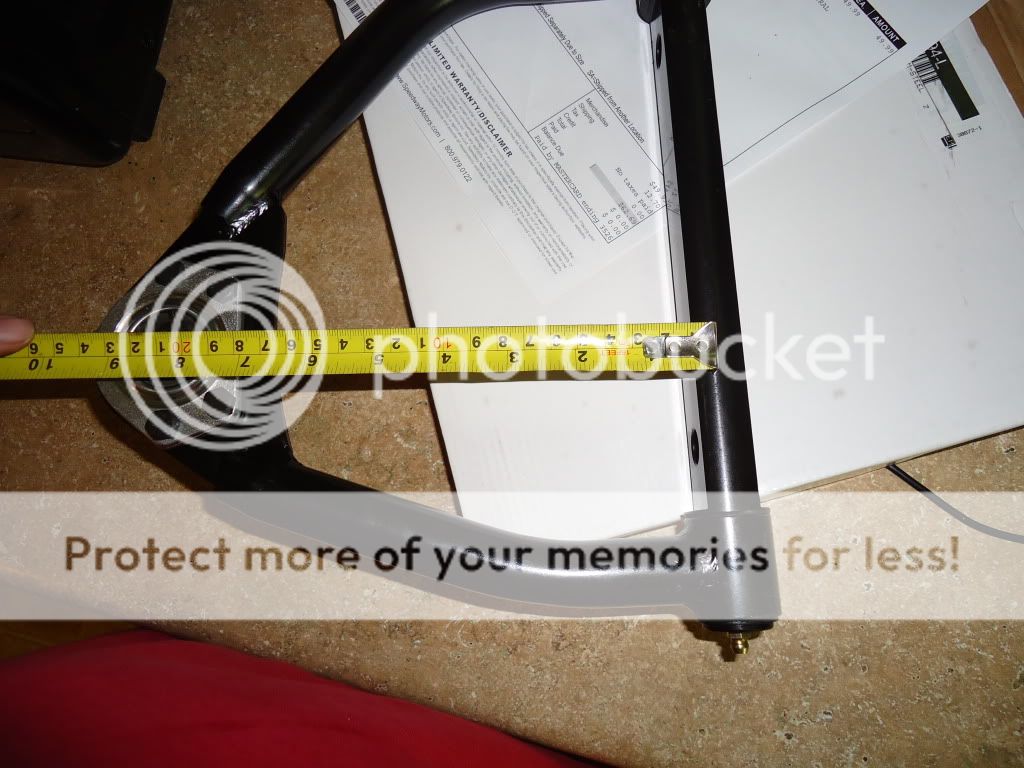
First we want to measure the new upper control arms and make sure that they are 8.5in and not anything else. If they are shorter, it will screw up the ability to set caster correctly.
To measure, go from the CENTER of the cross shaft, to the CENTER of where the ball joint will be.
Now we bolt the ball joint in. Sorry, I did not get a picture of this. Just make sure that the way you bolt it in puts the joint facing DOWN and the part of the arm with the LESSER bend in it facing FORWARD when put on the car.
Here are the ready parts! (you can see what I mean by lesser bend in the pic)
So now we can reassemble. We will start off by bolting the LCA back onto the frame using our 18mm sockets.
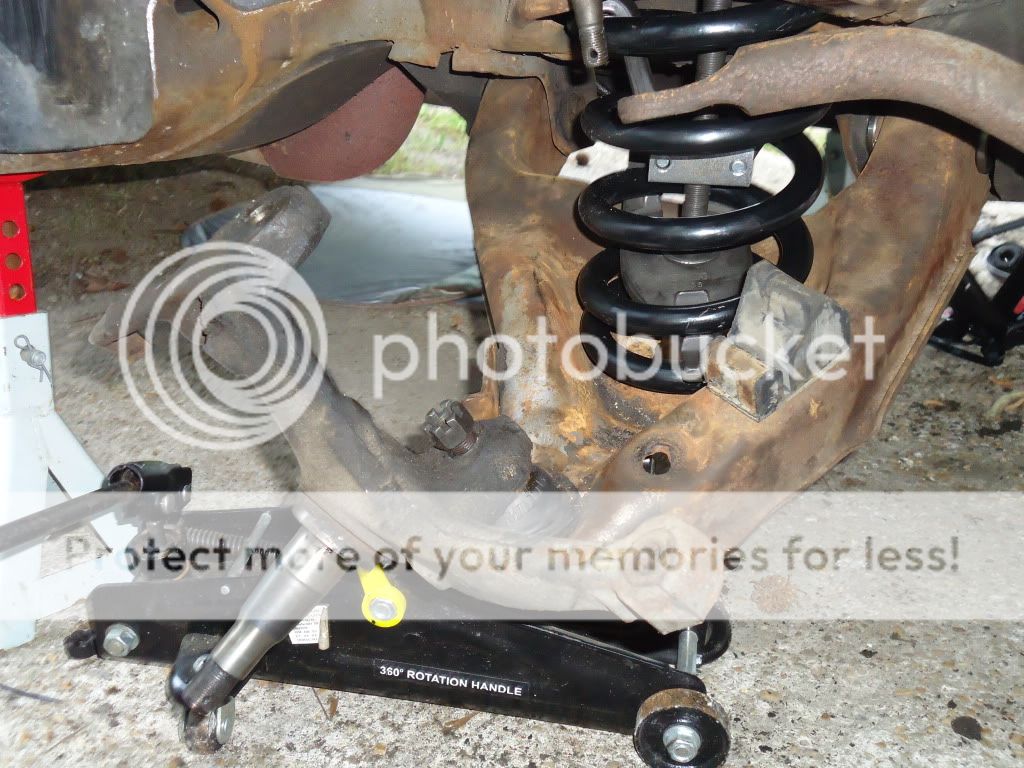
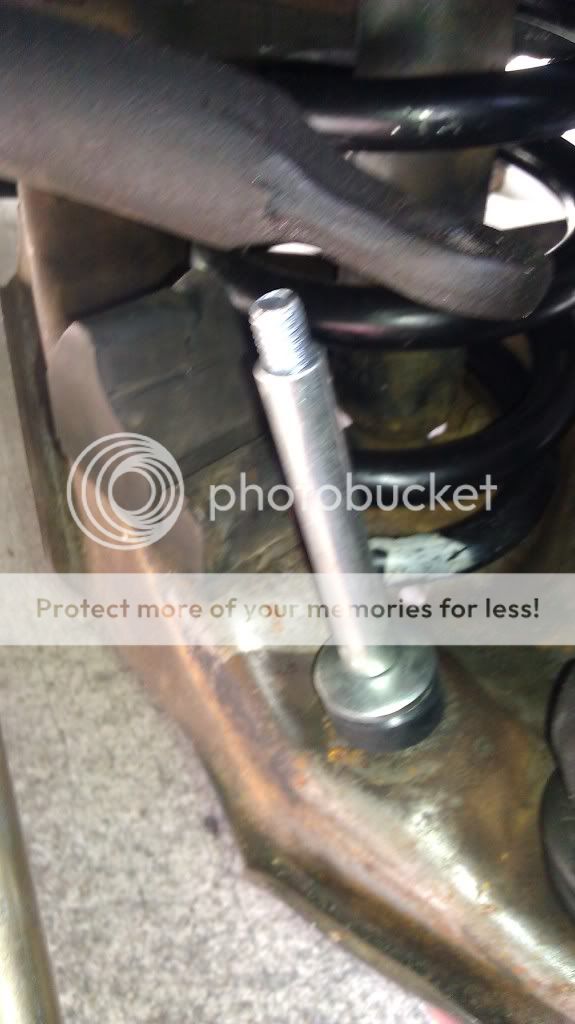
Now, we move forward with the UCA. 18mm on the back nut, 20mm on the front bolt. (BTW; in these photos, you can easily see the upper bolt/nut of the shock as well)
Next we can attach the spindle to either the LCA or the UCA. Using the 7/8th wrench, I attached to the LCA.
Now that the spindle is attached, we can put the spring in. This is easily the HARDEST part of the job. The spring just does NOT want to go in there. I could not get a good picture of this, but if you look in the pocket on the LCA where the spring goes, there is a raised section. You want the end of the spring to rest against that raised portion. There is also a rubber silencer that should be attached to the inside of the frame where the spring makes contact on the upper portion. A good trick to make sure this is on there is to take it off of the spring and duct tape it onto the top of the spring. Now look back up inside the spring and you can see some tabs that are hanging down. The TOP portion of the spring sits around that. This can be difficult to get it all lined up, but if you keep at it you can make this happen. Sorry the pics aren’t great, but if you still need help with this I’m sure there are lots of people you can ask for advice in the brakes and suspension section.
So here is how I did it. First I compressed the spring with my rented compressor. Then I placed my crappy jack underneath the LCA so that I would be able to easily access the jack arm to lift the LCA and compress the spring, but not lifting yet.Then I placed the TOP of the spring in the correct location. Using my other hand, I started to jack up the LCA.
As the arm raises, once the upper ball joint is close enough, slide it through the spindle.
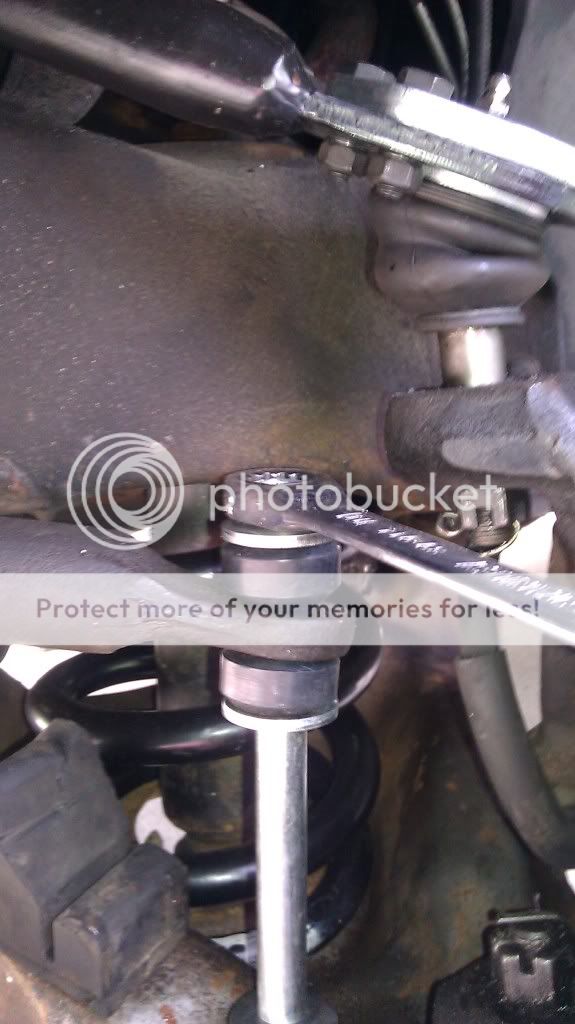
Now we spin the 3/4in nut onto the upper ball joint enough to where it will hold the spindle once we remove the compressor and lower the jack. It doesn’t take many threads, and we want a lot of wiggle room so we can compress the suspension with the jack to take pressure off of the spring compressor.
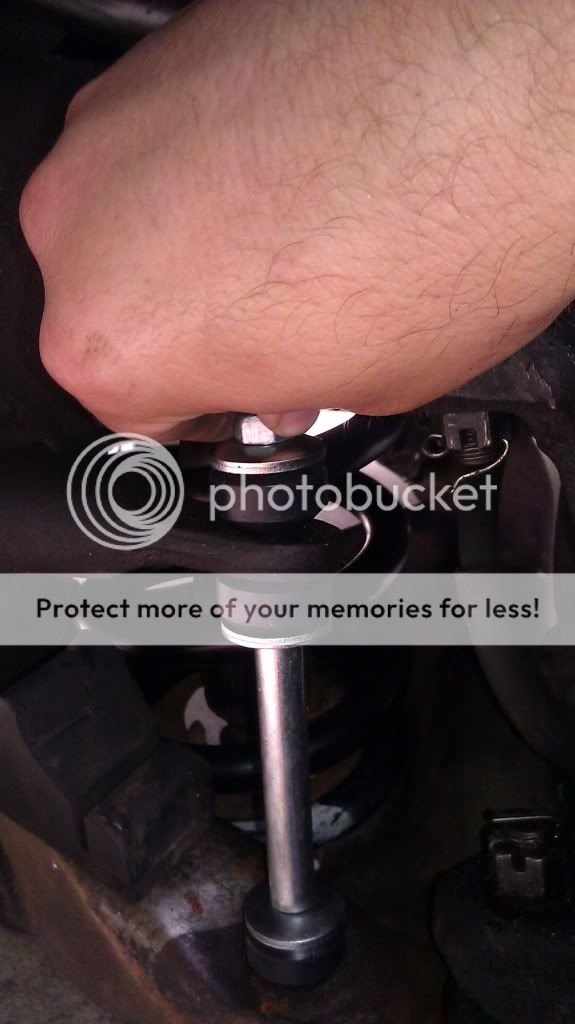
So once you have that nut on…do that!!! First just try and take out the spring compressor straight forward. When I tried this, I found that the hooks on top were caught with the tension of the coils. So what I did was jack the LCA up a bit, then using a hammer and anything long enough to slide in between the coils, I hammered the upper piece until it rotated enough to release the tension from the hooks, then I removed them. Couldn’t get a decent picture of this process, but this is one of the things you will see what I mean once you are doing it.
Once you get that out, use the 3/4in socket to tighten the upper ball joint.
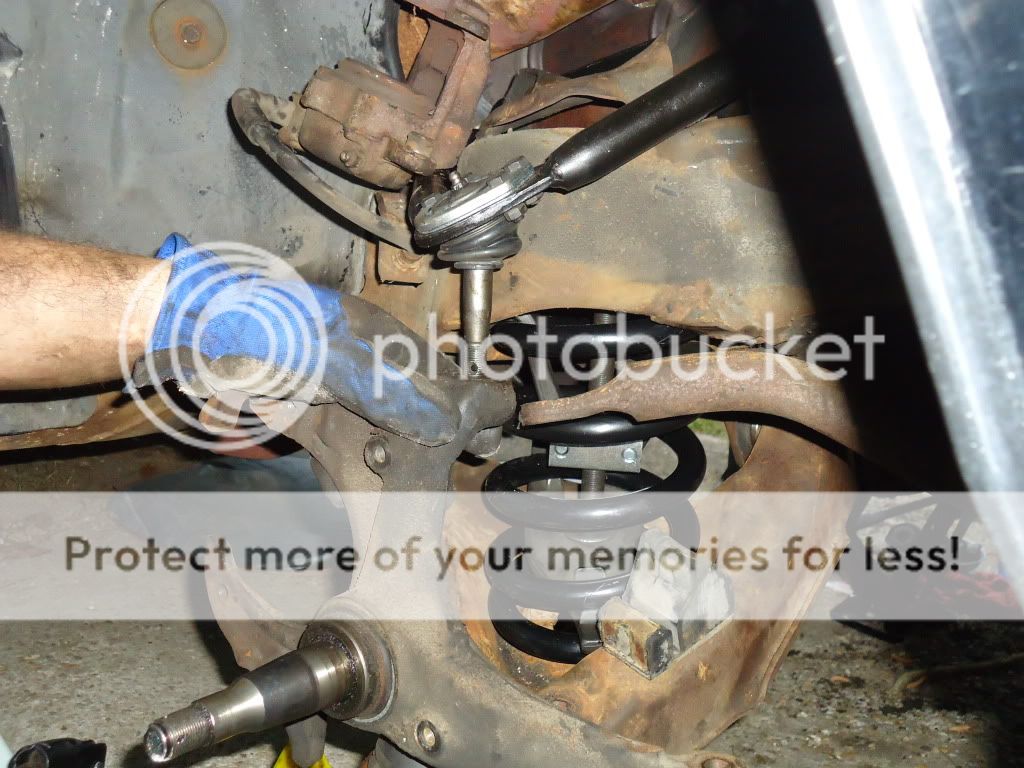
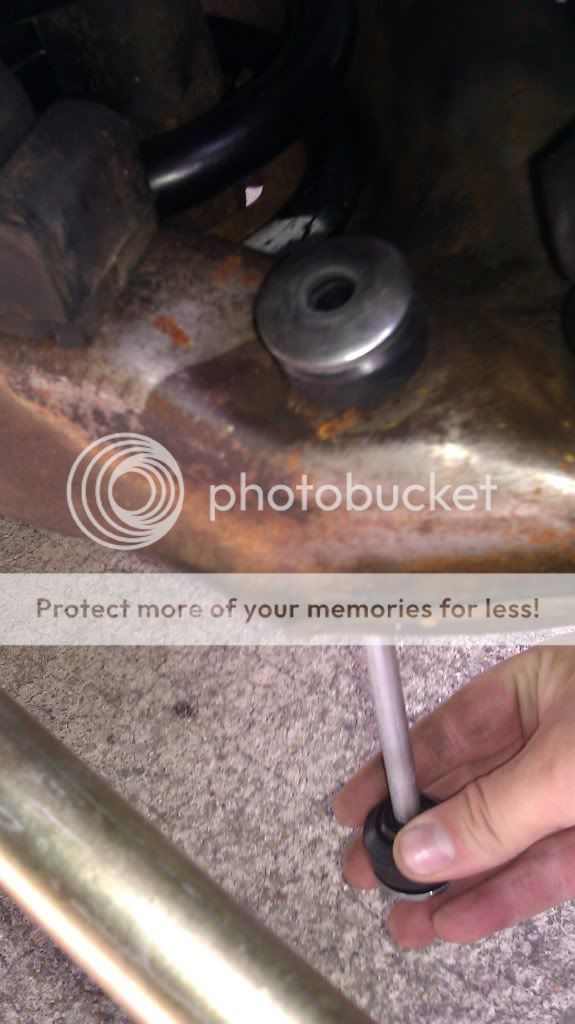
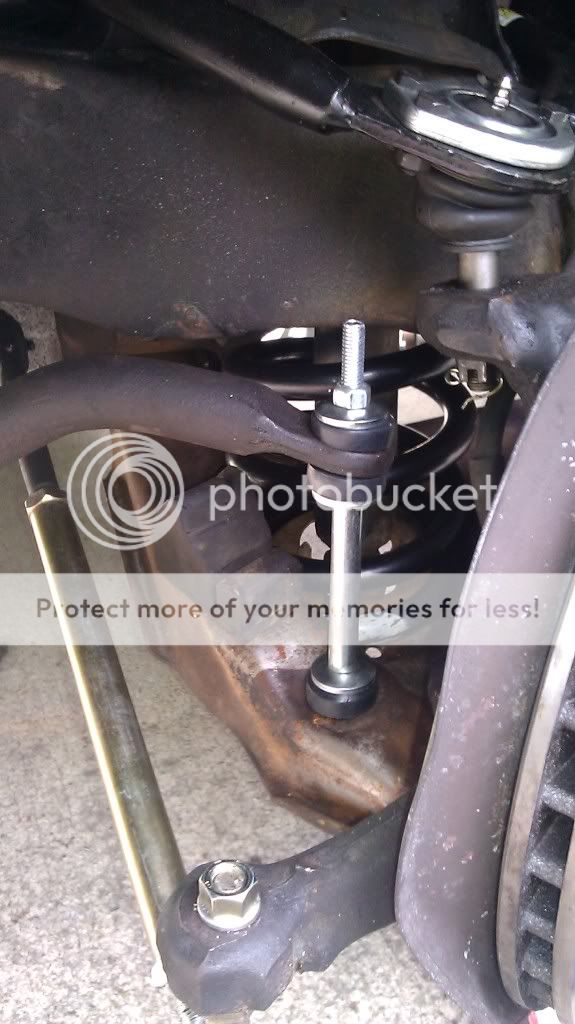
Now we can bolt the bump steer to the LCA using the 5/8th wrench.
I did not replace my shocks at this time due to budget constraints, but even if you did, they would go in the same way. Slide it up the middle of the spring and use the 15mm socket to attach it at the top…and after looking it appears I forgot to get a pic of this as well…jeez I suck! So moving on!
Then use the 13mm socket on the bottom bolts, again not worrying about a wrench on the nuts because they are clips.
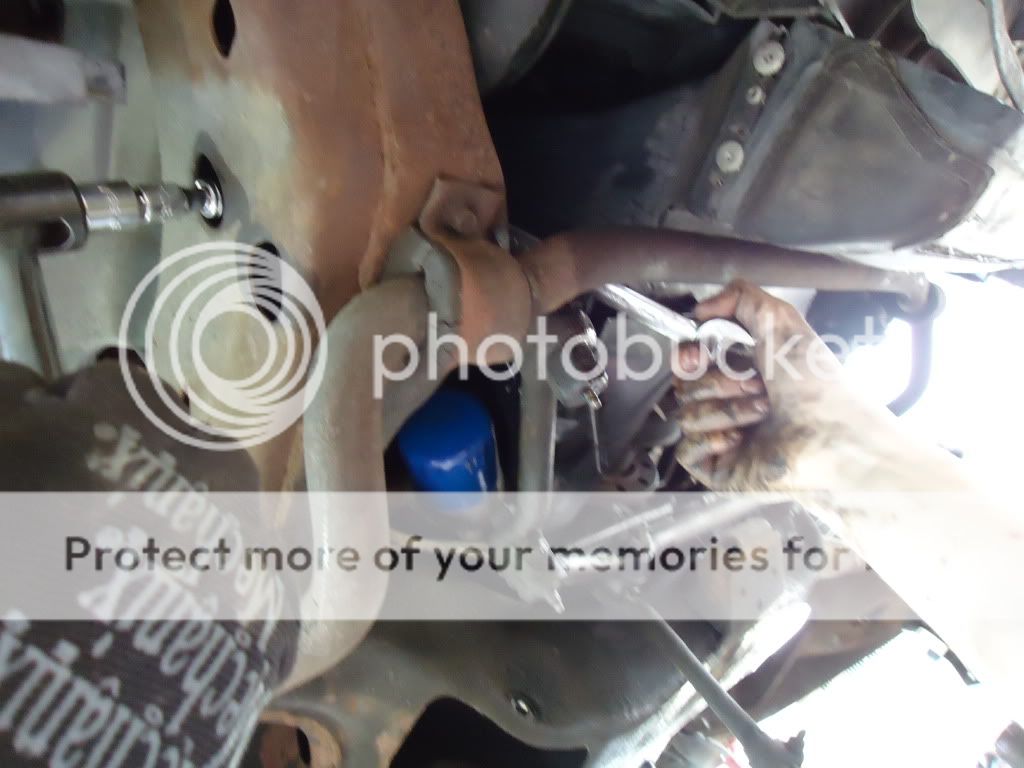
Now on to the very last thing for the suspension…the new (or reused) sway bar linkage!
I got two made by Duralast from Autozone again. Here is what you get
So take that apart, but leave the bottom washer and rubber bushing on top of the bolt head. Place a rubber bushing, then washer, on top of the LCA (in that order) and push the long a$$ bolt through.
Then put the sleeve over the long a$$ bolt and washer and rubber bushing (in that order) so that it will all be UNDER the sway bar.
Push through the bottom of the sway bar as seen in the above pic, then place a rubber bushing, washer, and nut (in that order).
Tighten with a 14mm wrench
And done!!
And I mean done!!! Your suspension and steering have now been replaced!!
Go through and make sure everything is torqued down properly.. here’s a great post I found by member “usetaboost” for the measurements. After that make sure every castle nut has a cotter pin…
upper control arm pivot shaft to frame nuts 48 upper control arm pivot shaft to bushing nuts 85 upper balljoint stud to steering knuckle nut 52 lower balljoint stud to steering knuckle nut 70 lower control arm bushing to frqame bolt and nut 65 front shock absorbwer upper satud nut 100in lbs] front shock absorber to lower control arm bolts20 front stabilizer bar link nut 156 in lbs front stabilizer bar bracket to frame bolts 24 REAR SUSPENSION control arm bolts and nuts up[per and lower 80 rear shock absorber to lower mount 65 rear shock absorber to upper mount 144 inlbs rear stabilizer bar to lower control arm nut 37 steering steering wheel to steering shaft nut 30 outer tie rod end to steering knuckle nut 30 inner tie rod end to intermediate rod nut 40 tie rod adjuster sleeve clamp nut 15 steering gear to frame bolts 80 pitman arm to steering gear shaft nut 185 idler arm to intermediate rod nut 40 idler arm to frame nuts 60 intermediate shaft pinch bolts upper 46 lower30 wheel lug nuts 80 steel 100 aluminum-just thought I'd throw that in there.
Repack your bearings (I may cover in another thread, but if you youtube it, easy to find) put the inner bearing into the new rotor (or reused old one) using the hammer to lightly tap the seal back into place and put the rotor back onto the spindle. After that, put your repacked outer bearing into the rotor, put the washer on top, castle nut and tighten to snug while spinning the rotor until it gets tough. Loosen the castle nut until the rotor is easy to spin, then snug it back down and put in the cotor pin and the dust cover..put the wheels on! and take it for an alignment!
I hope this was helpful to someone. I do apologize again for any missing pictures or wrong sizes given for tools. I do not think anything vital was missed.If anyone has some tips or advice please give it! If anyone sees anything they think I totally screwed up and need to fix before I drive the car for any series distance….LET ME KNOW!!!!!!!
The "parts list" is posted on only 1 TB site right now and if it gets a lot of exposure it will be deleted, sorry. It's taken me several years to get all the parts right to do this.
Matt's one of the few that has this list and I really don't want everyone to have it. I may be offering it as a "kit" for others but for now it stays private.
You did good Matt and I'm more than happy to help you even though you're a squid. Add this to the "suspension recipies" sticky after you've had some time to drive it an see how she feels.
He just got moved to a new duty station across the country an is not quite settled in yet. When he gets the time to get back on the board for a while I'm sure he'll tell us how he likes the new set up.
Good job! Nice set up and you cant beat the prices of those parts! Definately the best bang for the buck out there. I do have one question that has been keeping me from using those outer tie rods......How much are these going to hinder us guys using deeper backspace rims? Have you measured for clearences on those? I thought about buying a set just to find out a few years ago but never got around to it. They do work thats for sure. ----Jeremy
Sorry for the late reply, but as Charlie says I just got transferred. Haven't driven the car since the 15th of last month!!!! I am in another parts ordering stage (Charlie, sent you an email from my gmail account) and once I've got that all settled out I will be doing the final adjustments on the bump steer and getting some real test rides along with some measurements.
JDPOLZIN: I'll have to figure out what you need in measurements to answer that question...still new to all this!!
WH1, thats great posting. I will be using your post to change my suspension too! Difference is that I have the drivetrain out and the car won't be as heavy. ... will keep you posted.
Excellent write up... I would add, if you haven't already done so; the Jeep steering shaft mod. It is a HUGE improvement. I put one on my GN and when I turn the steering wheel, the car actually moves! It used to wallow. Now, it feels significantly more responsive. Just my .02.
")


") ...now where is the "secret parts list" ...............
...now where is the "secret parts list" ............... It's taken me several years to get all the parts right to do this.
 Add this to the "suspension recipies" sticky after you've had some time to drive it an see how she feels.